Original XBOX - TSOP Flash
First of all what the hell is a TSOP?
It is a re-writable chip that is on the original XBOX which holds the bios image for the system, if you flash this with 3rd party code, it is essentially like installing a modchip.
All you need to do is short out certain points on the motherboard. This will enable write access to the flash.
Boot animation after flashing EvoX M8+ BIOS to TSOP
Tools needed
- SATA to IDE adapter. Get the StarTech one if possible as it is the best that is out there and boots really fast.
- 80 Pin IDE Cable that is long enough for this project
- Larger SATA HDD that is compatible with the mod
- TruHexen 2021 Disk
- Soldering iorn
- Steady hands
Shorting the right points
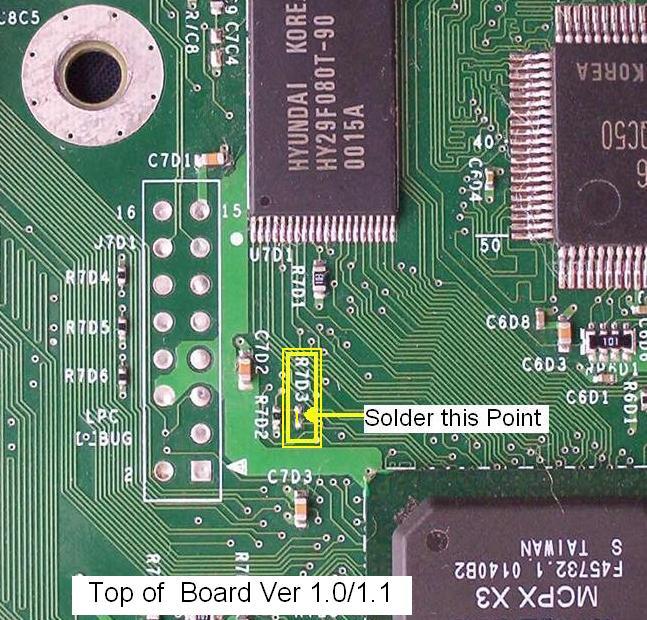
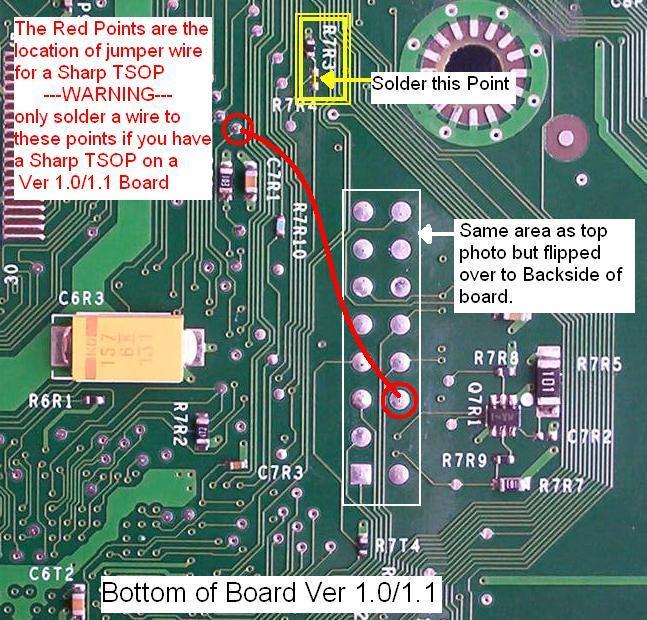
XBOX v1.0 - v1.1
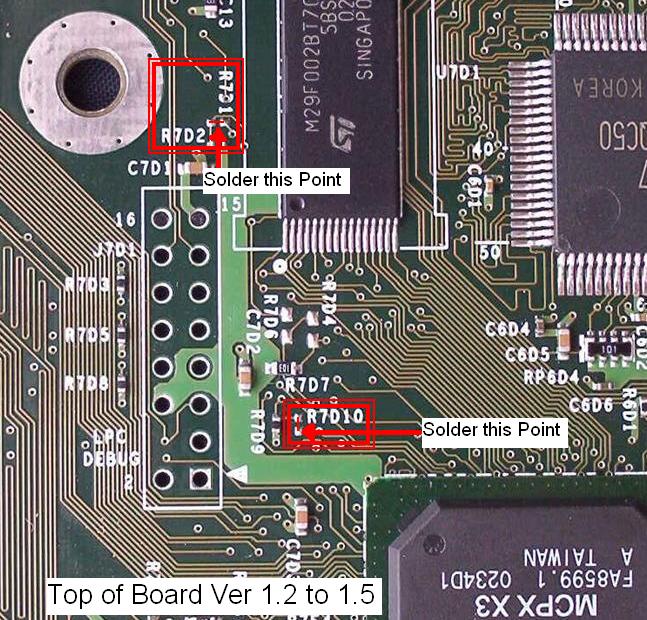
XBOX v1.1 - v1.5
TSOP revisions
Revision 1.0-1.1 Xbox motherboards have a 1MB TSOP (Variants: Hynix, Sharp) Revision 1.2-1.5 Xbox motherboards have a 256KB TSOP. Revision 1.6/1.6b motherboards do not have a TSOP and therefore cannot be TSOP flashed.
My XBOX v1.0 had a Hynix chip.
Warning
- TSOP flashing cannot be done with a modchip installed, as the TSOP will not be available while the modchip is running.
- It is highly recommended not to inject config files into the BIOS files, as it has a high chance of bricking your Xbox!
- Installing a BFM BIOS will brick your Xbox. These are only meant to be loaded with PBL off of a CD/DVD/HDD.
TSOP flashing v1.0 to v1.1 (Hardware mod)
Solder the R7D3 pads together on the top side of the motherboard Solder the R7R3 pads together on the bottom side of the motherboard
TSOP flashing v1.2 to v1.5 (Hardware mod)
Install the new HDD and prepare the HDD
- Install the new HDD as seen in the below image
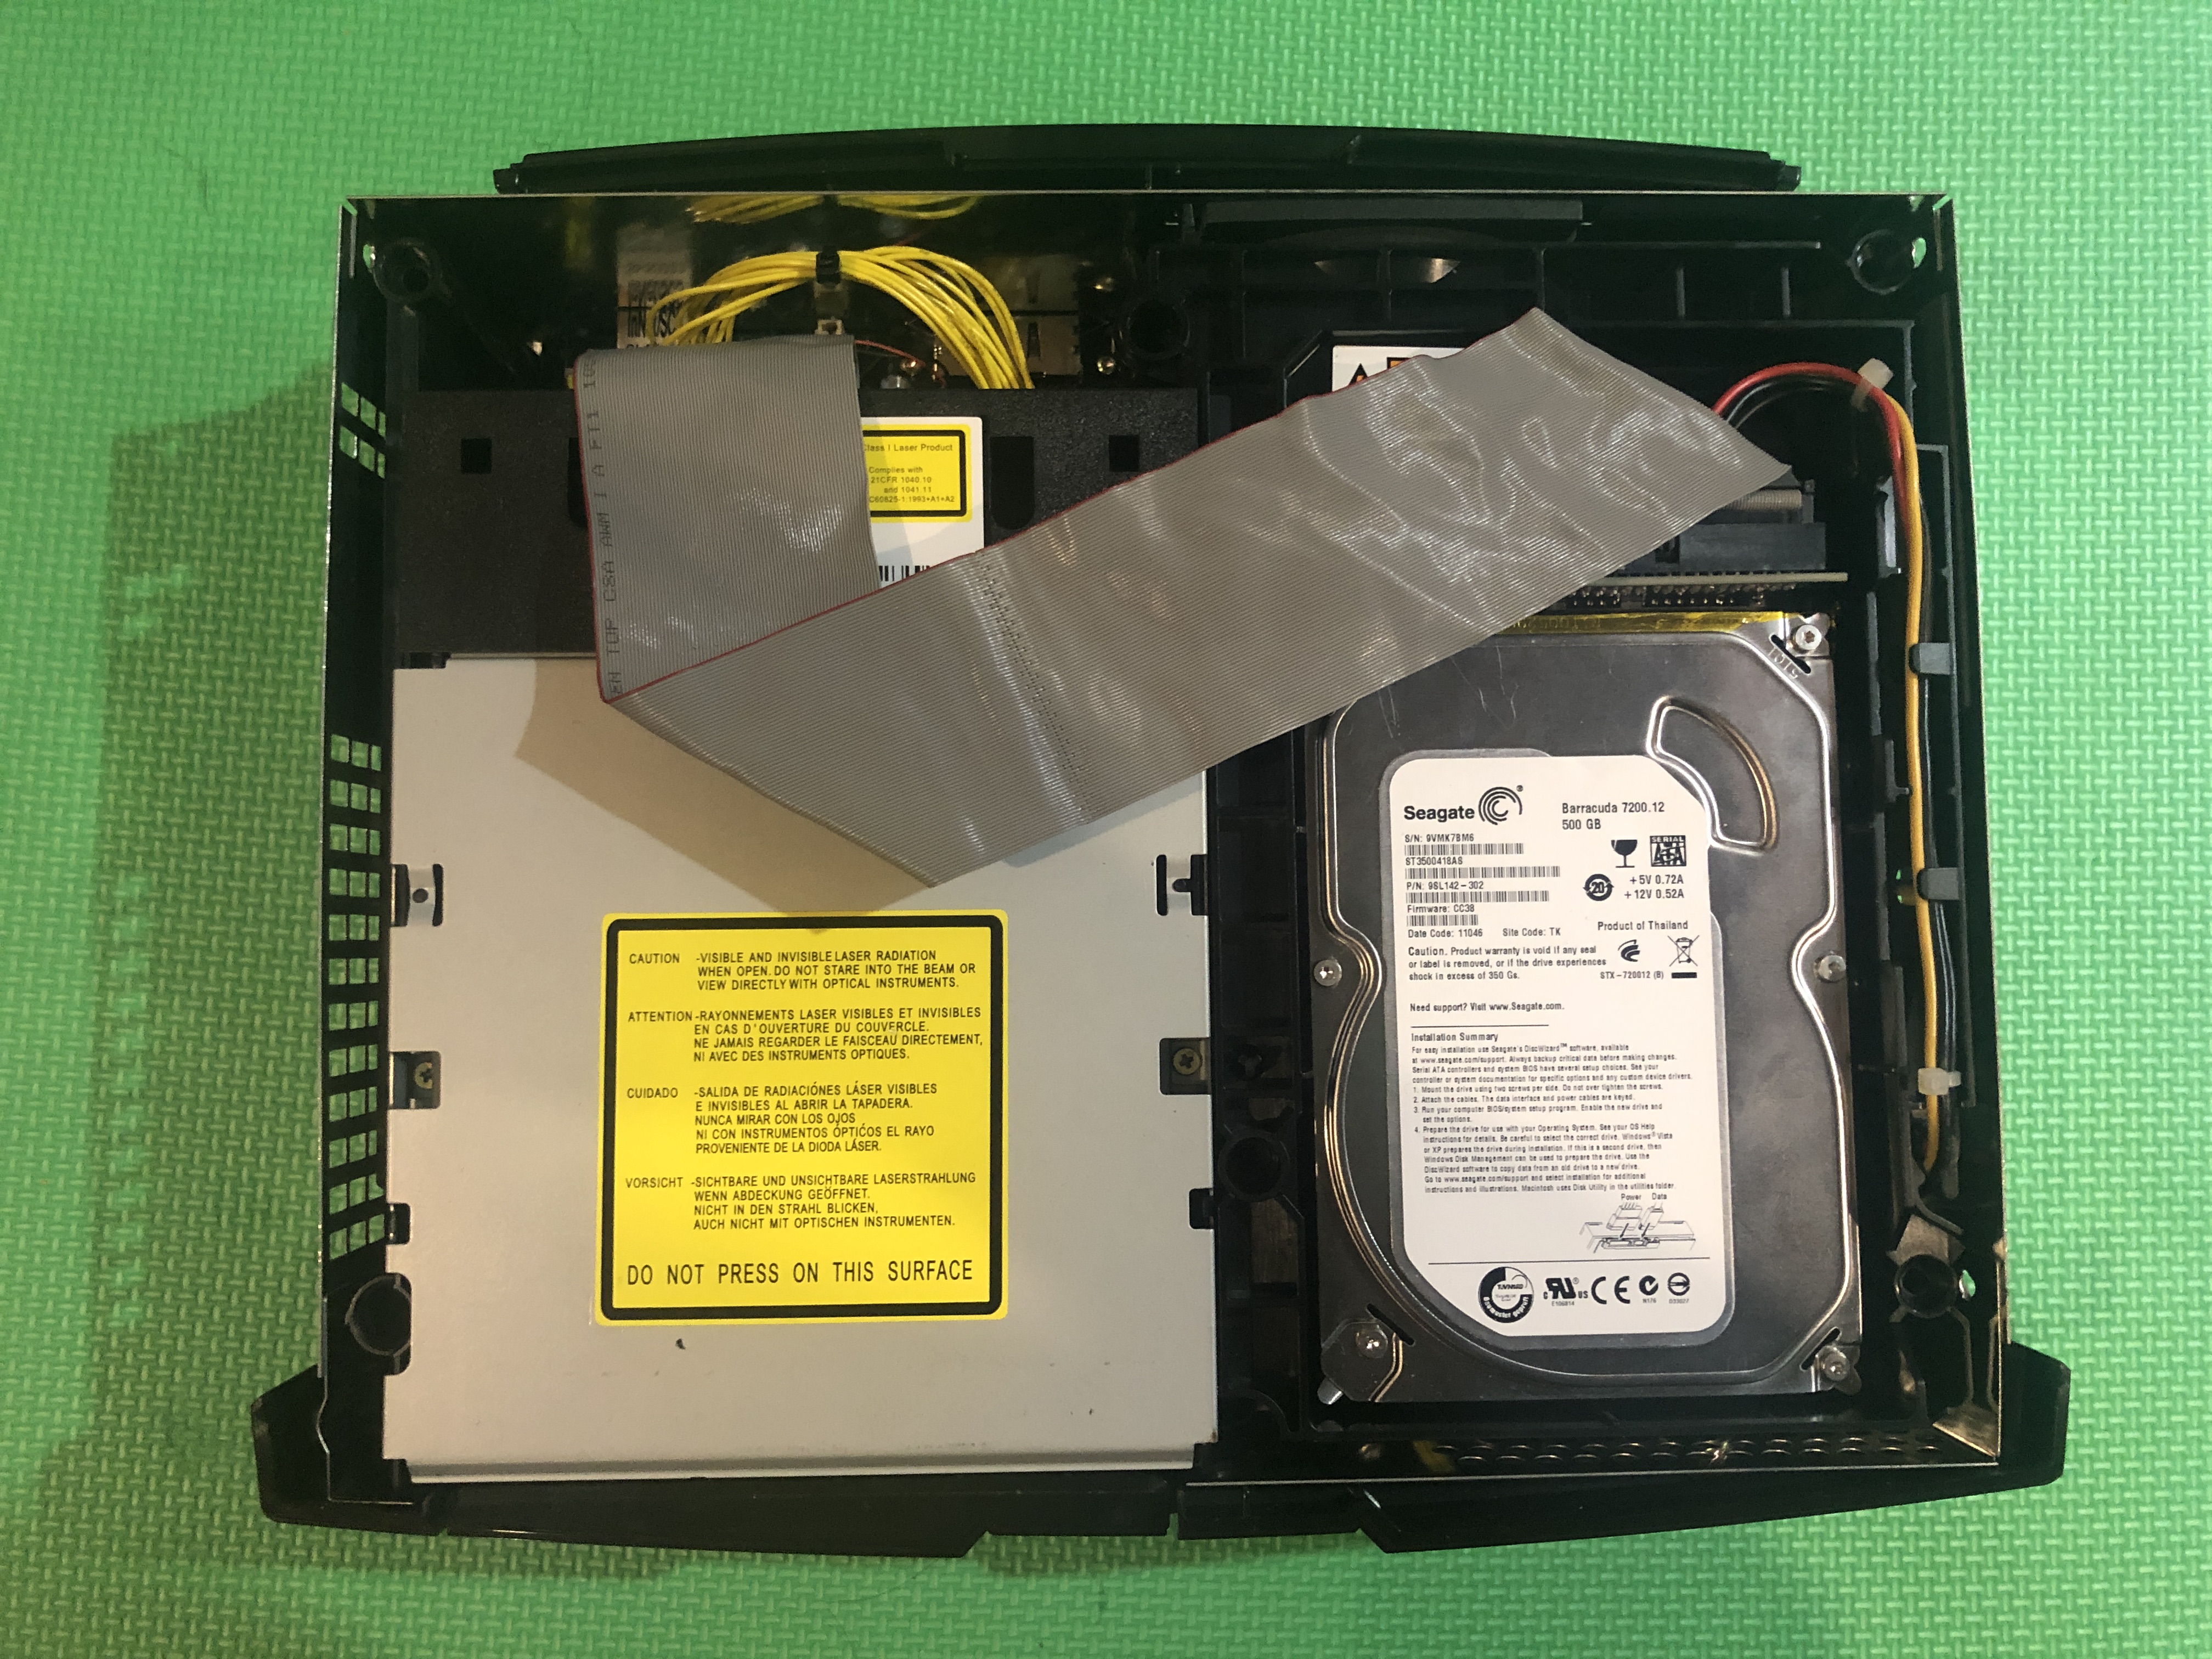
The IDE cable was repurposed from an old PC. With some adjustments was able to fit it inside.
Insert TruHexen 2021 disk and boot
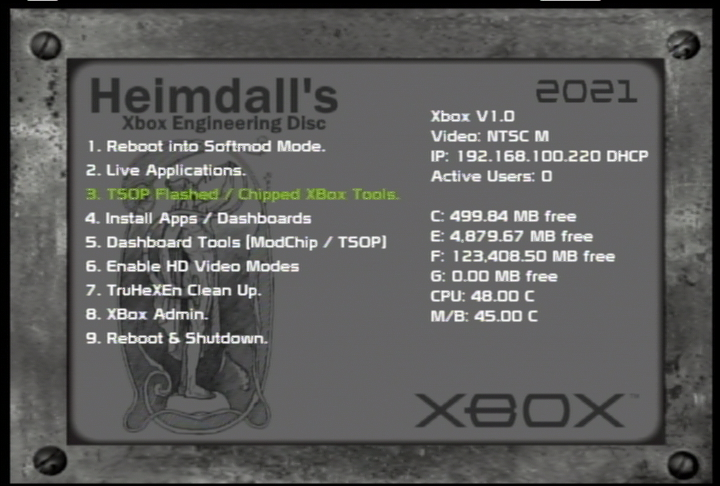
Go to
TSOP Flashed / Chipped XBOX Tools>Chipped \ Flashed XBox Disk Upgrades>New Disk. NTSC Xbox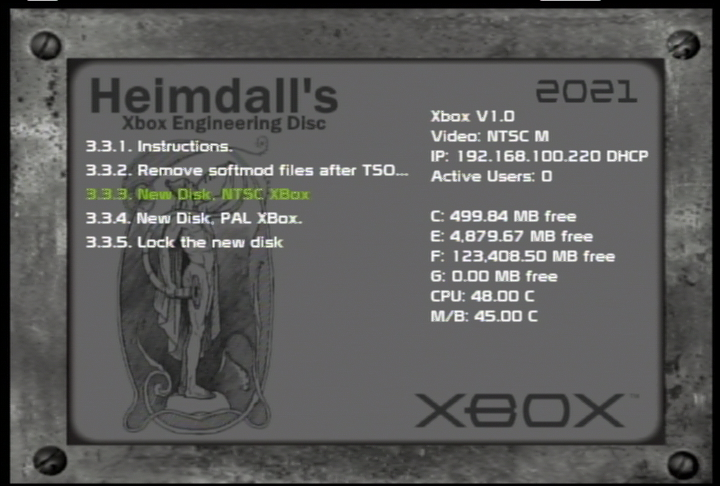
Install with pass code
A,Y,B,X
Format the drive and proceed. You will eventually be at this screen.
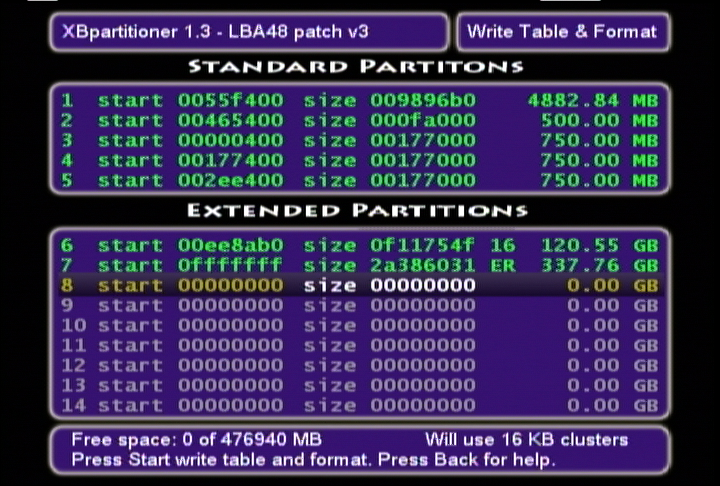
- Cycle through parition options by pressing
A - Don't have partition that is > 1TB
- Press
StartandYto write - Press
Backtwice to exit
- Cycle through parition options by pressing
Once you boot you will see UnleasX dashboard
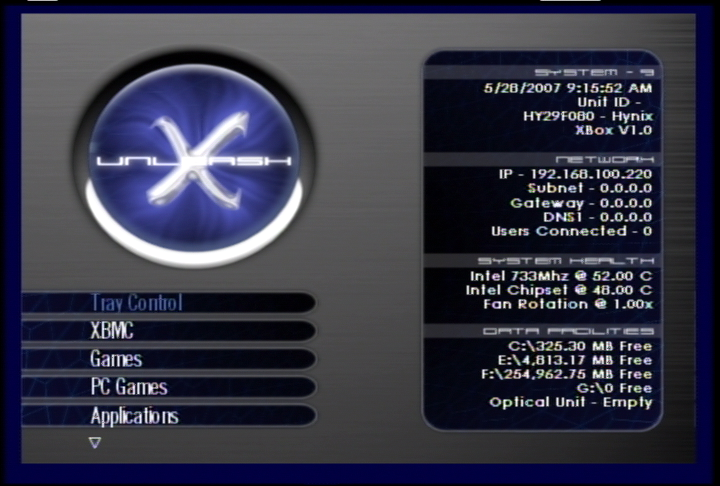
Change skin to green
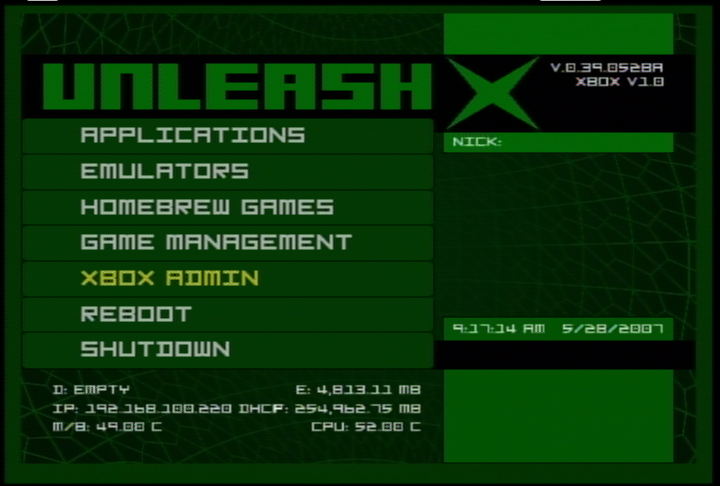
Insert the Hexen 2021 disk Install basic applications (Parttitioner) Install XBMC
What's the big deal about the different versions of BIOS?
You need to flash a new bios that can see all of a 2TB hdd. You need a bios that ends .67. The .67 refers to partition 6 & 7 or F & G.
The below two can be flashed from the TruHexen 2021 DVD
BIOS Features
Only two bioses are really recommended to be used based on the situation
Xecuter 2 5035 / Xecuter 2 5035 1.6
Pros:
- Easy configuration via .ini file. Can also be edited or created with X2 Config Maker
- Customizable boot animation colors
- 128MB RAM support
Cons:
- 512KB size (only fits 1.0/1.1 TSOPs and some modchips)
- Xecuter 2 "Config Live!" text on screen for a few seconds after boot
EvoX M8+ / EvoX M8+ 1.6 (Recommended)
Pros:
- Boots fast
- 256KB size (fits all TSOPs and modchips)
- In Game Reset (IGR) button combination
- Customizable boot animation colors
- Works with 1.6/1.6b Xboxes
Cons:
- Reconfiguring requires editing the .bin file with EVTool and then reflashing.
- Does not support 128MB RAM
- Does not support LBA48 by default. Must be reconfigured with EVTool, or use a pre-patched version
- Does not have DVD drive check disabled by default. Must be reconfigured with EVTool, or use a pre-patched version
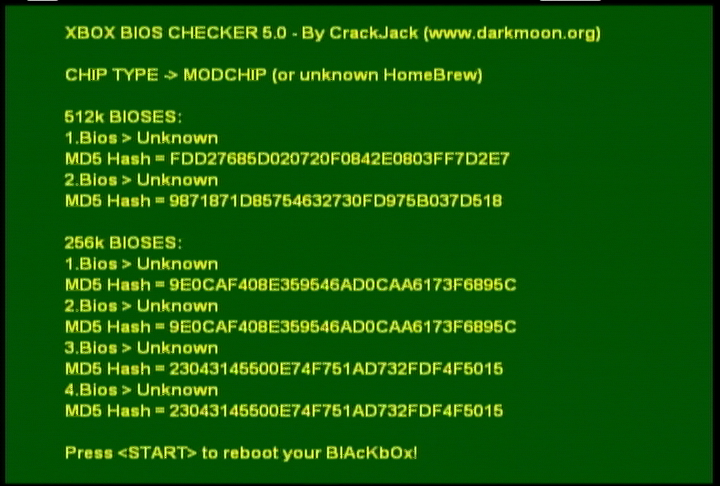
BIOS Checker
Bios Checker 5.0- With the Xecuter chip enabled, load the BIOS checker. You should see something similar to the below.
Advanced hacks
Flashing an Xecuter CE chip using the swap method
Sometimes you might accidentally screw up the flash chip. This method allows to rewrite the flash chip, given you have another system with a working flash chip installed.