Sony GV-8 Video Walkman
Table of contents
Introduction
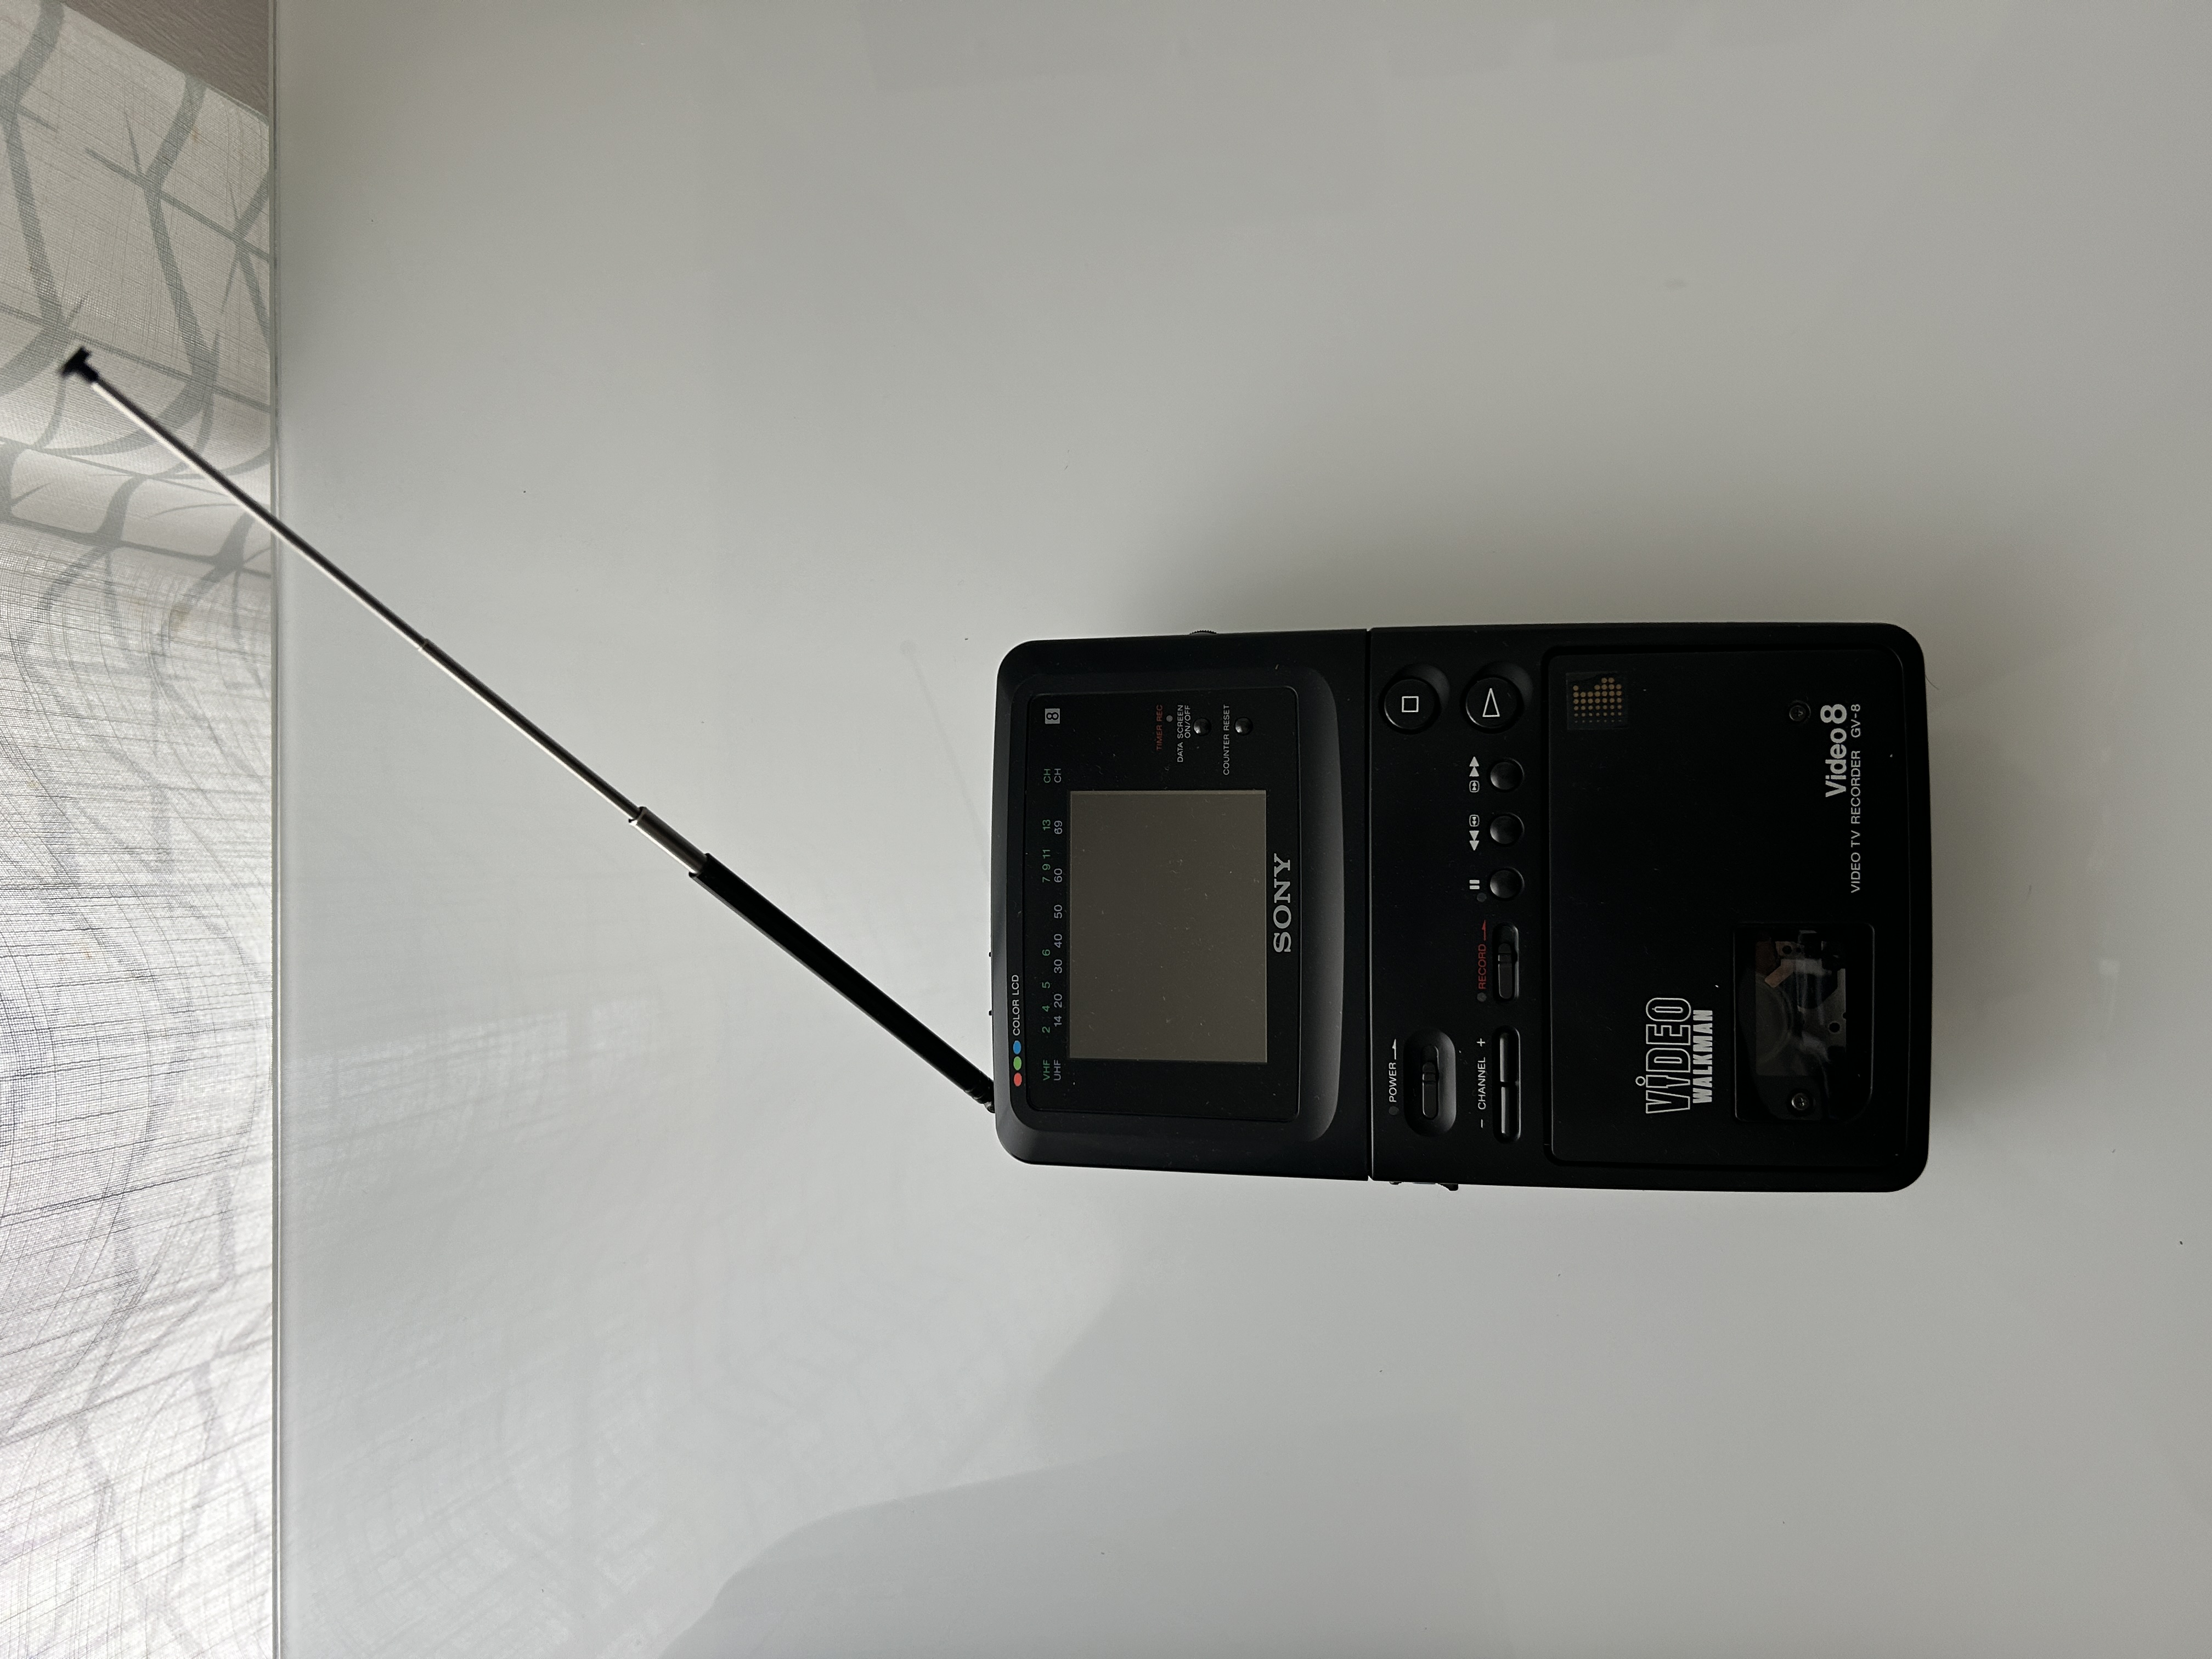
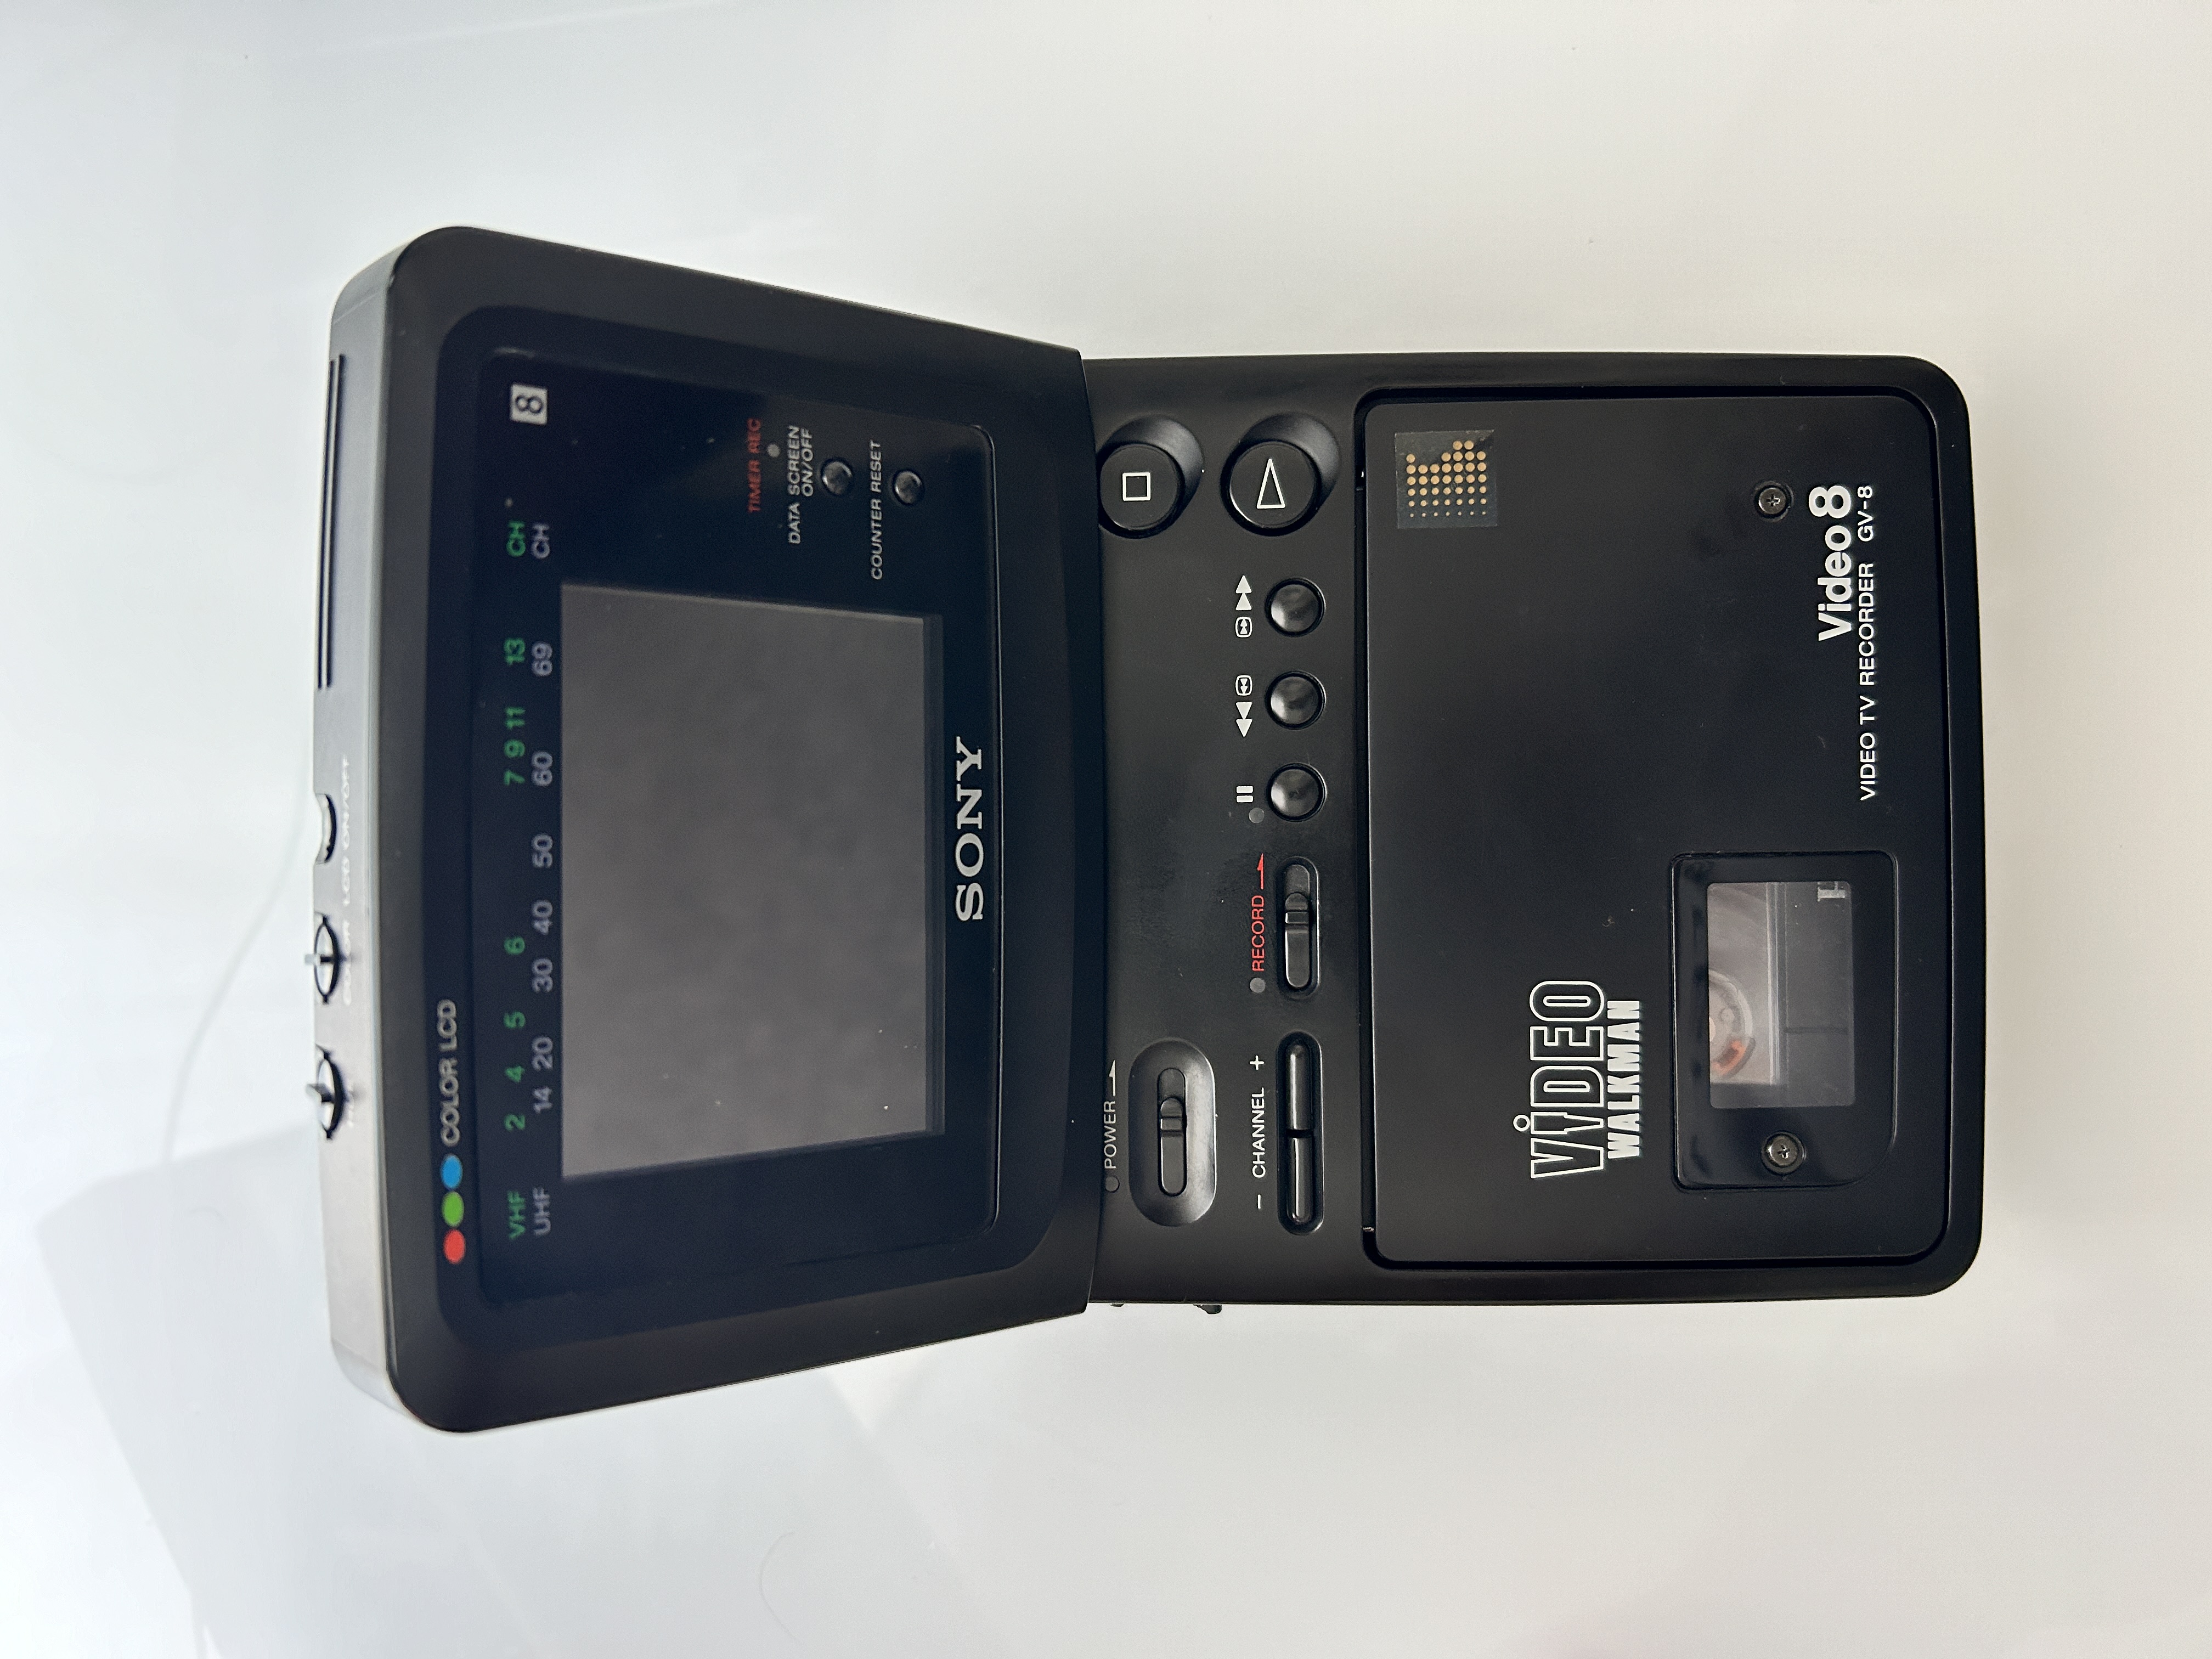
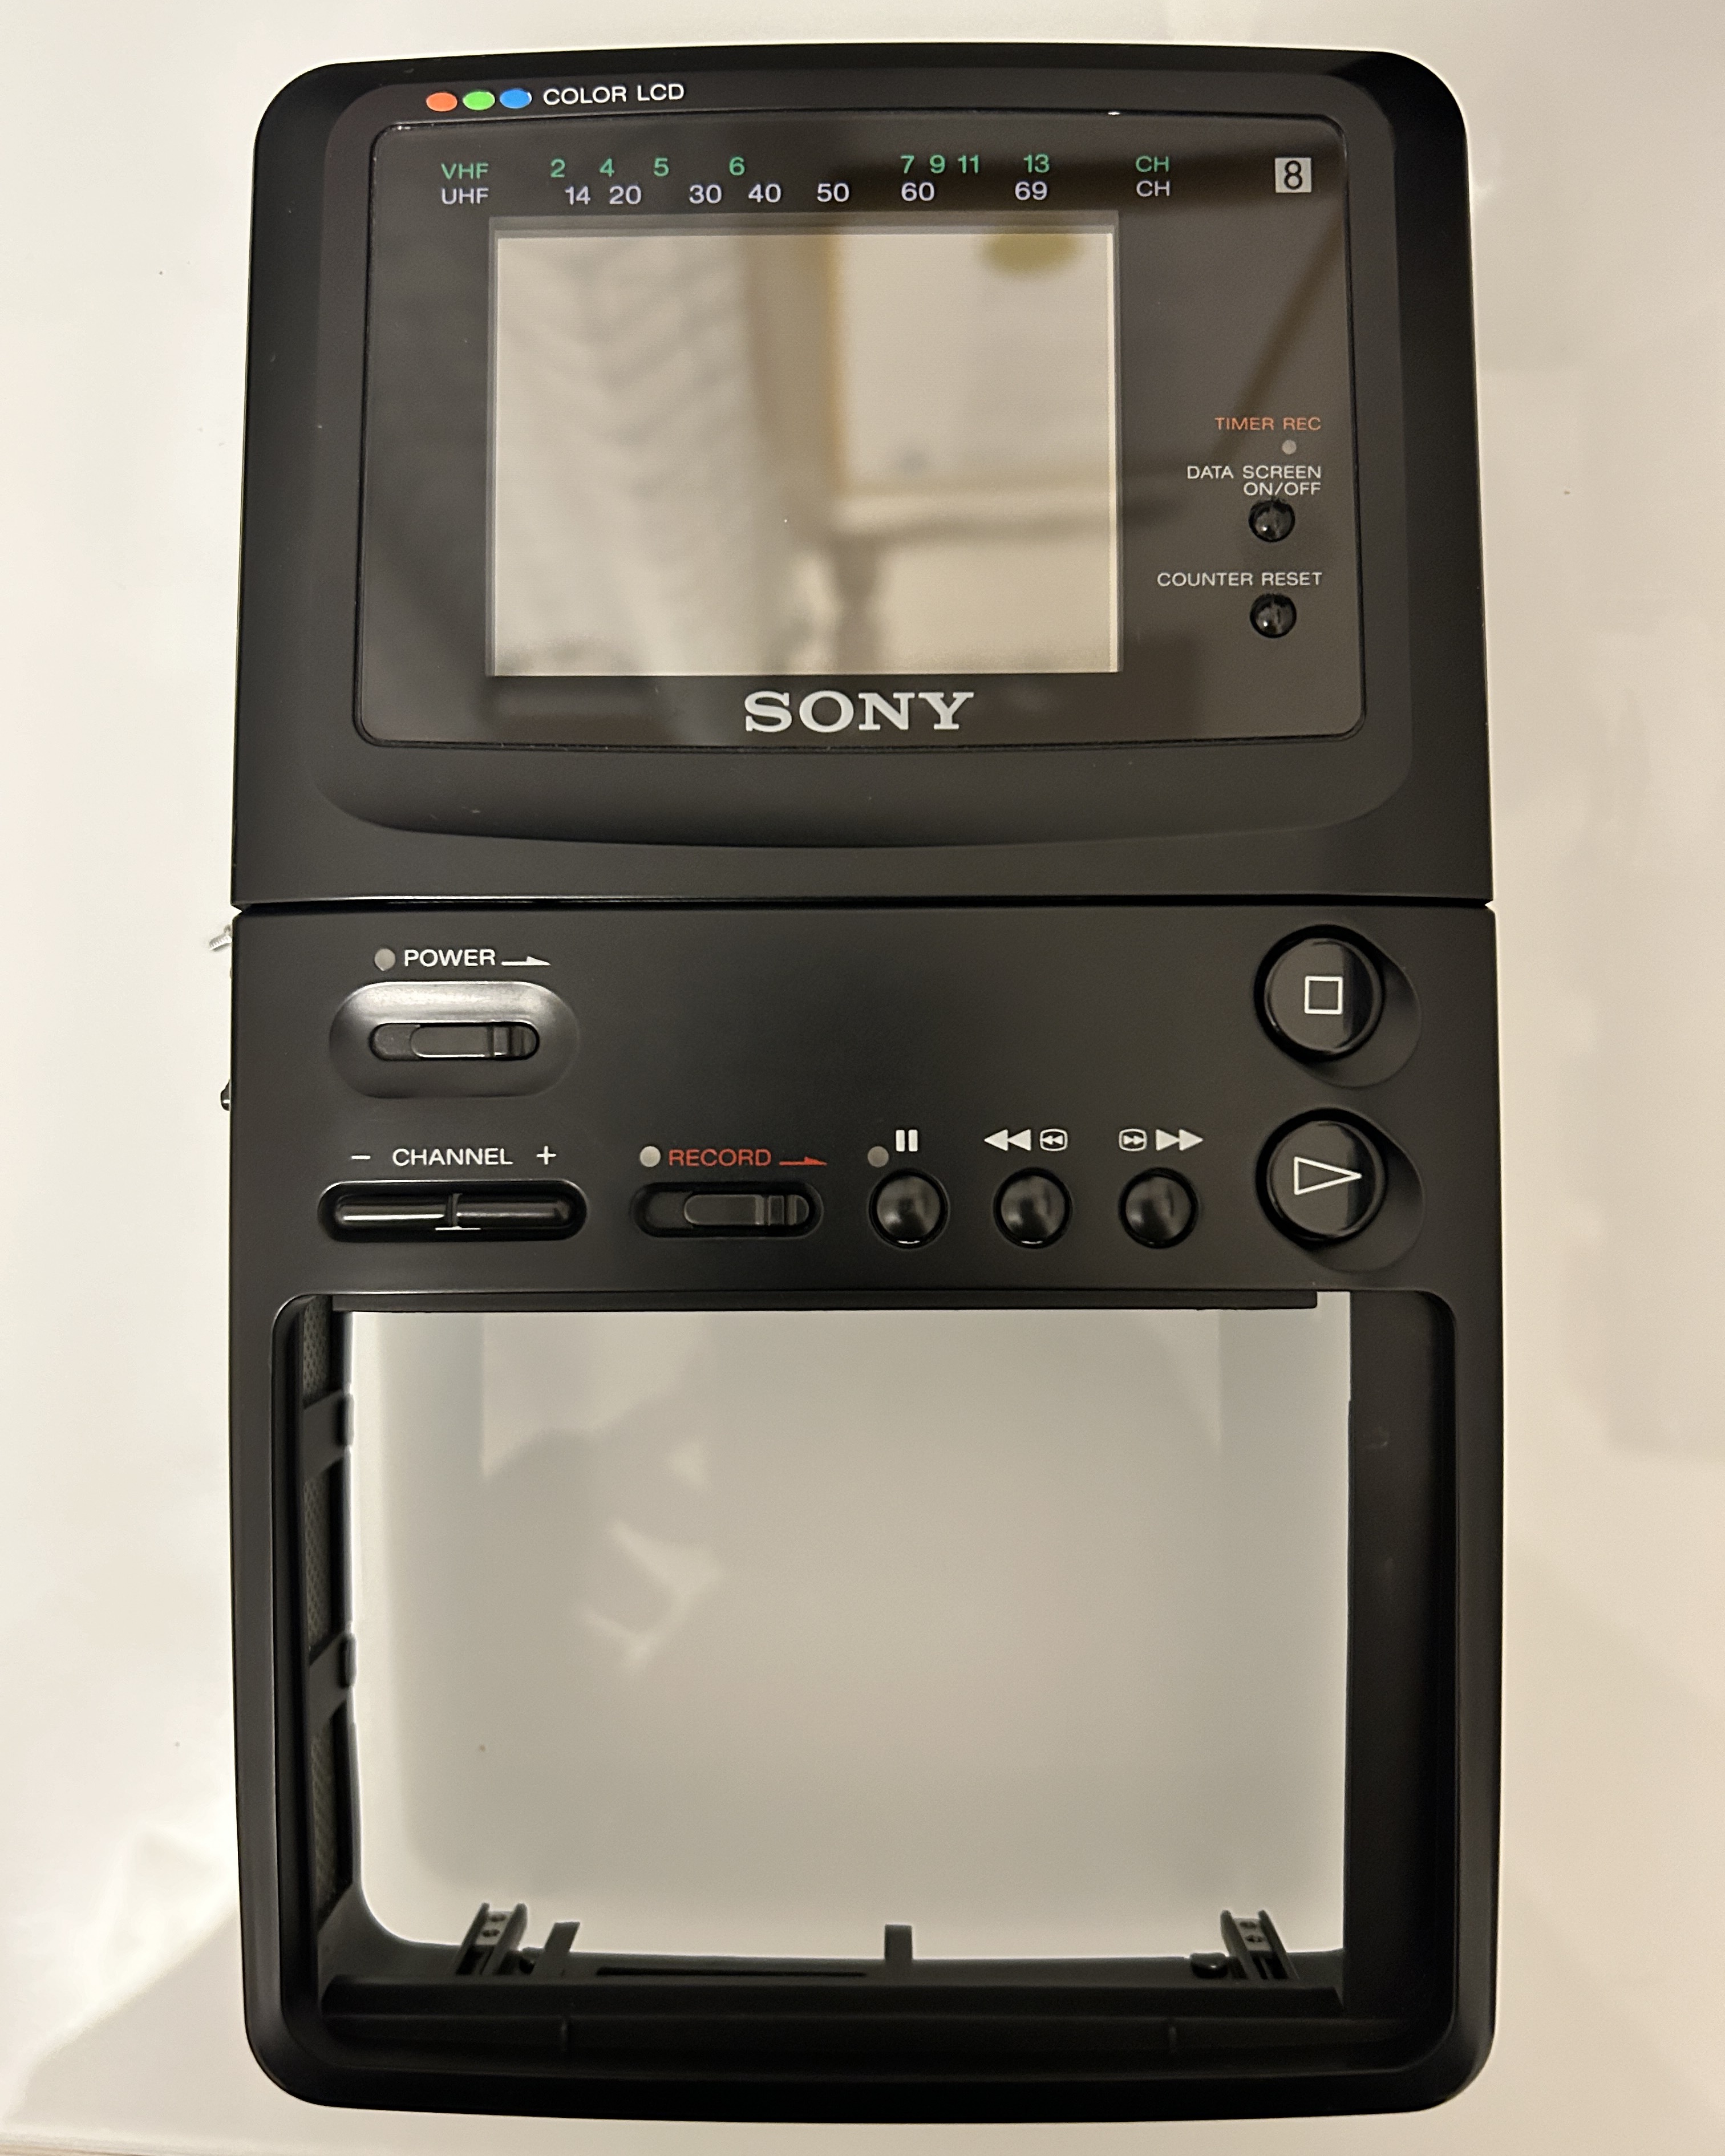
Introduced in 1988, this little unit was known as the first "Video WALKMAN". It combines a color LCD TV with a recording unit, taking advantage of the compact format and long recording and playback of 8 mm video. An acrylic panel magnifies the 3-inch monitor, which can be adjusted to the ideal viewing angle. The speaker is built into the bottom of the case. A tuner makes it easier to see what's on TV, with input/output ports also a standard feature.
I snagged this from someone on Facebook Marketplace, who also happened to have the original receipts. They purchased this unit back in 1990 for a whopping $1700 Canadian. On top of that, they also splurged on a 2-year warranty and extra batteries, setting them back an extra $300 at the time. However, when it was sold to me in 2023 for $40 along with several accessories, it was obviously non-functional and ended up being sold for parts.
Finally, almost a year after the purchase, I managed to bring it fully back to life. It wasn't a walk in the park, though. Brittle plastics, leaking capacitors, several hair-thin traces corroded – this device had it all. Its compact design didn't make things any easier; servicing it was quite the challenge.
This was probably one of the most complex devices I've tackled in the past year.
Match made in heaven

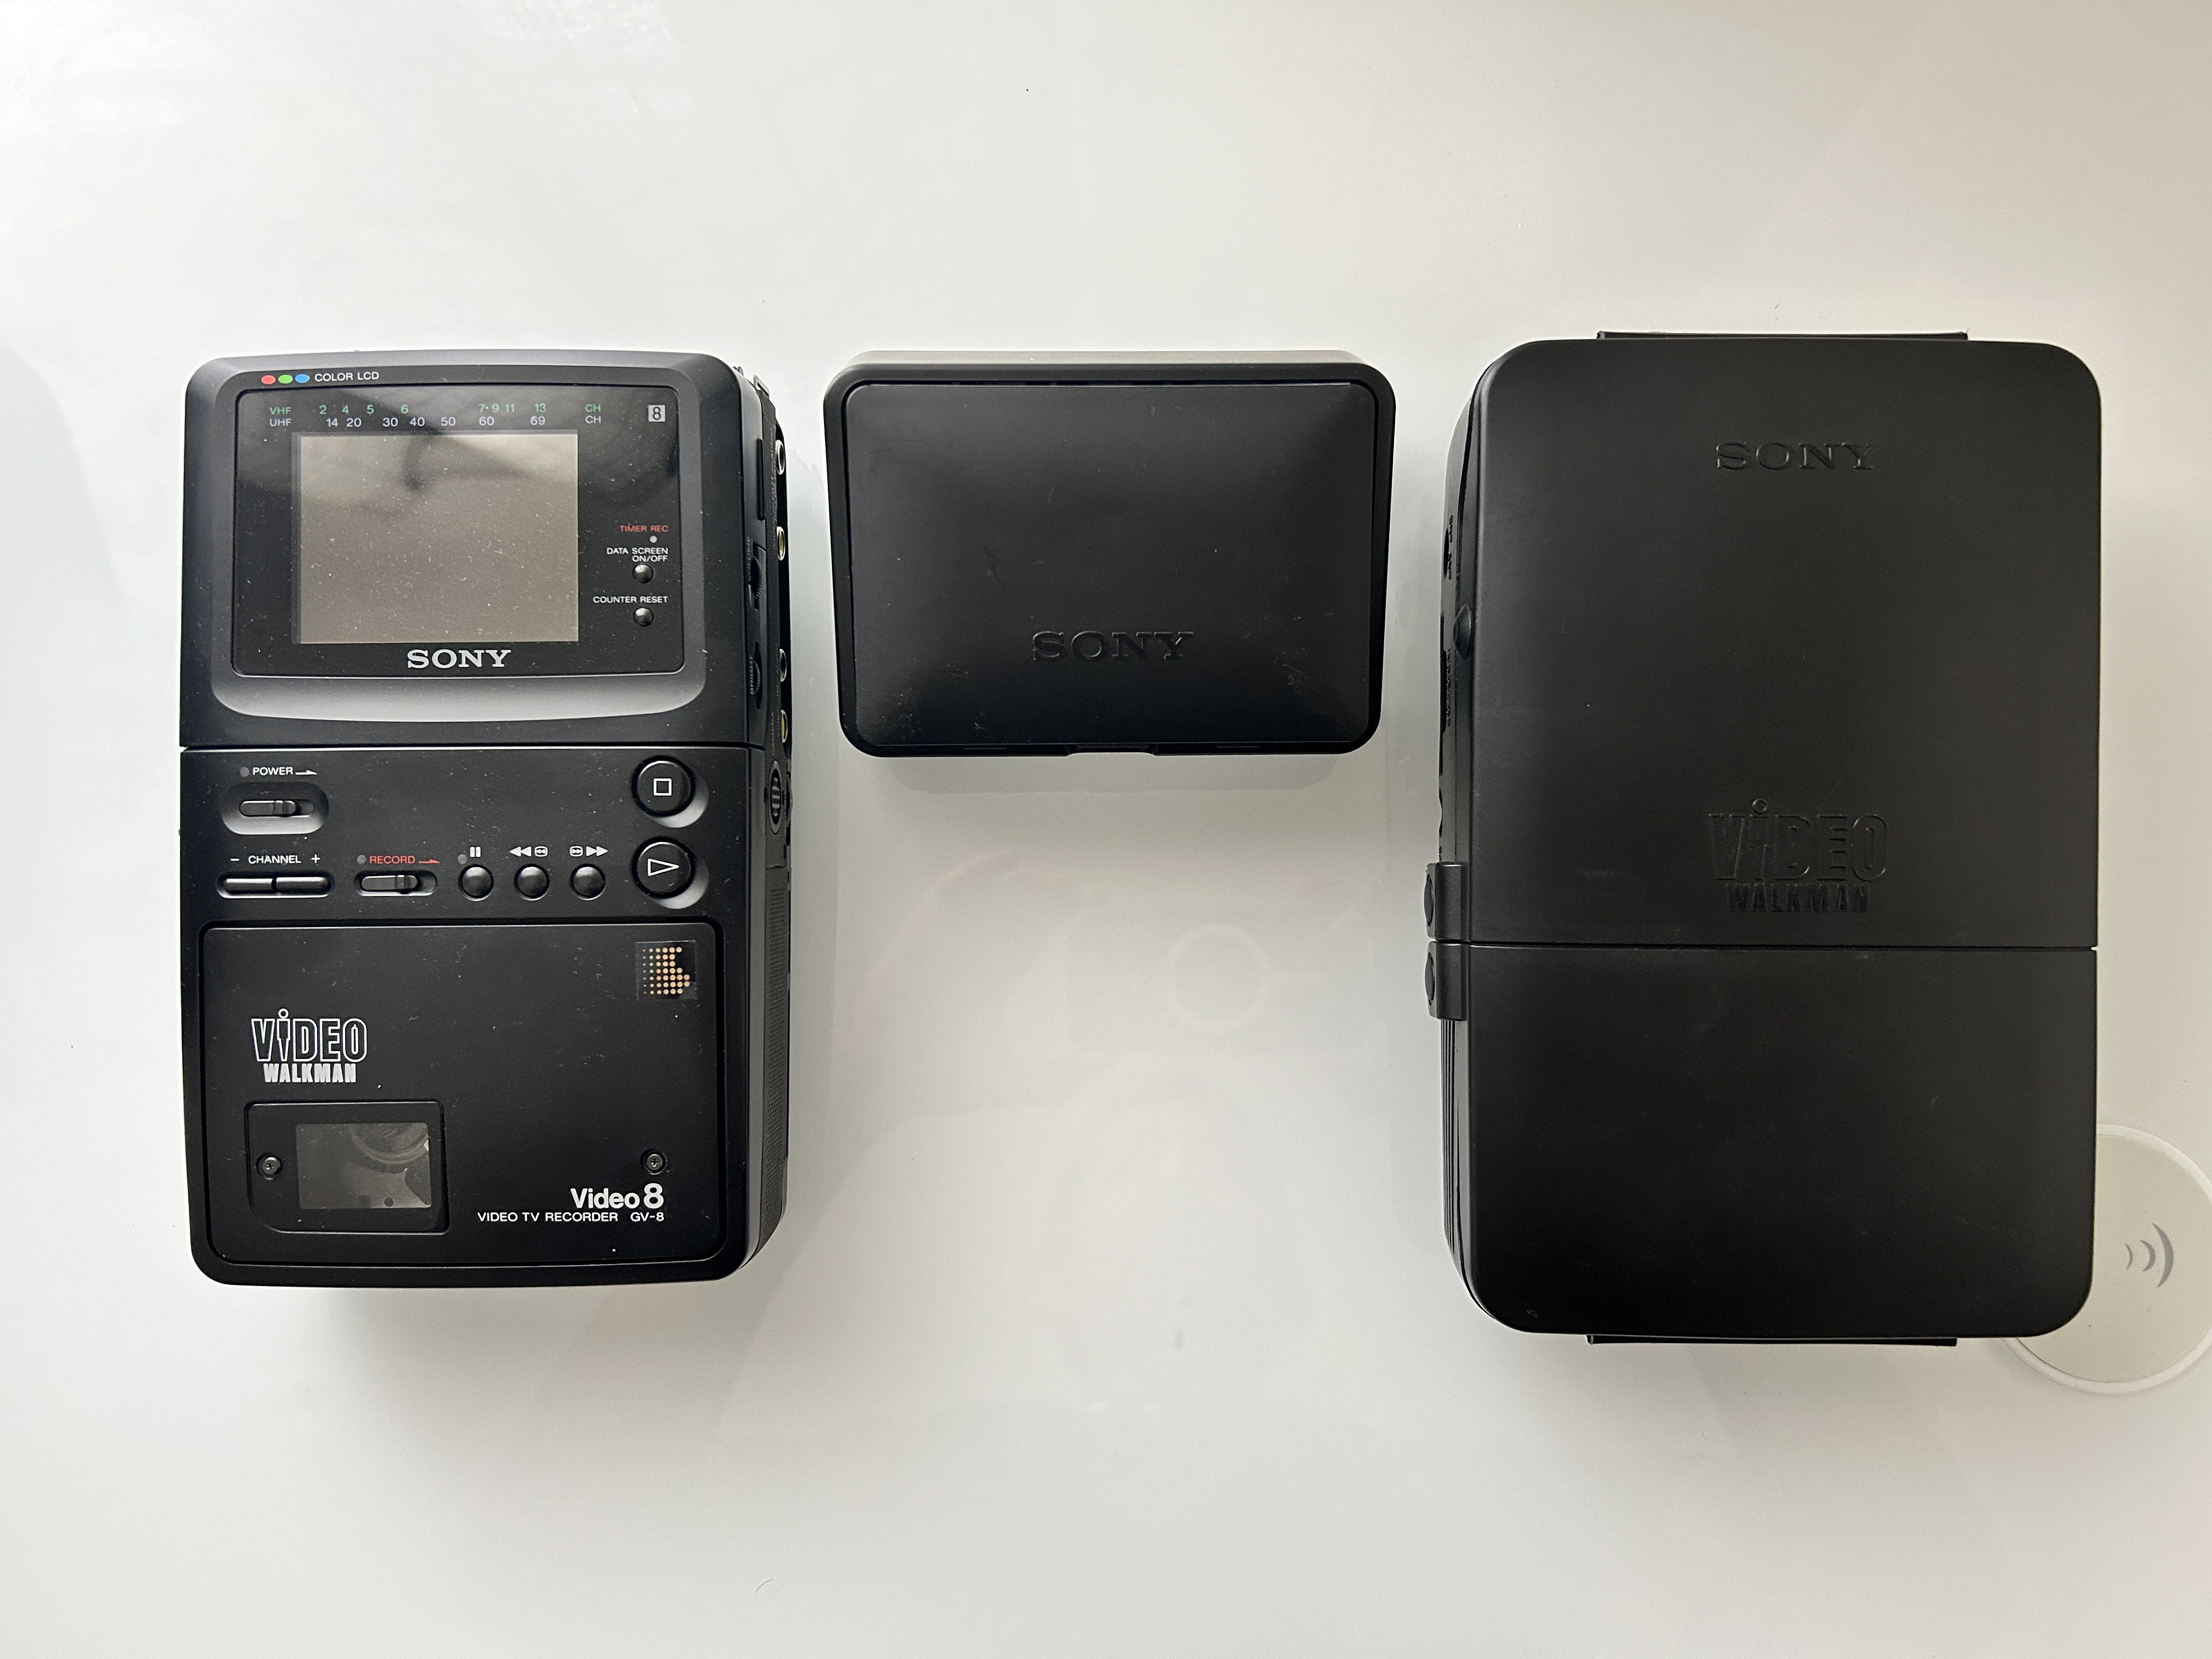
I was particularly intrigued by this small unit because of its compatibility with the EV-DT1. For some reason, during the pandemic, I found myself fixating on late 80s Sony devices. As we started to emerge from the pandemic, I made a commitment to this project. I was determined to see it through to the end. While the restoration process was challenging, it provided me with a valuable experience. I took my time and worked on it meticulously. Along the way, I realized that I needed another spare unit to complete the project. So, I ended up purchasing another unit from eBay. The final product you see here is a result of combining the best parts from both units.
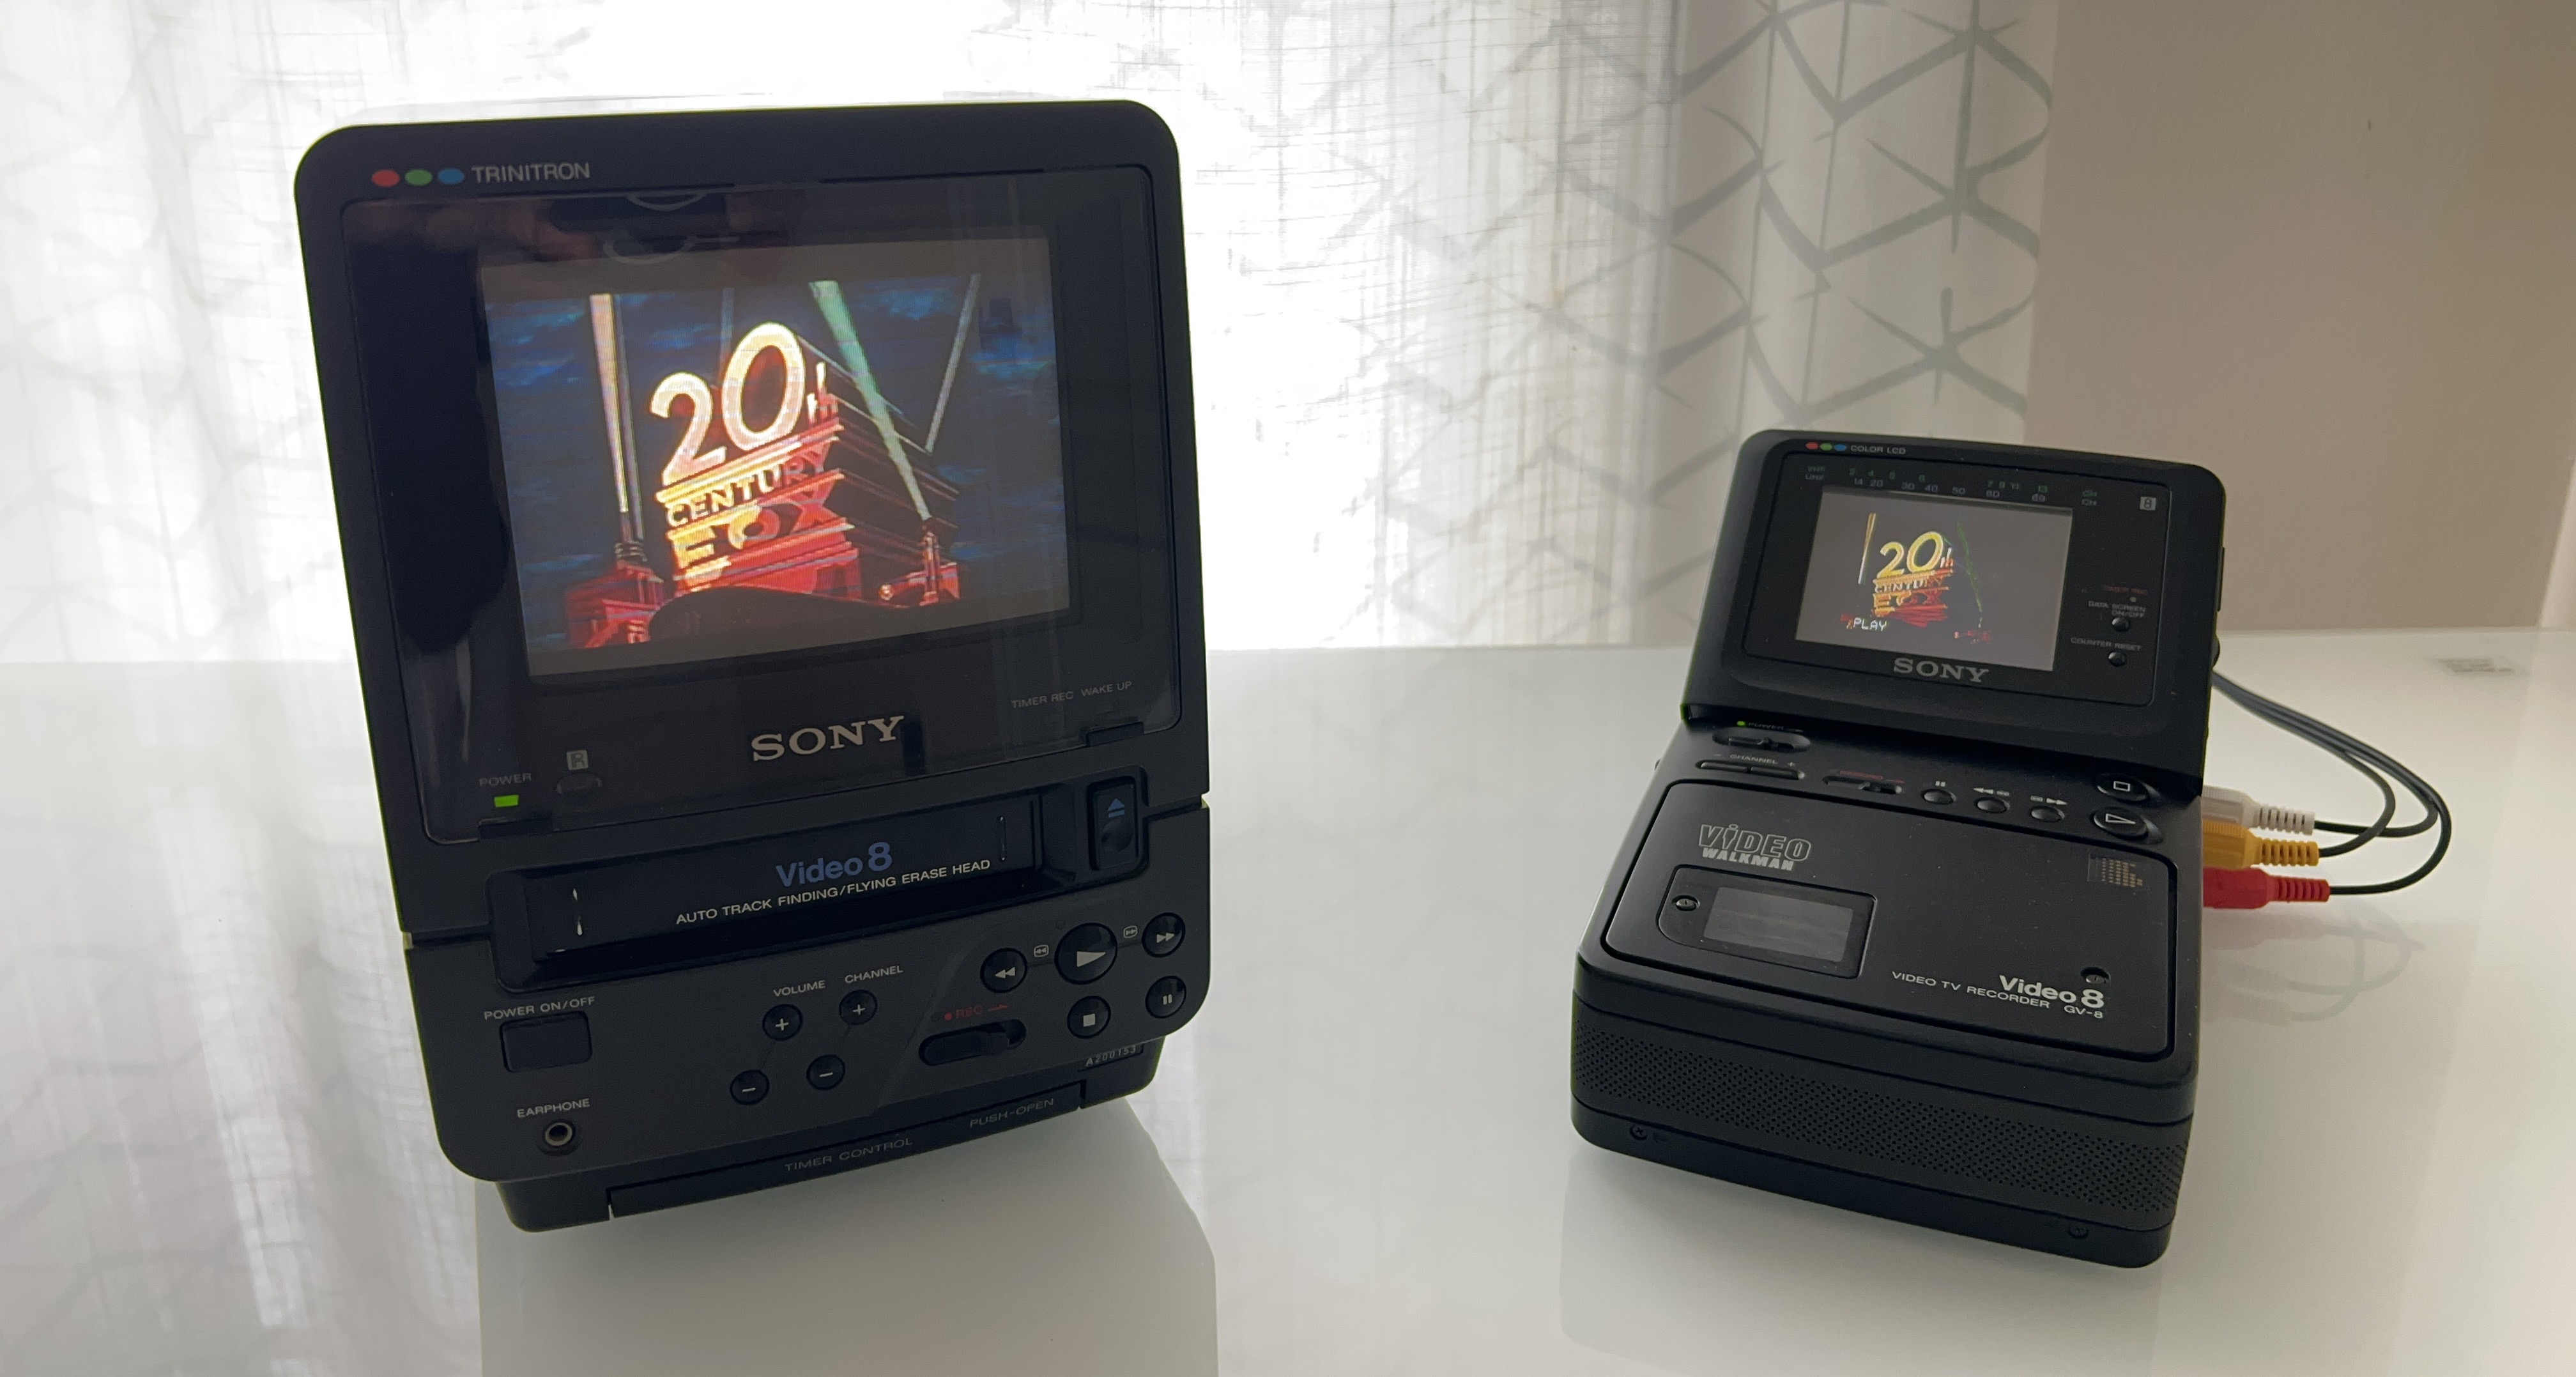
I was marvelled how futuristic this unit would've looked in the late 80s. Well here is GV-8 again, all functions restored, corrected all of Sony's electronics mistakes and now it is ready for another 20 years with ceramic and solid capacitors that will last a lifetime. Only risk factor now is the plastics.
User and Service Manuals
You can read more about the specs of this unit in the brochure or user manual. I was only able to find the PAL version of the schematics for free. I may have snippets of the NTSC version throughout this article.
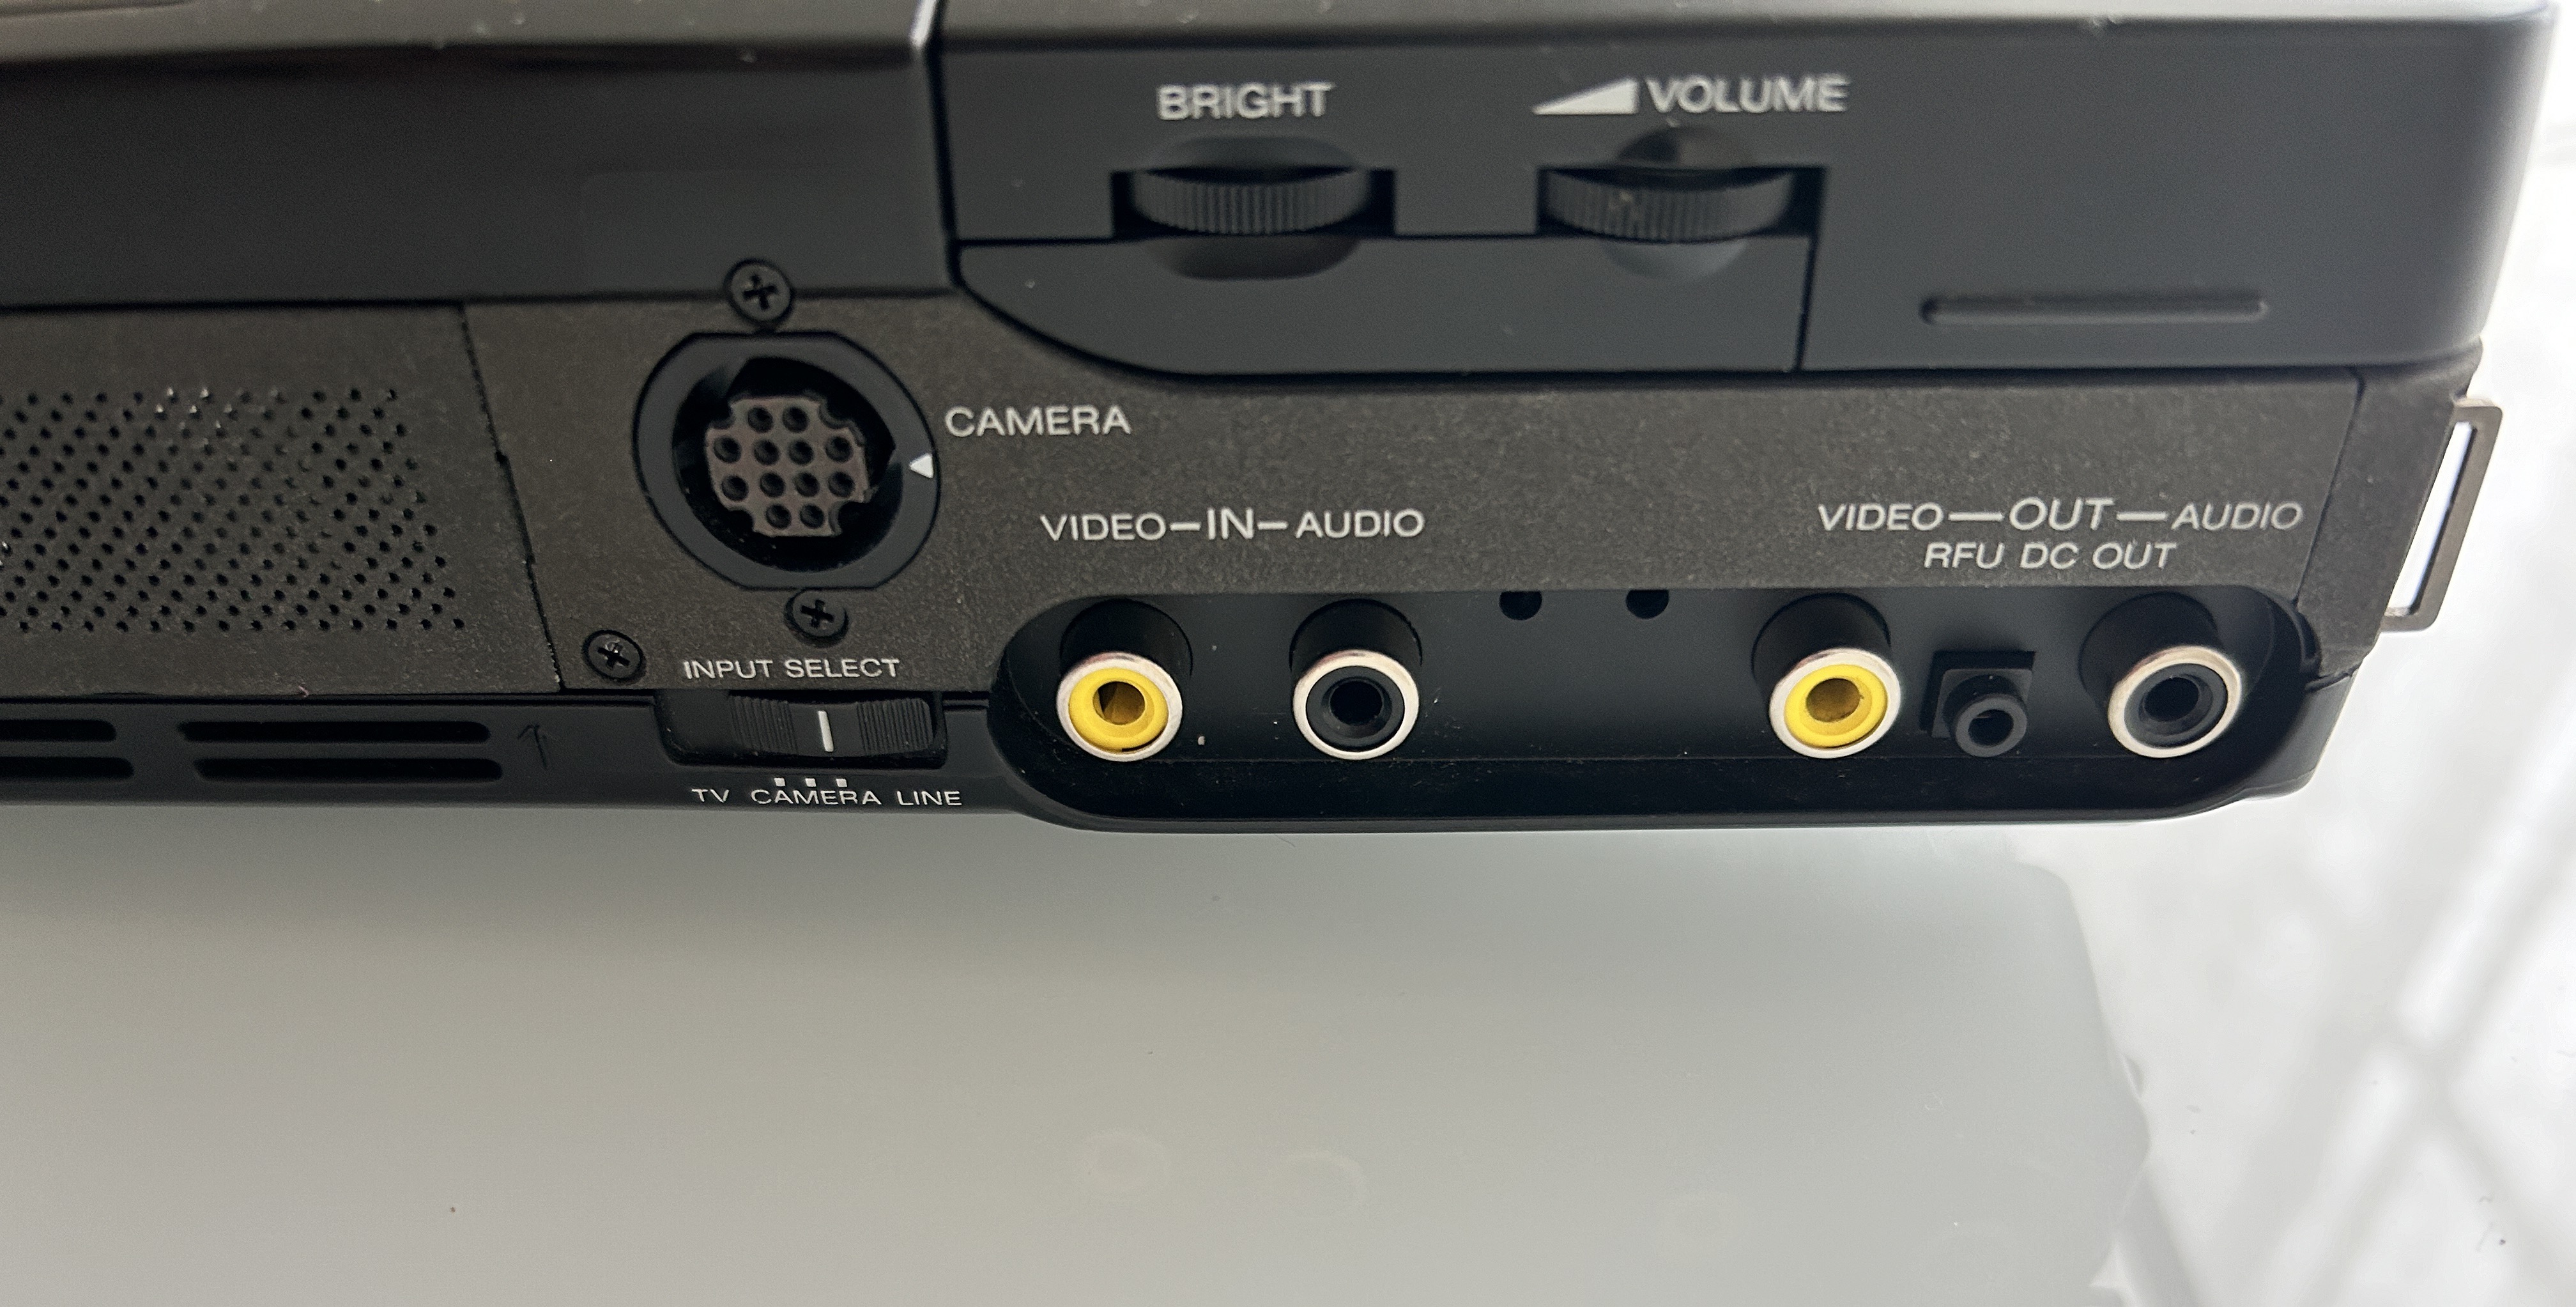
Getting video input and output to work
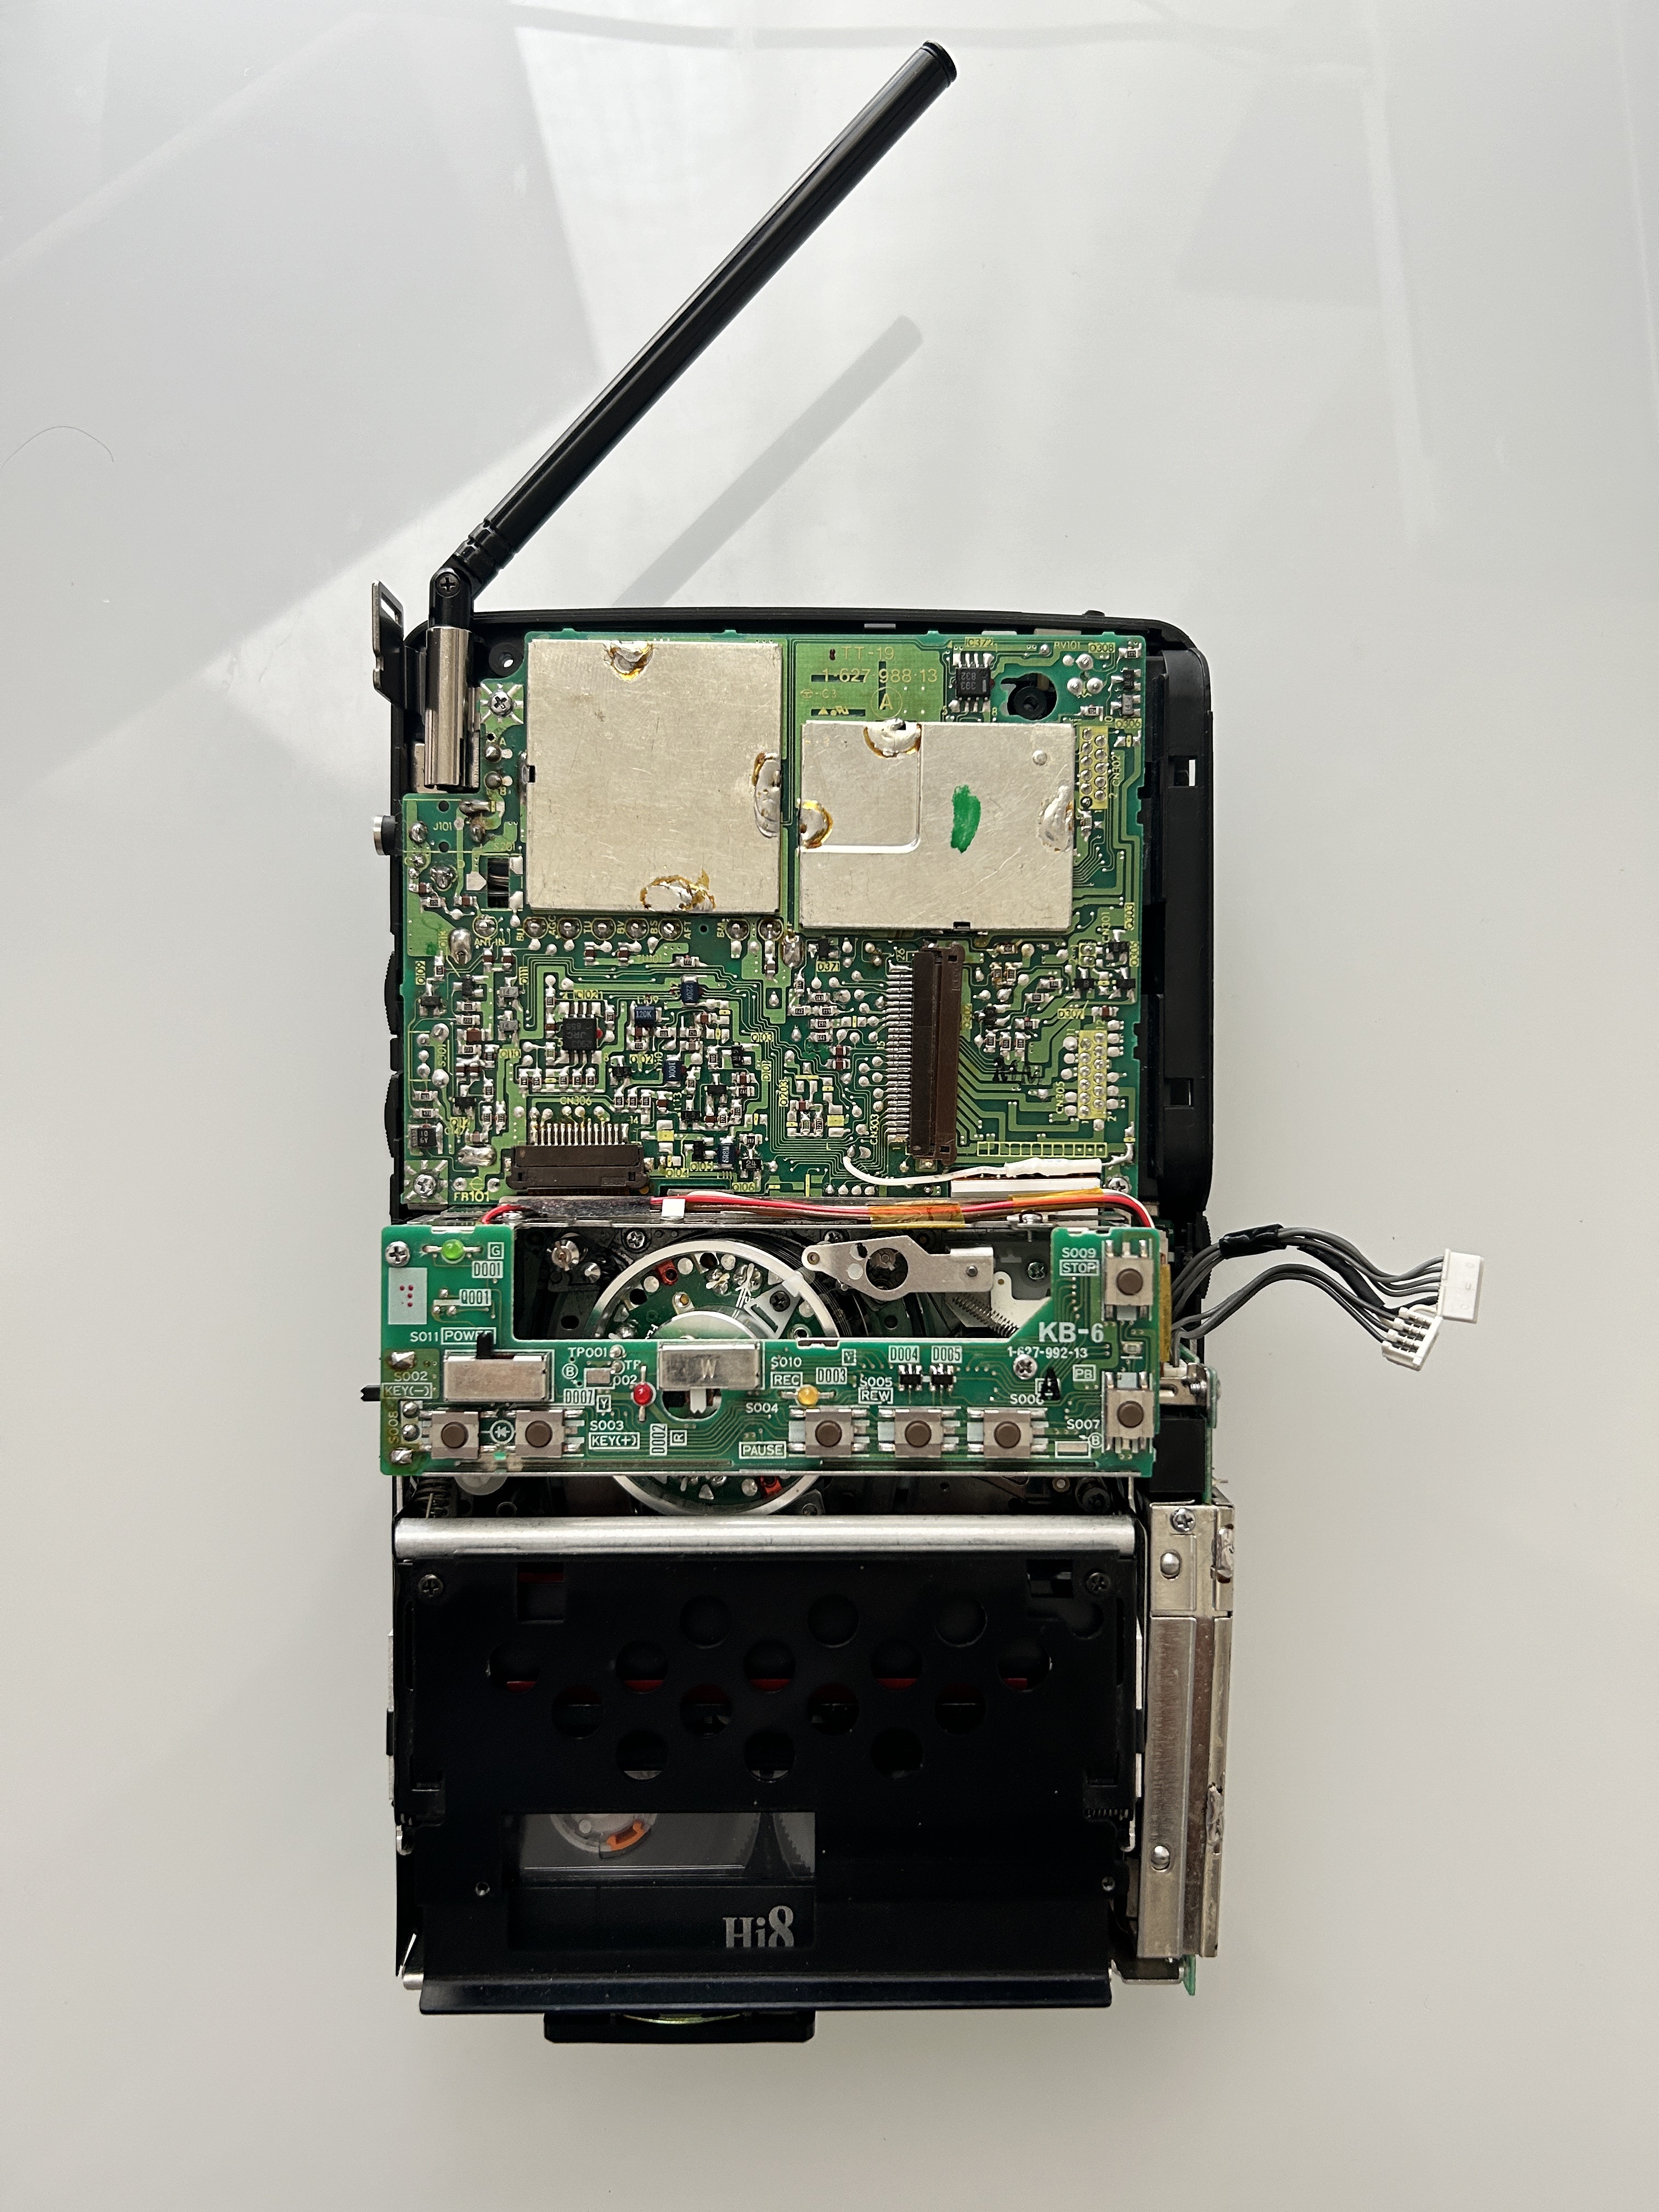
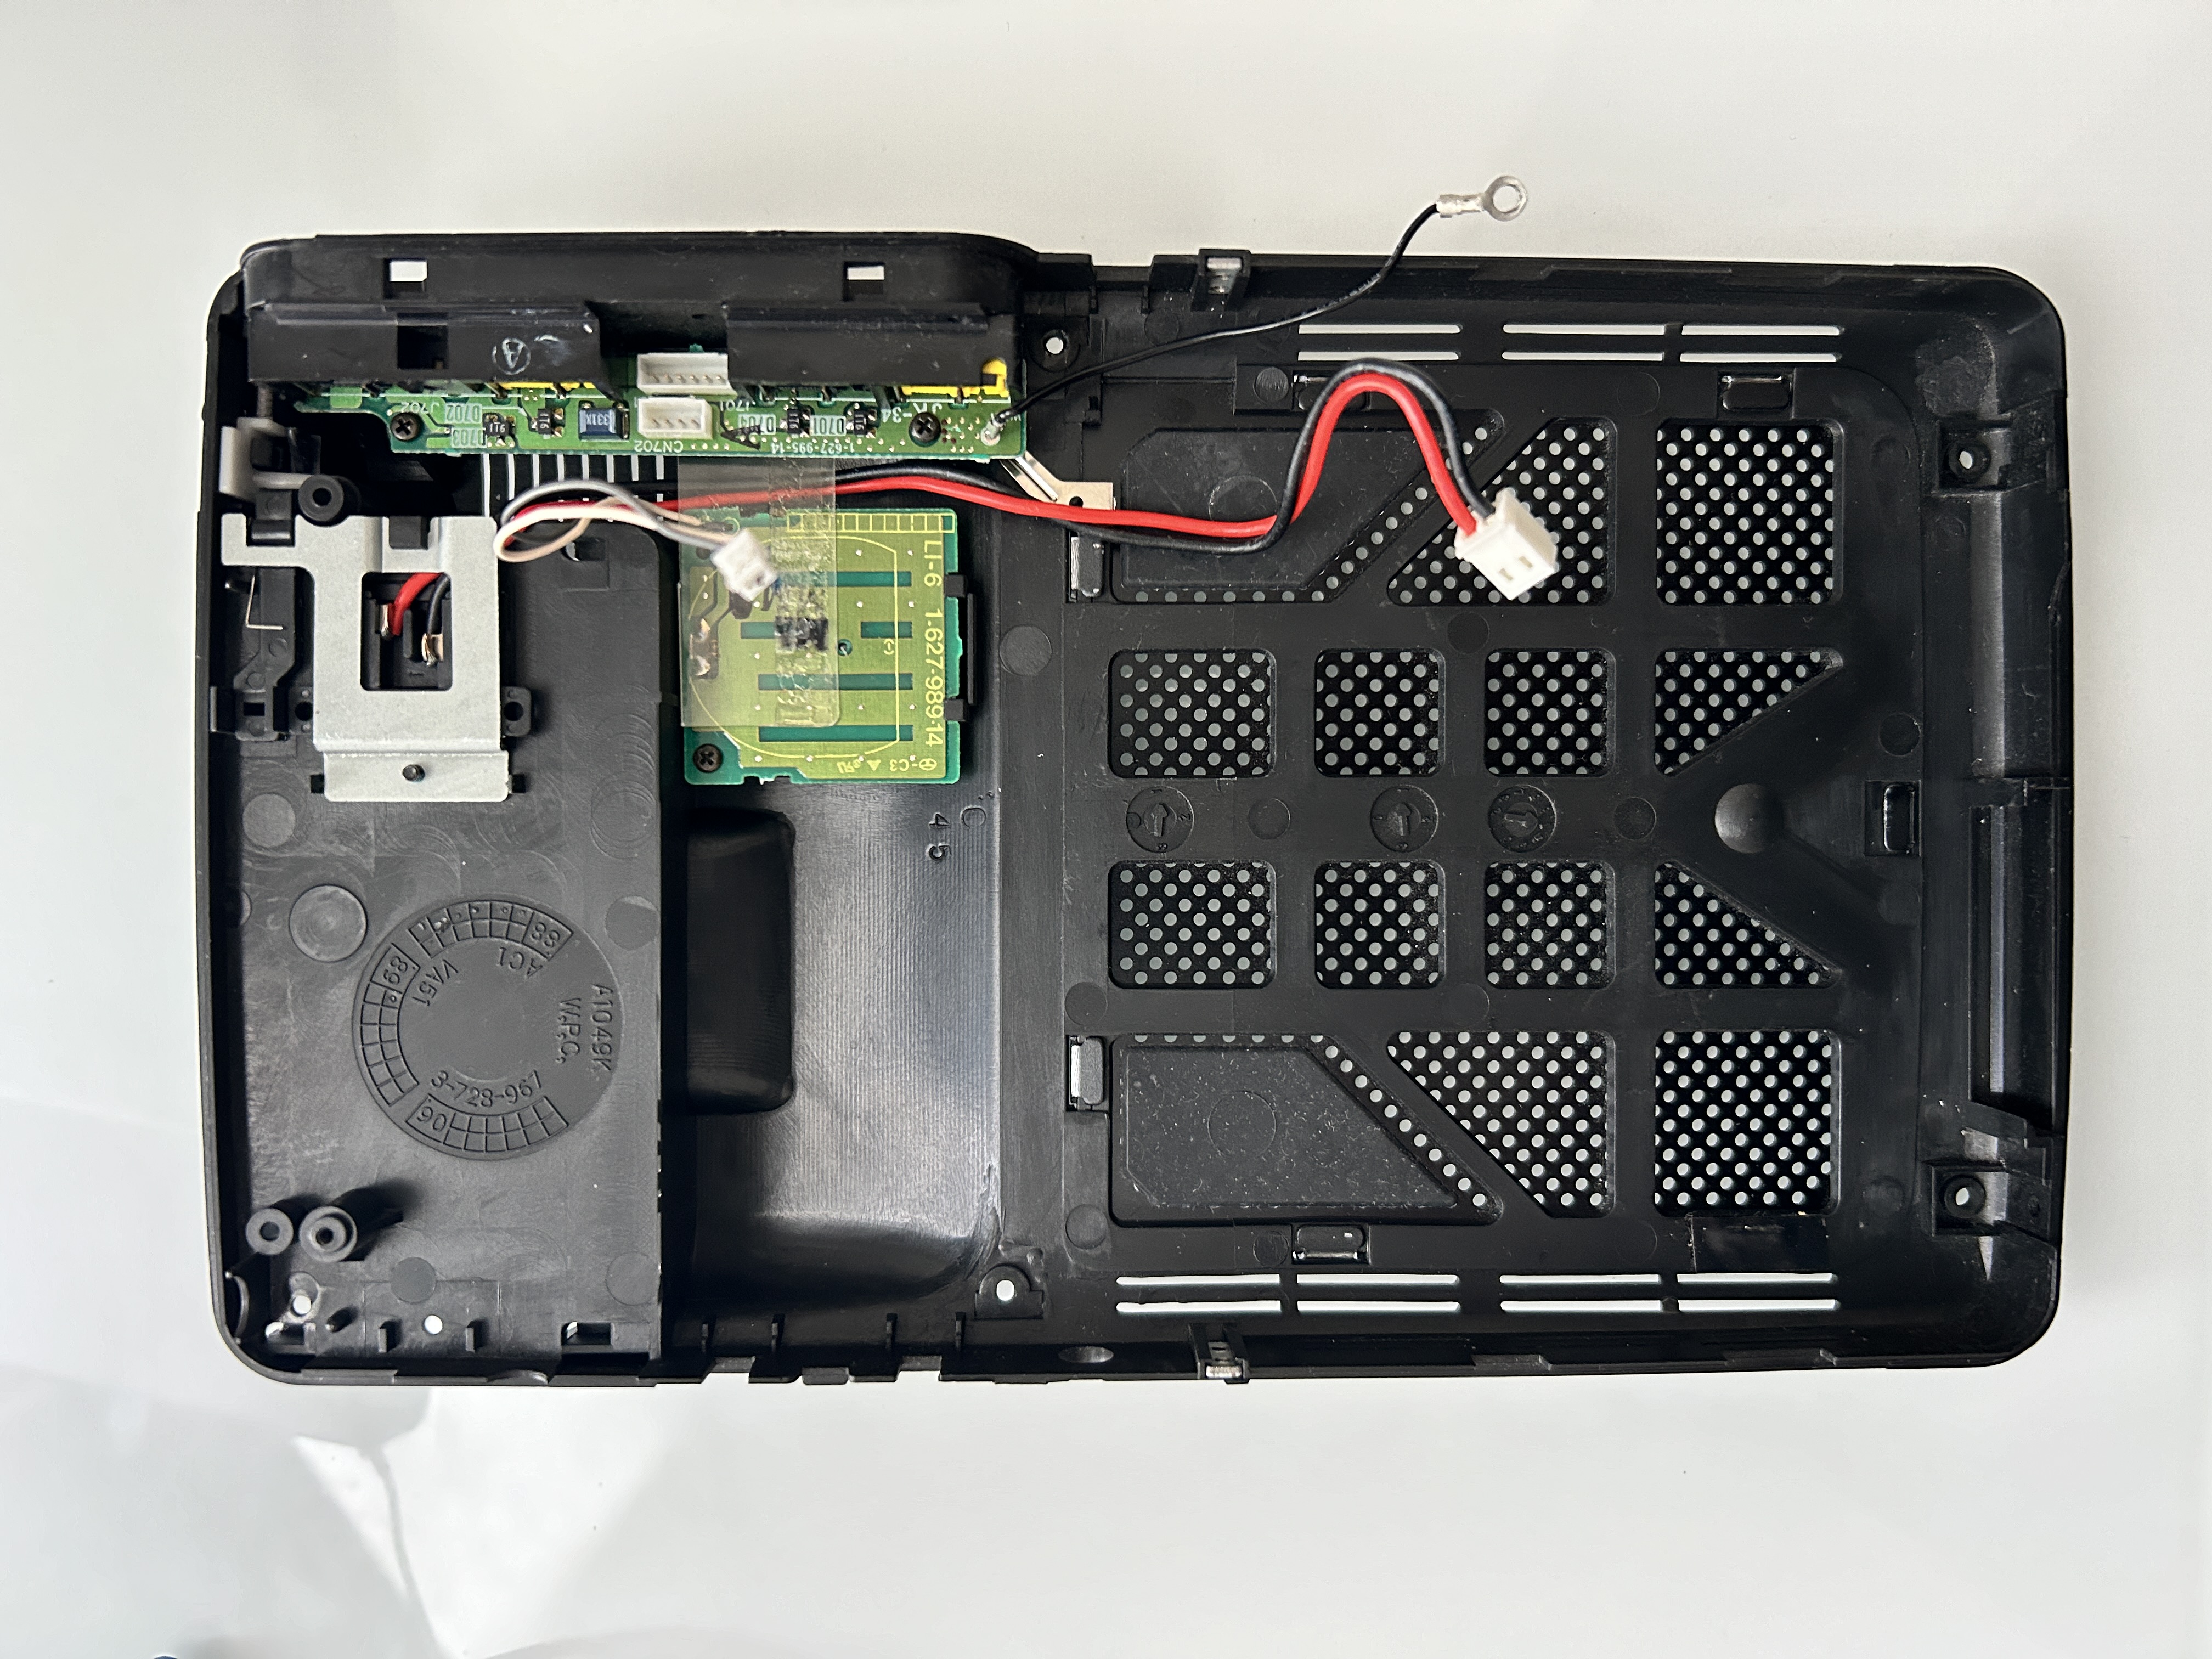
When you open up the unit, you'll quickly notice how densely packed all the boards are. The more time you spend with it, the more familiar everything will become. Patience is crucial for getting this unit up and running again
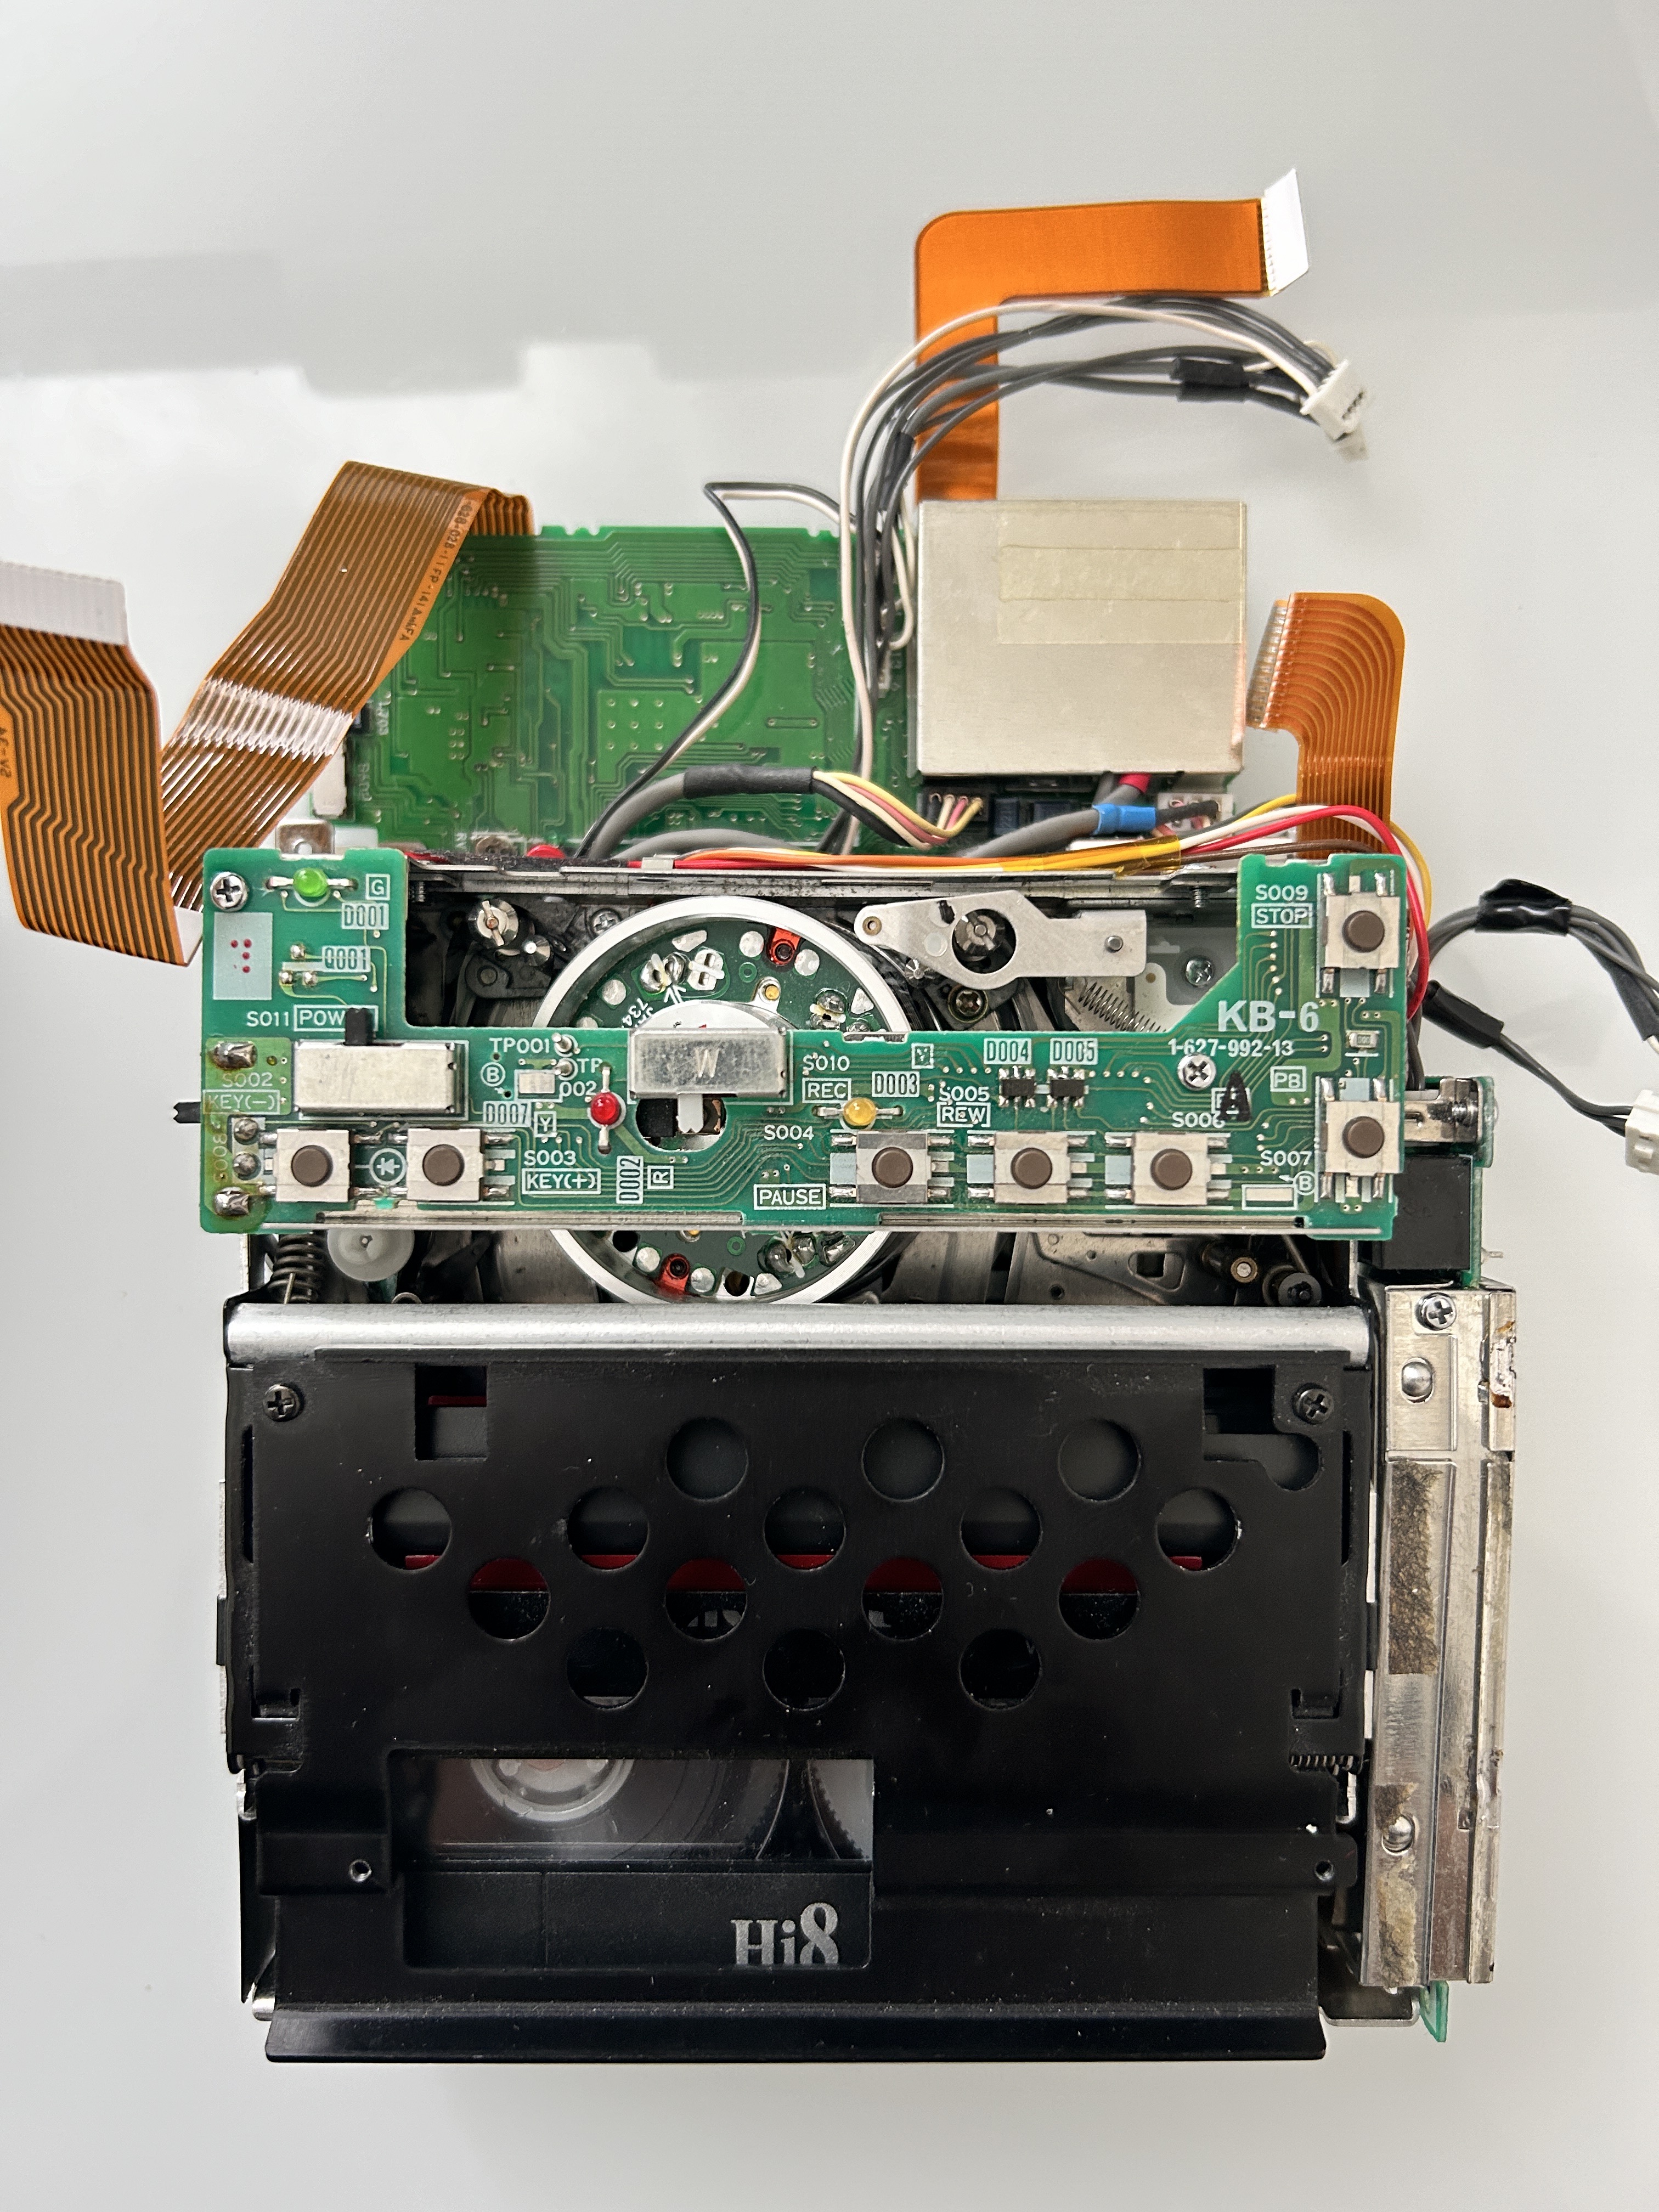
Video 8 tape mechanism
The intricate mechanical workings of this unit is truly captivating. Numerous gears interlock in synchronous harmony to drive its functions. It's hard to imagine the effort required to enjoy a portable movie back in the late 80s. Nowadays, we just take it for granted with streaming and all with just couple of clicks. No moving parts!!
Tape mechanism bottom 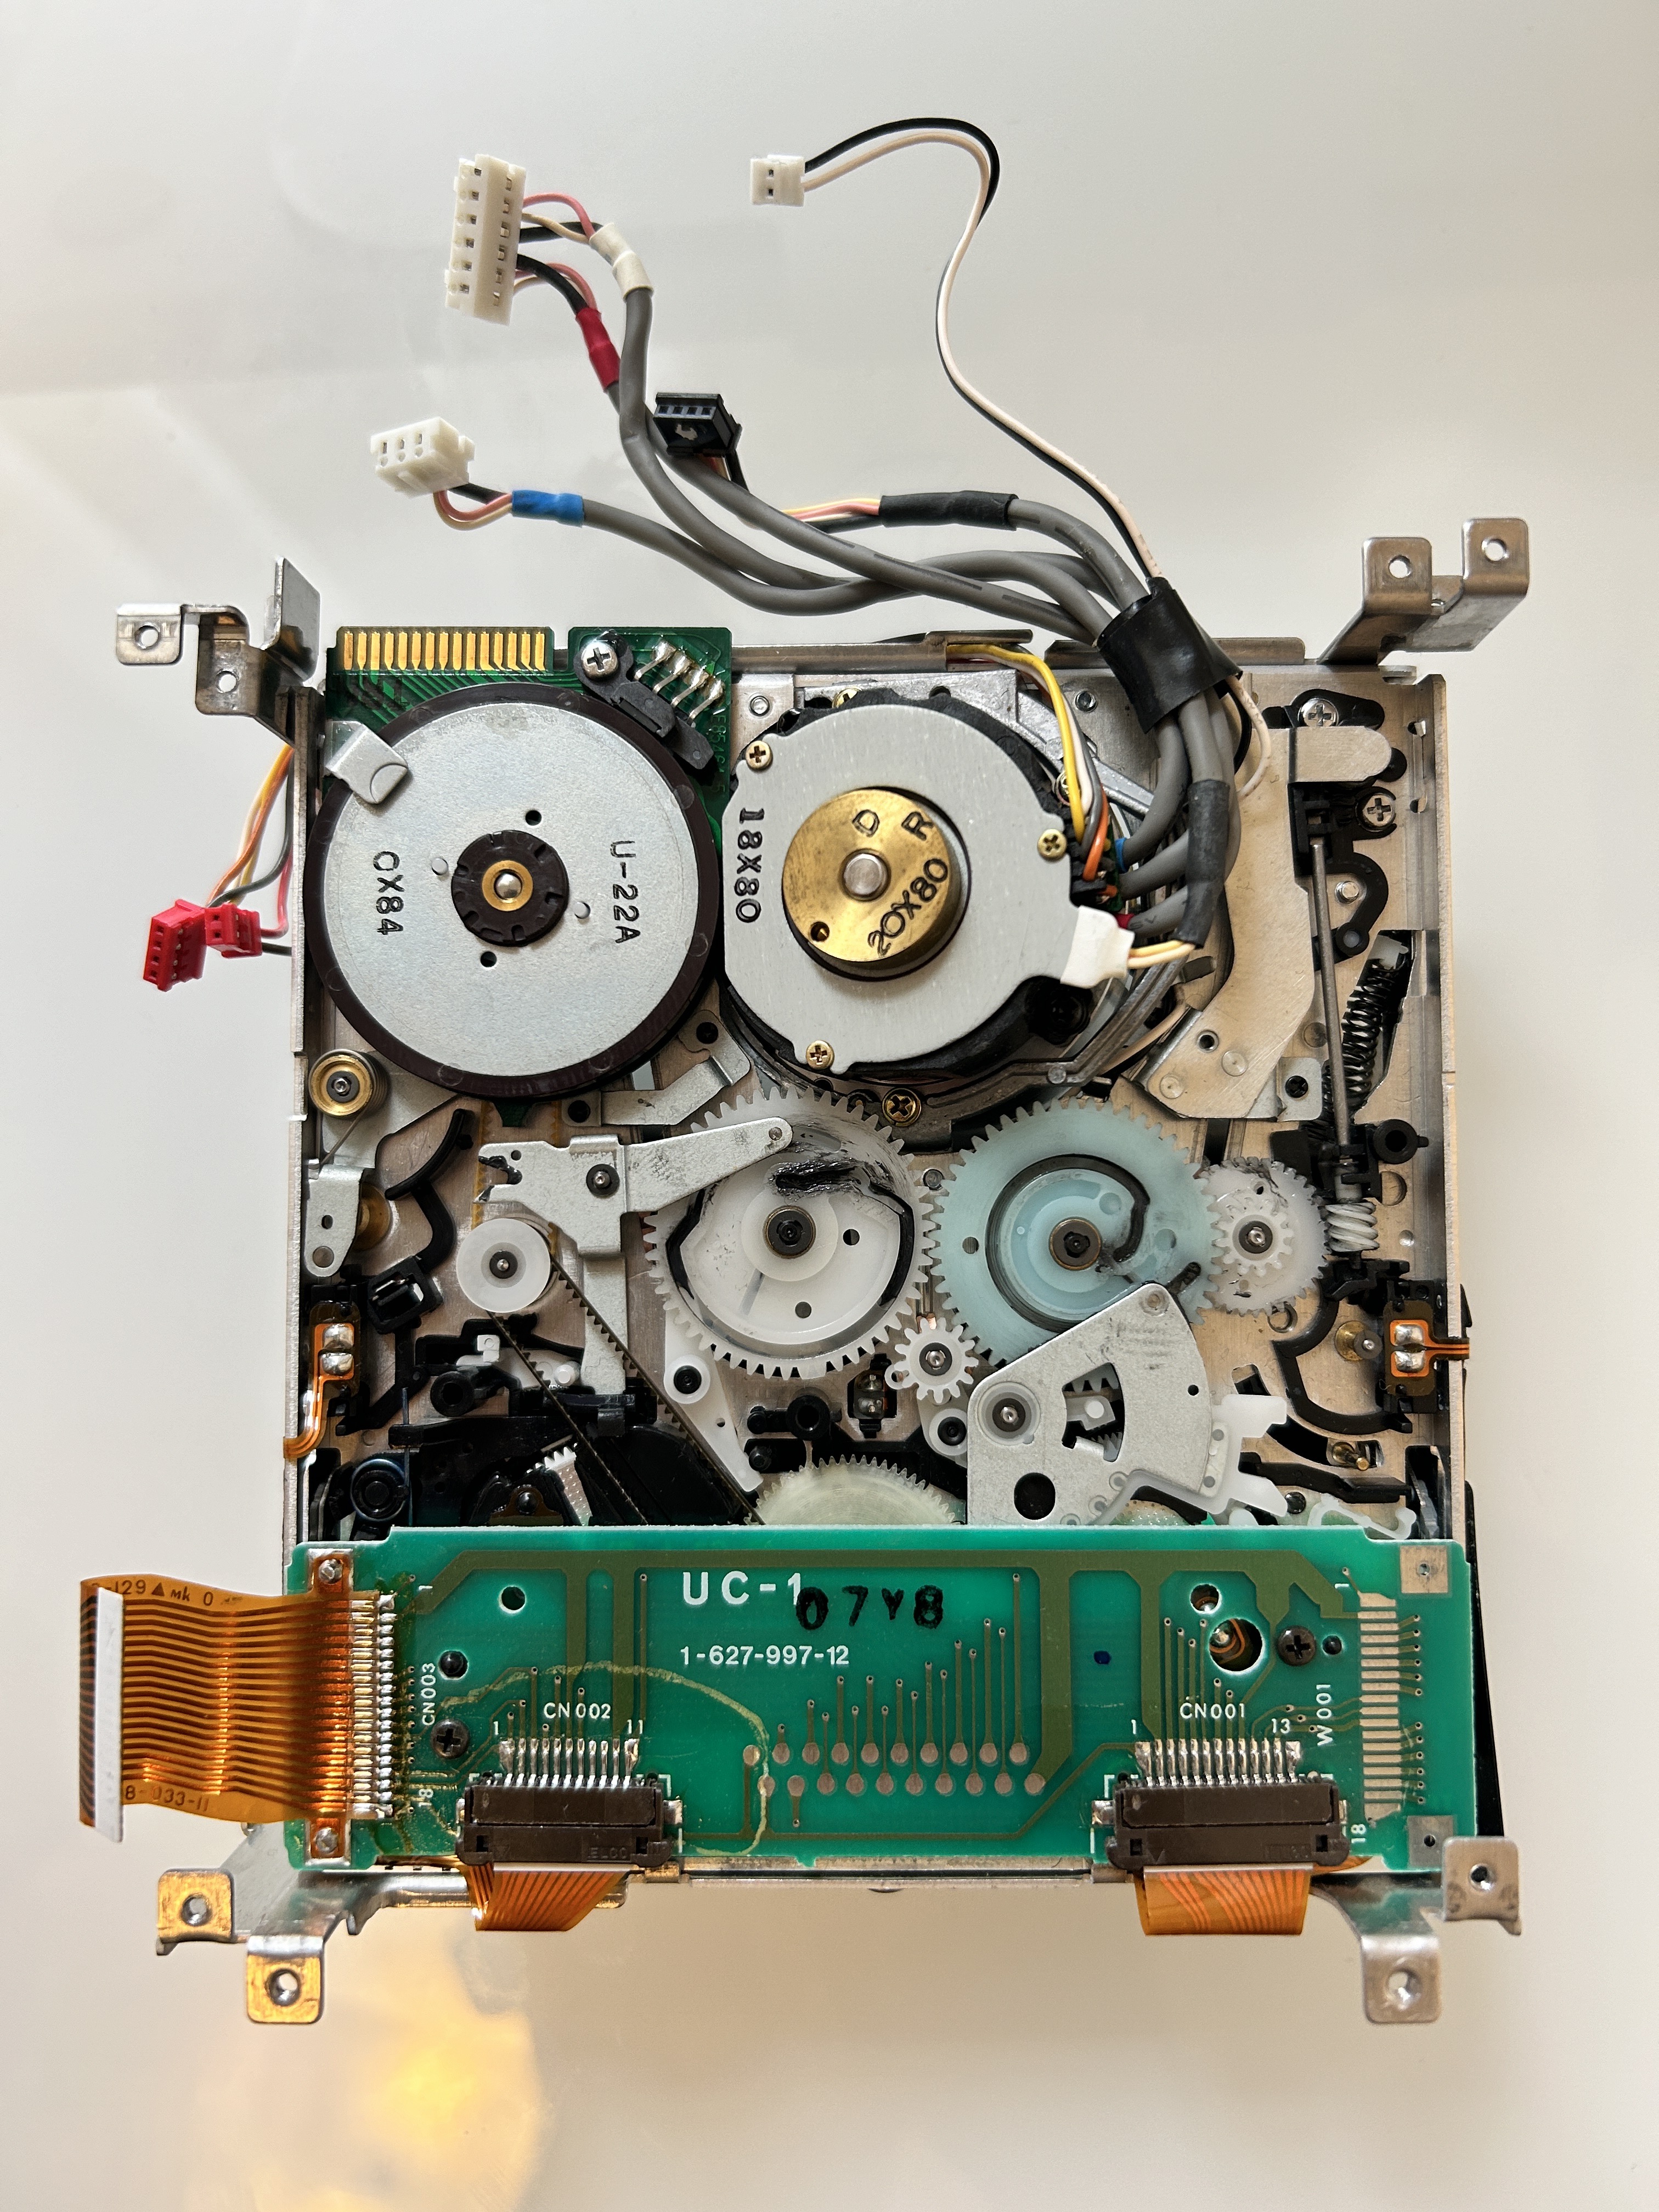
Tape head 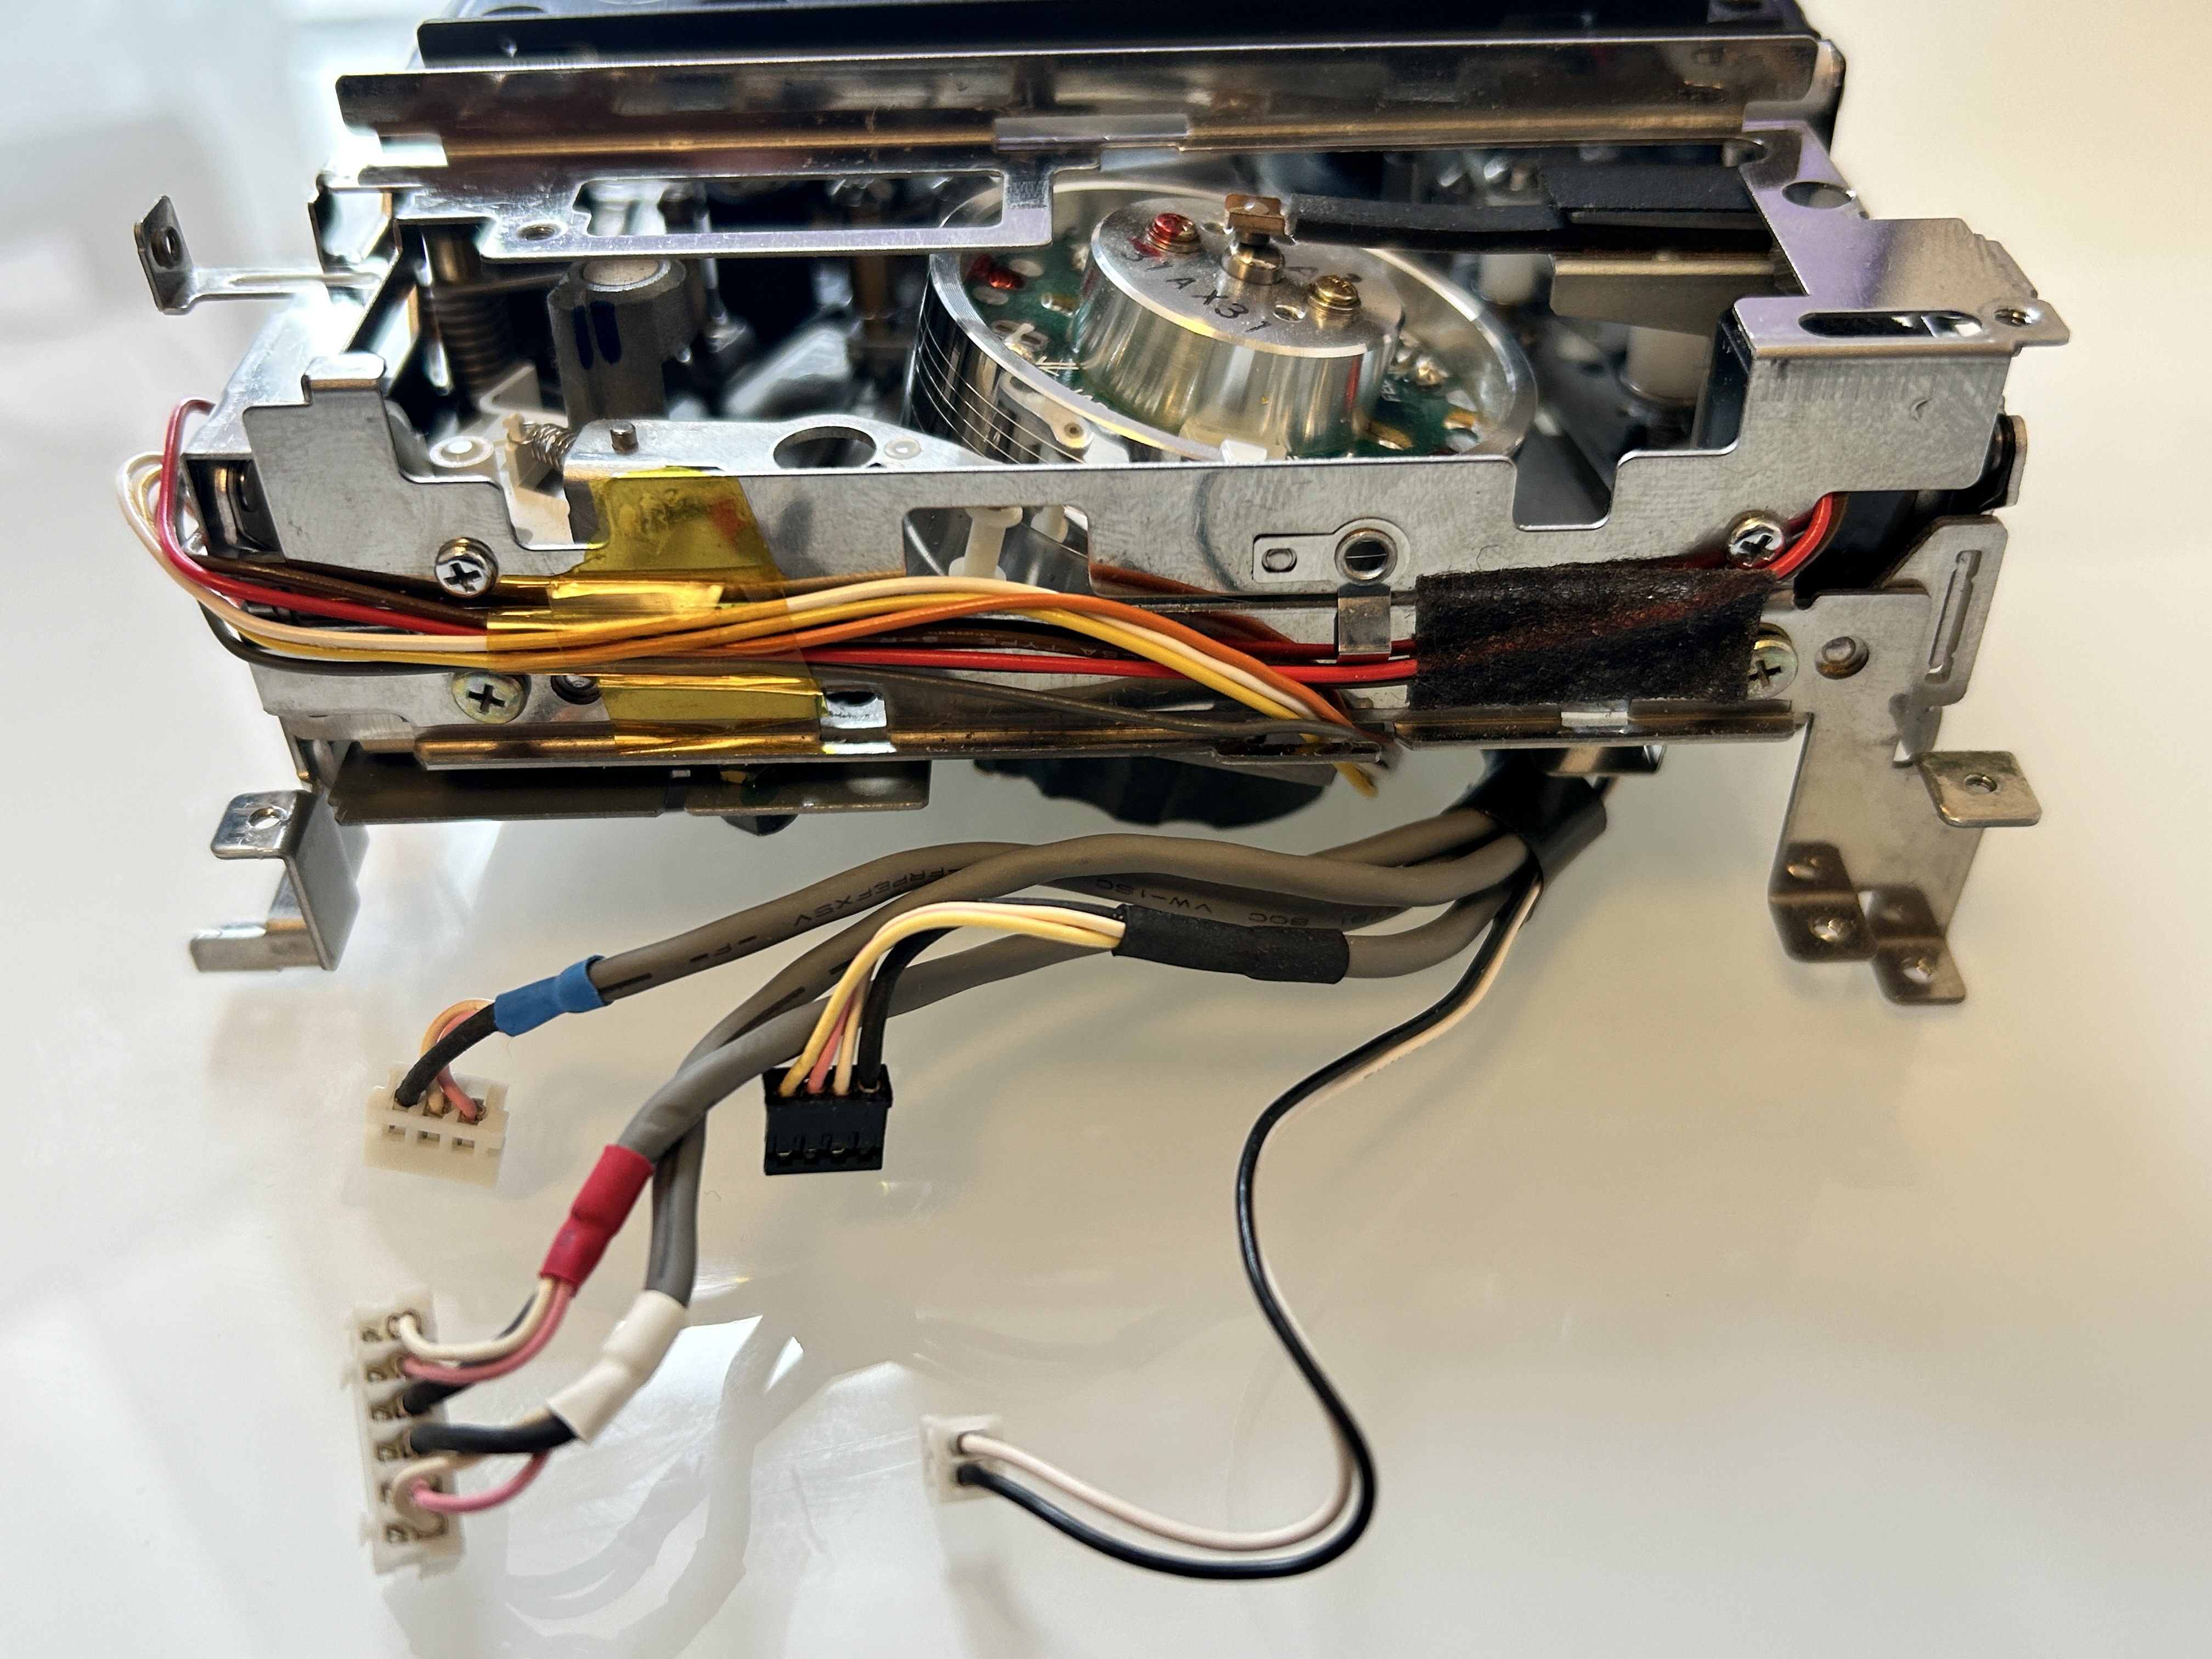
SR-34 video board
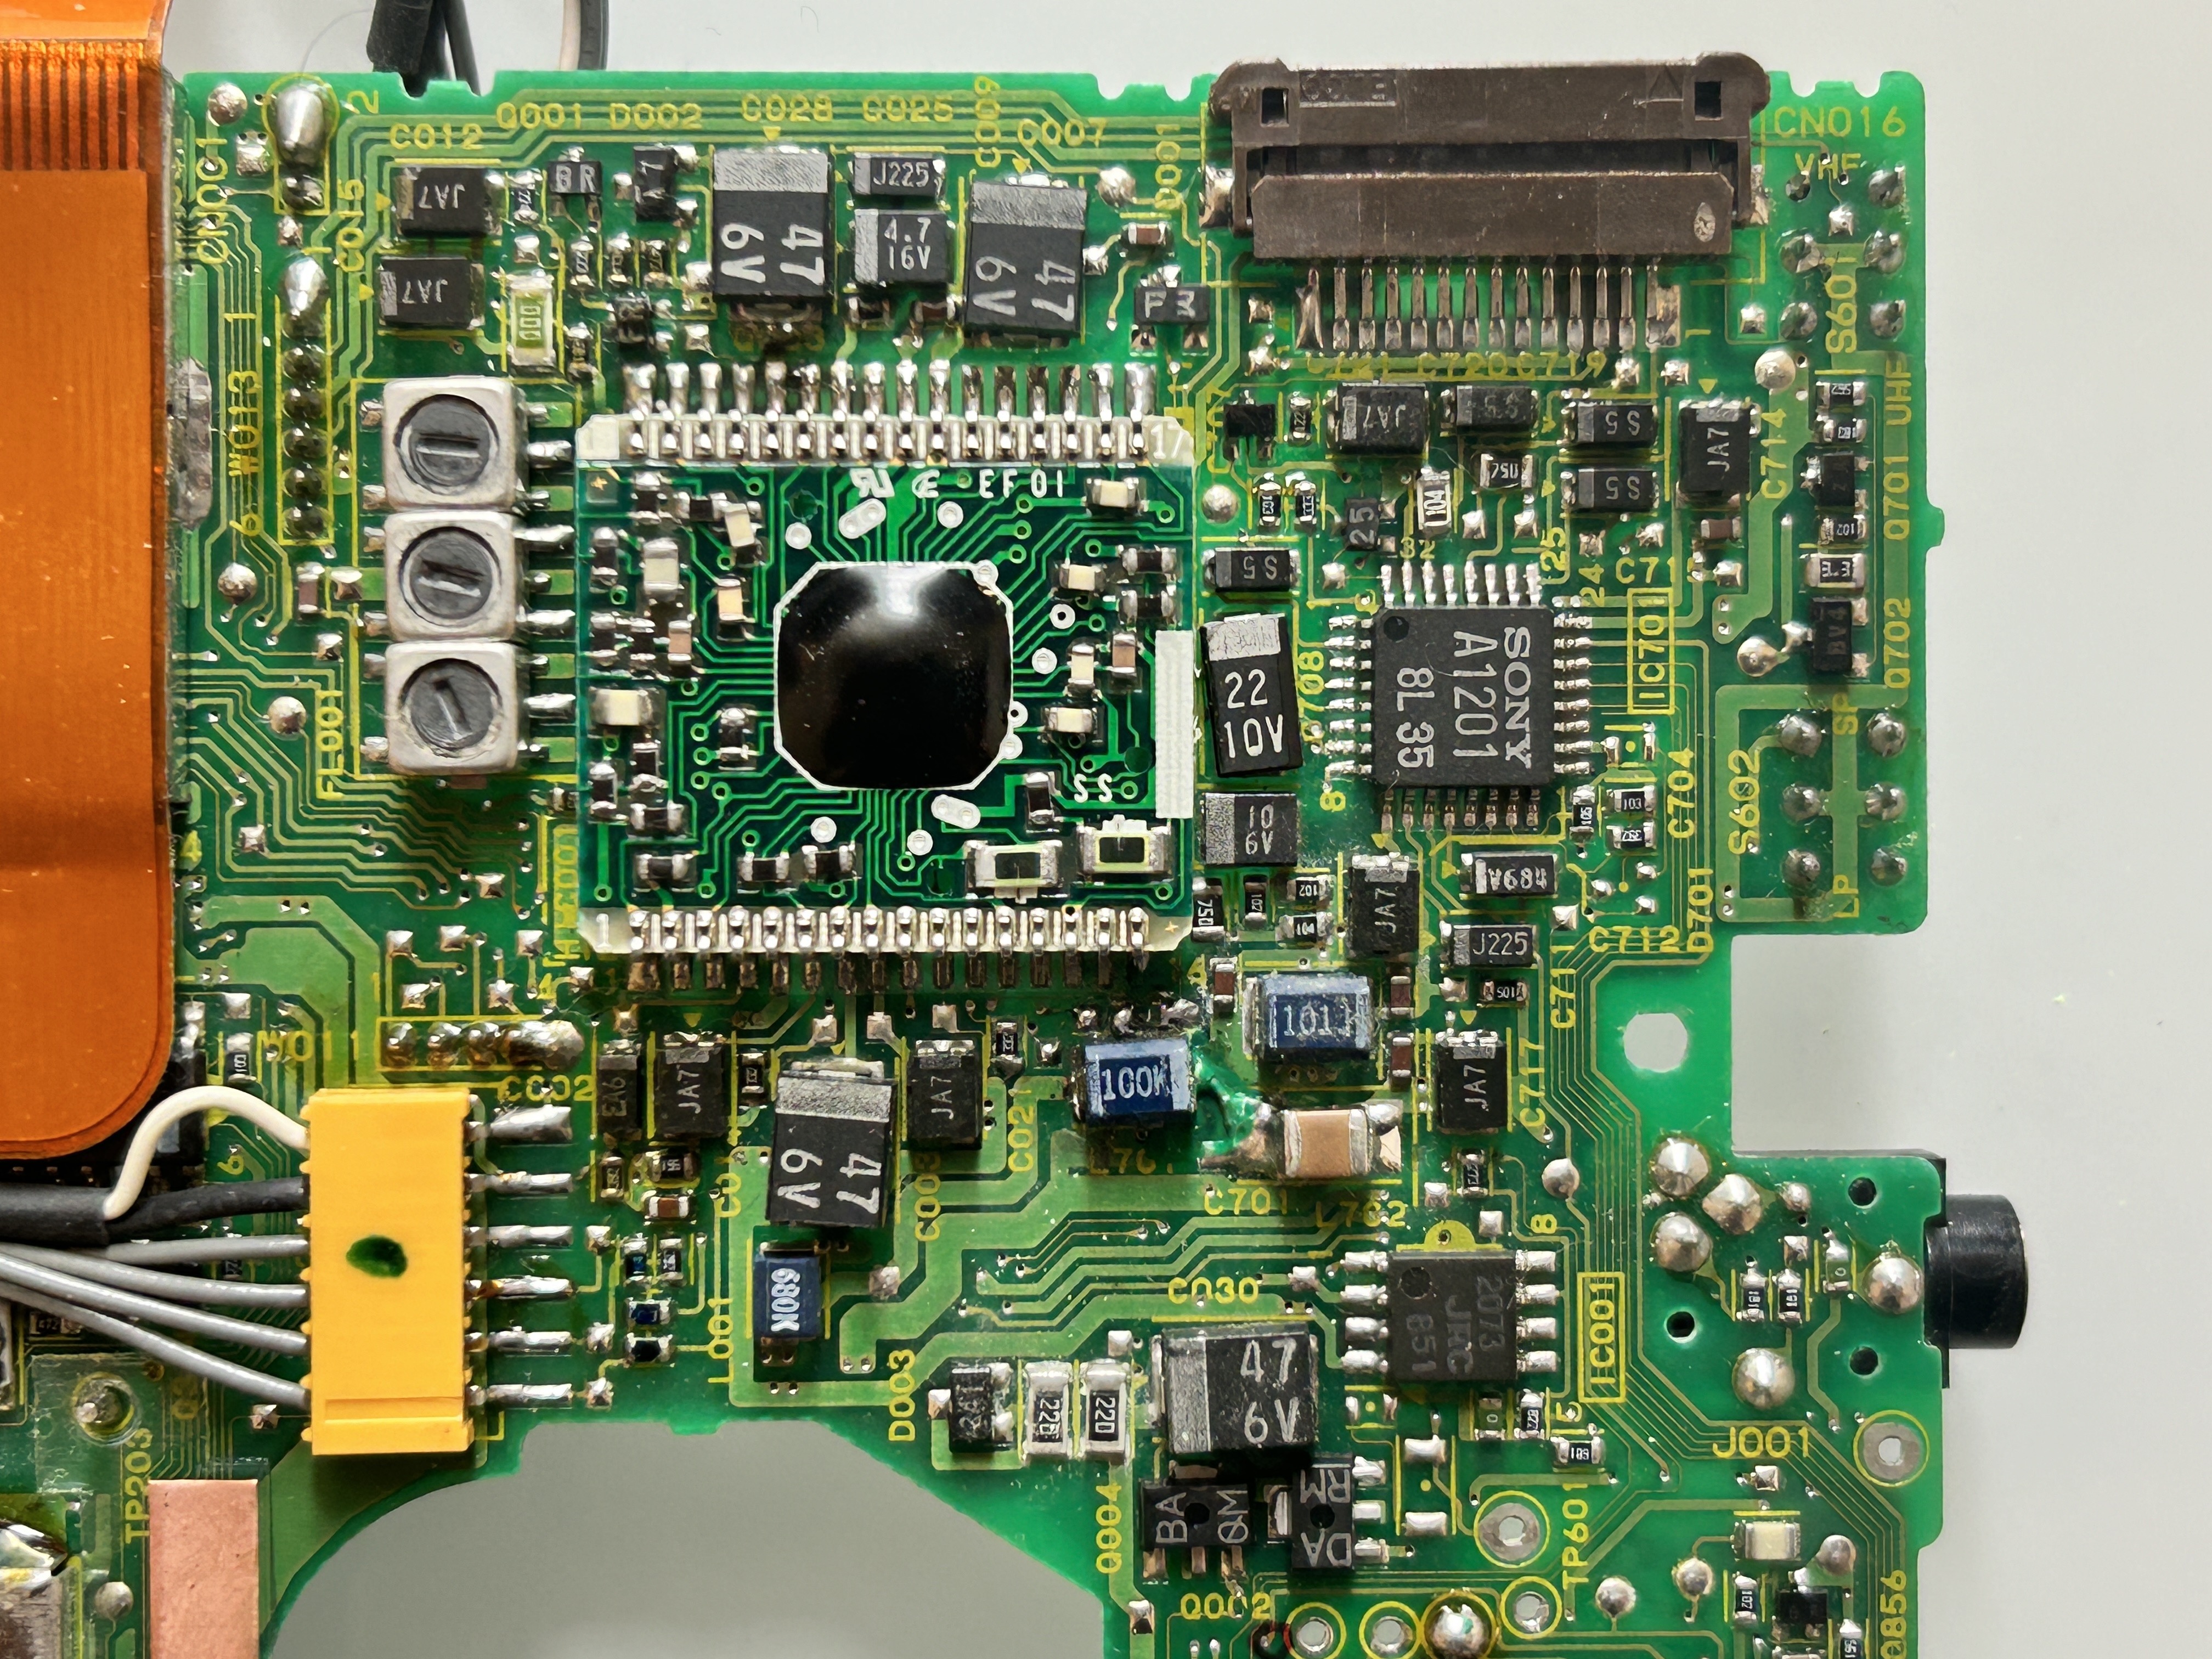
This main board oversees video/audio processing and all mechanical motor functions of the video 8 drive assembly. You won't have any trouble spotting the leaked capacitors on this board.
SR-34 board after replacing with ceramic and solid polymer capacitors. These capacitors will out live other components on this device now.
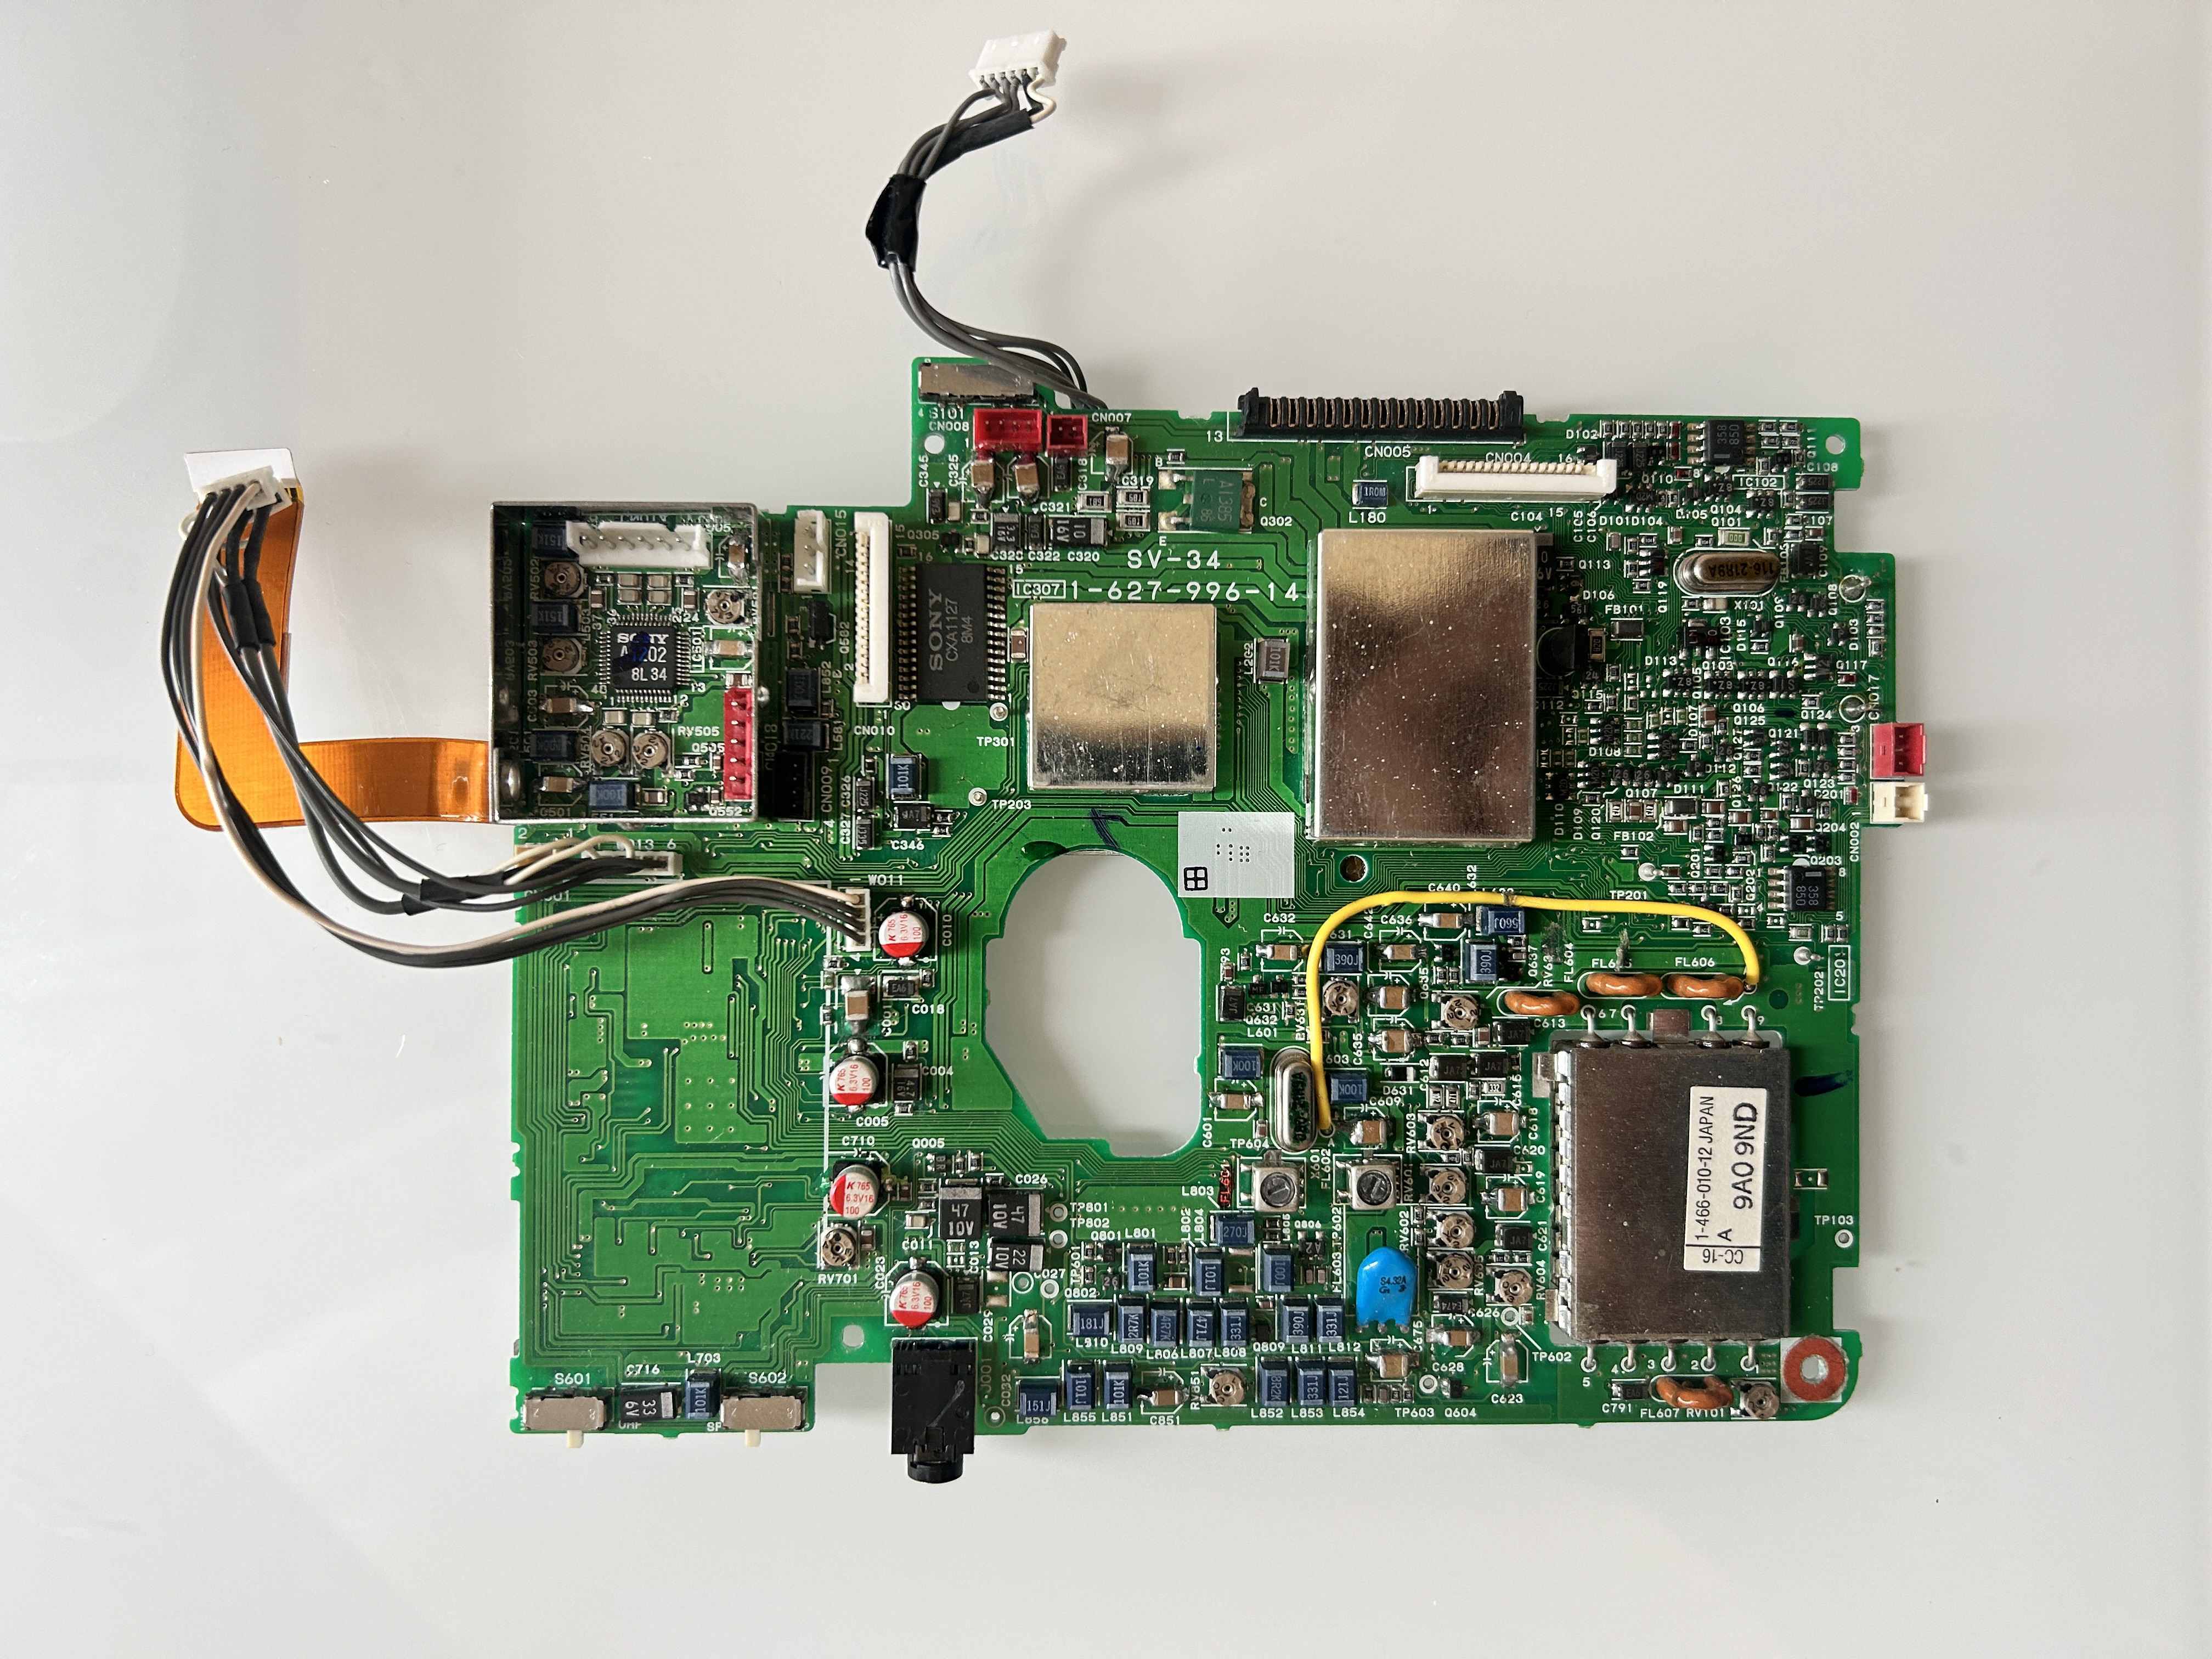
There were several traces that needed fixing here. The extent of your repair work will depend on where the capacitor acid has leaked. However, you can expect the issues to be concentrated in the same general area.
Firstly, I wanted to ensure that whatever I input into the video input would be transmitted properly through the video output. However, it was immediately evident that this wasn't functioning correctly. The culprit? Leaked or dried capacitors. Replacing all the 100uF, 6.3V capacitors on this board should resolve this issue.
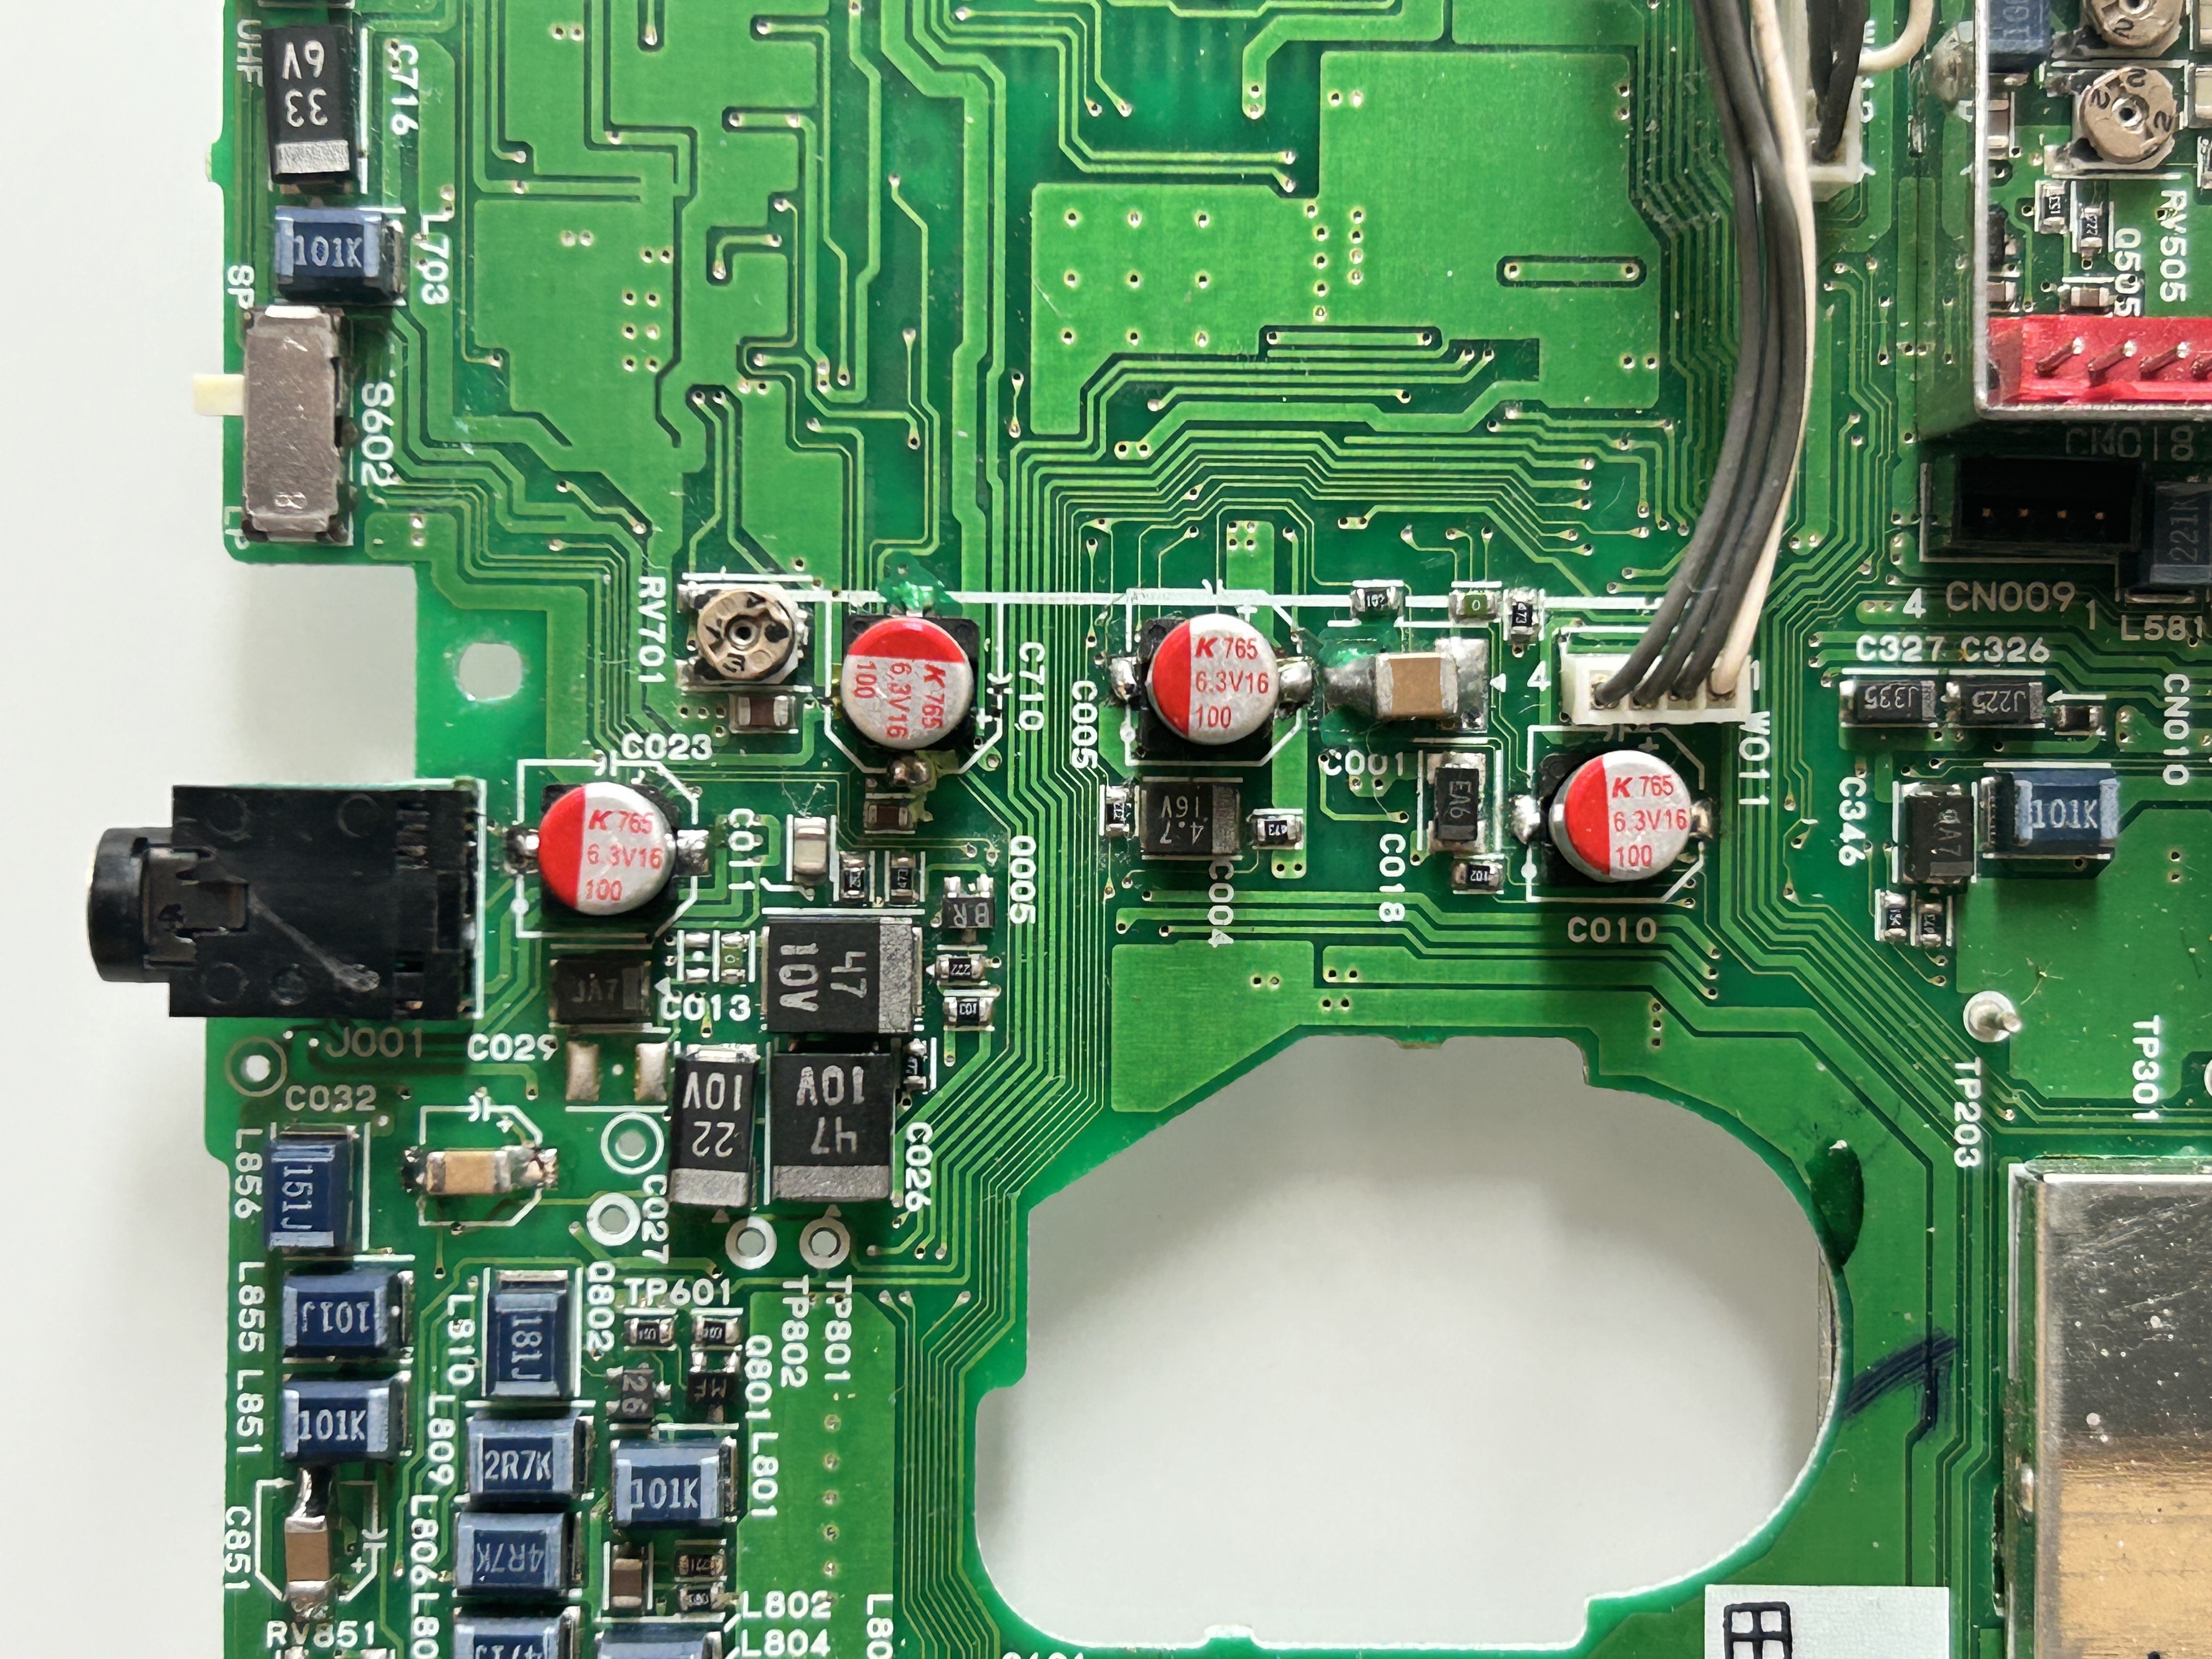
Additionally, you might observe that the audio isn't working either. To address this, you'll need to focus on this specific section of the SR-34 board. It's likely that capacitor acid has leaked through the tiny via holes, potentially causing corrosion or shorting of pins. Thoroughly cleaning this area and repairing any broken traces should rectify the problem. Below is an image after fixing broken traces and cleaning.
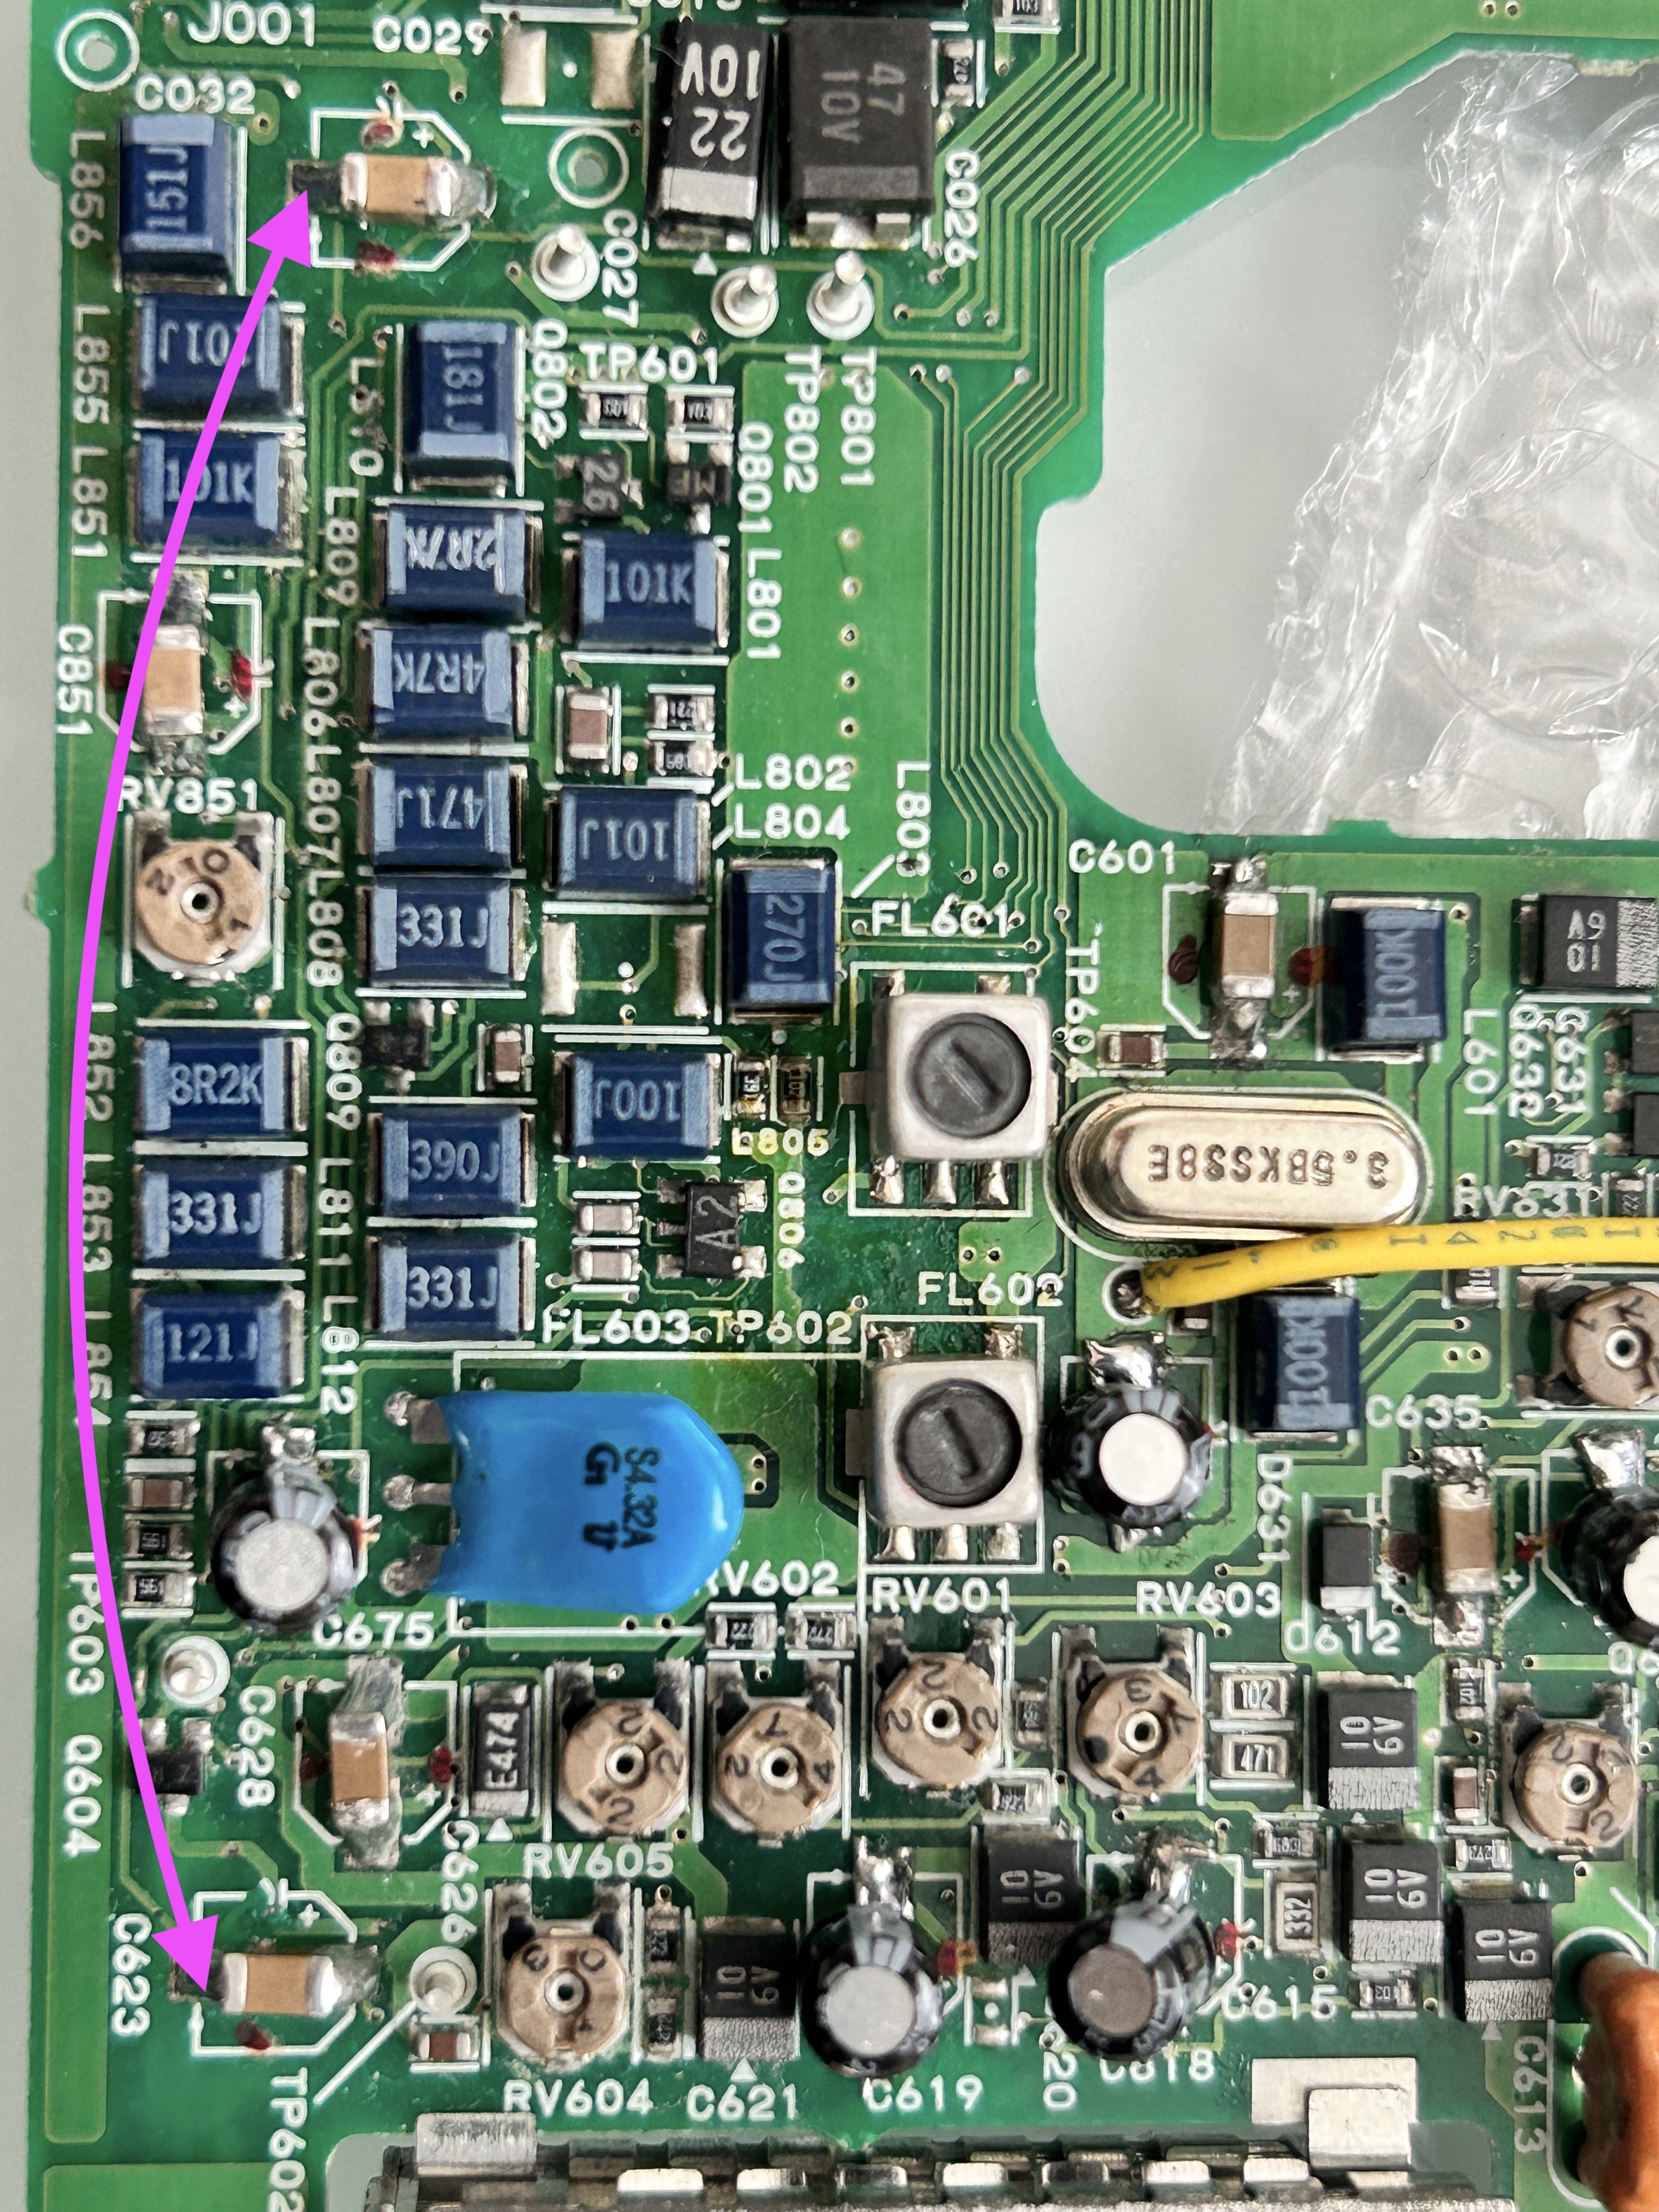
If recording video is not working, but audio is working, check if there is continuity between the two capacitors seen in the image below. In two of the boards that I tested, there was no continuity. Jumping a wire between these two points solved the issue.
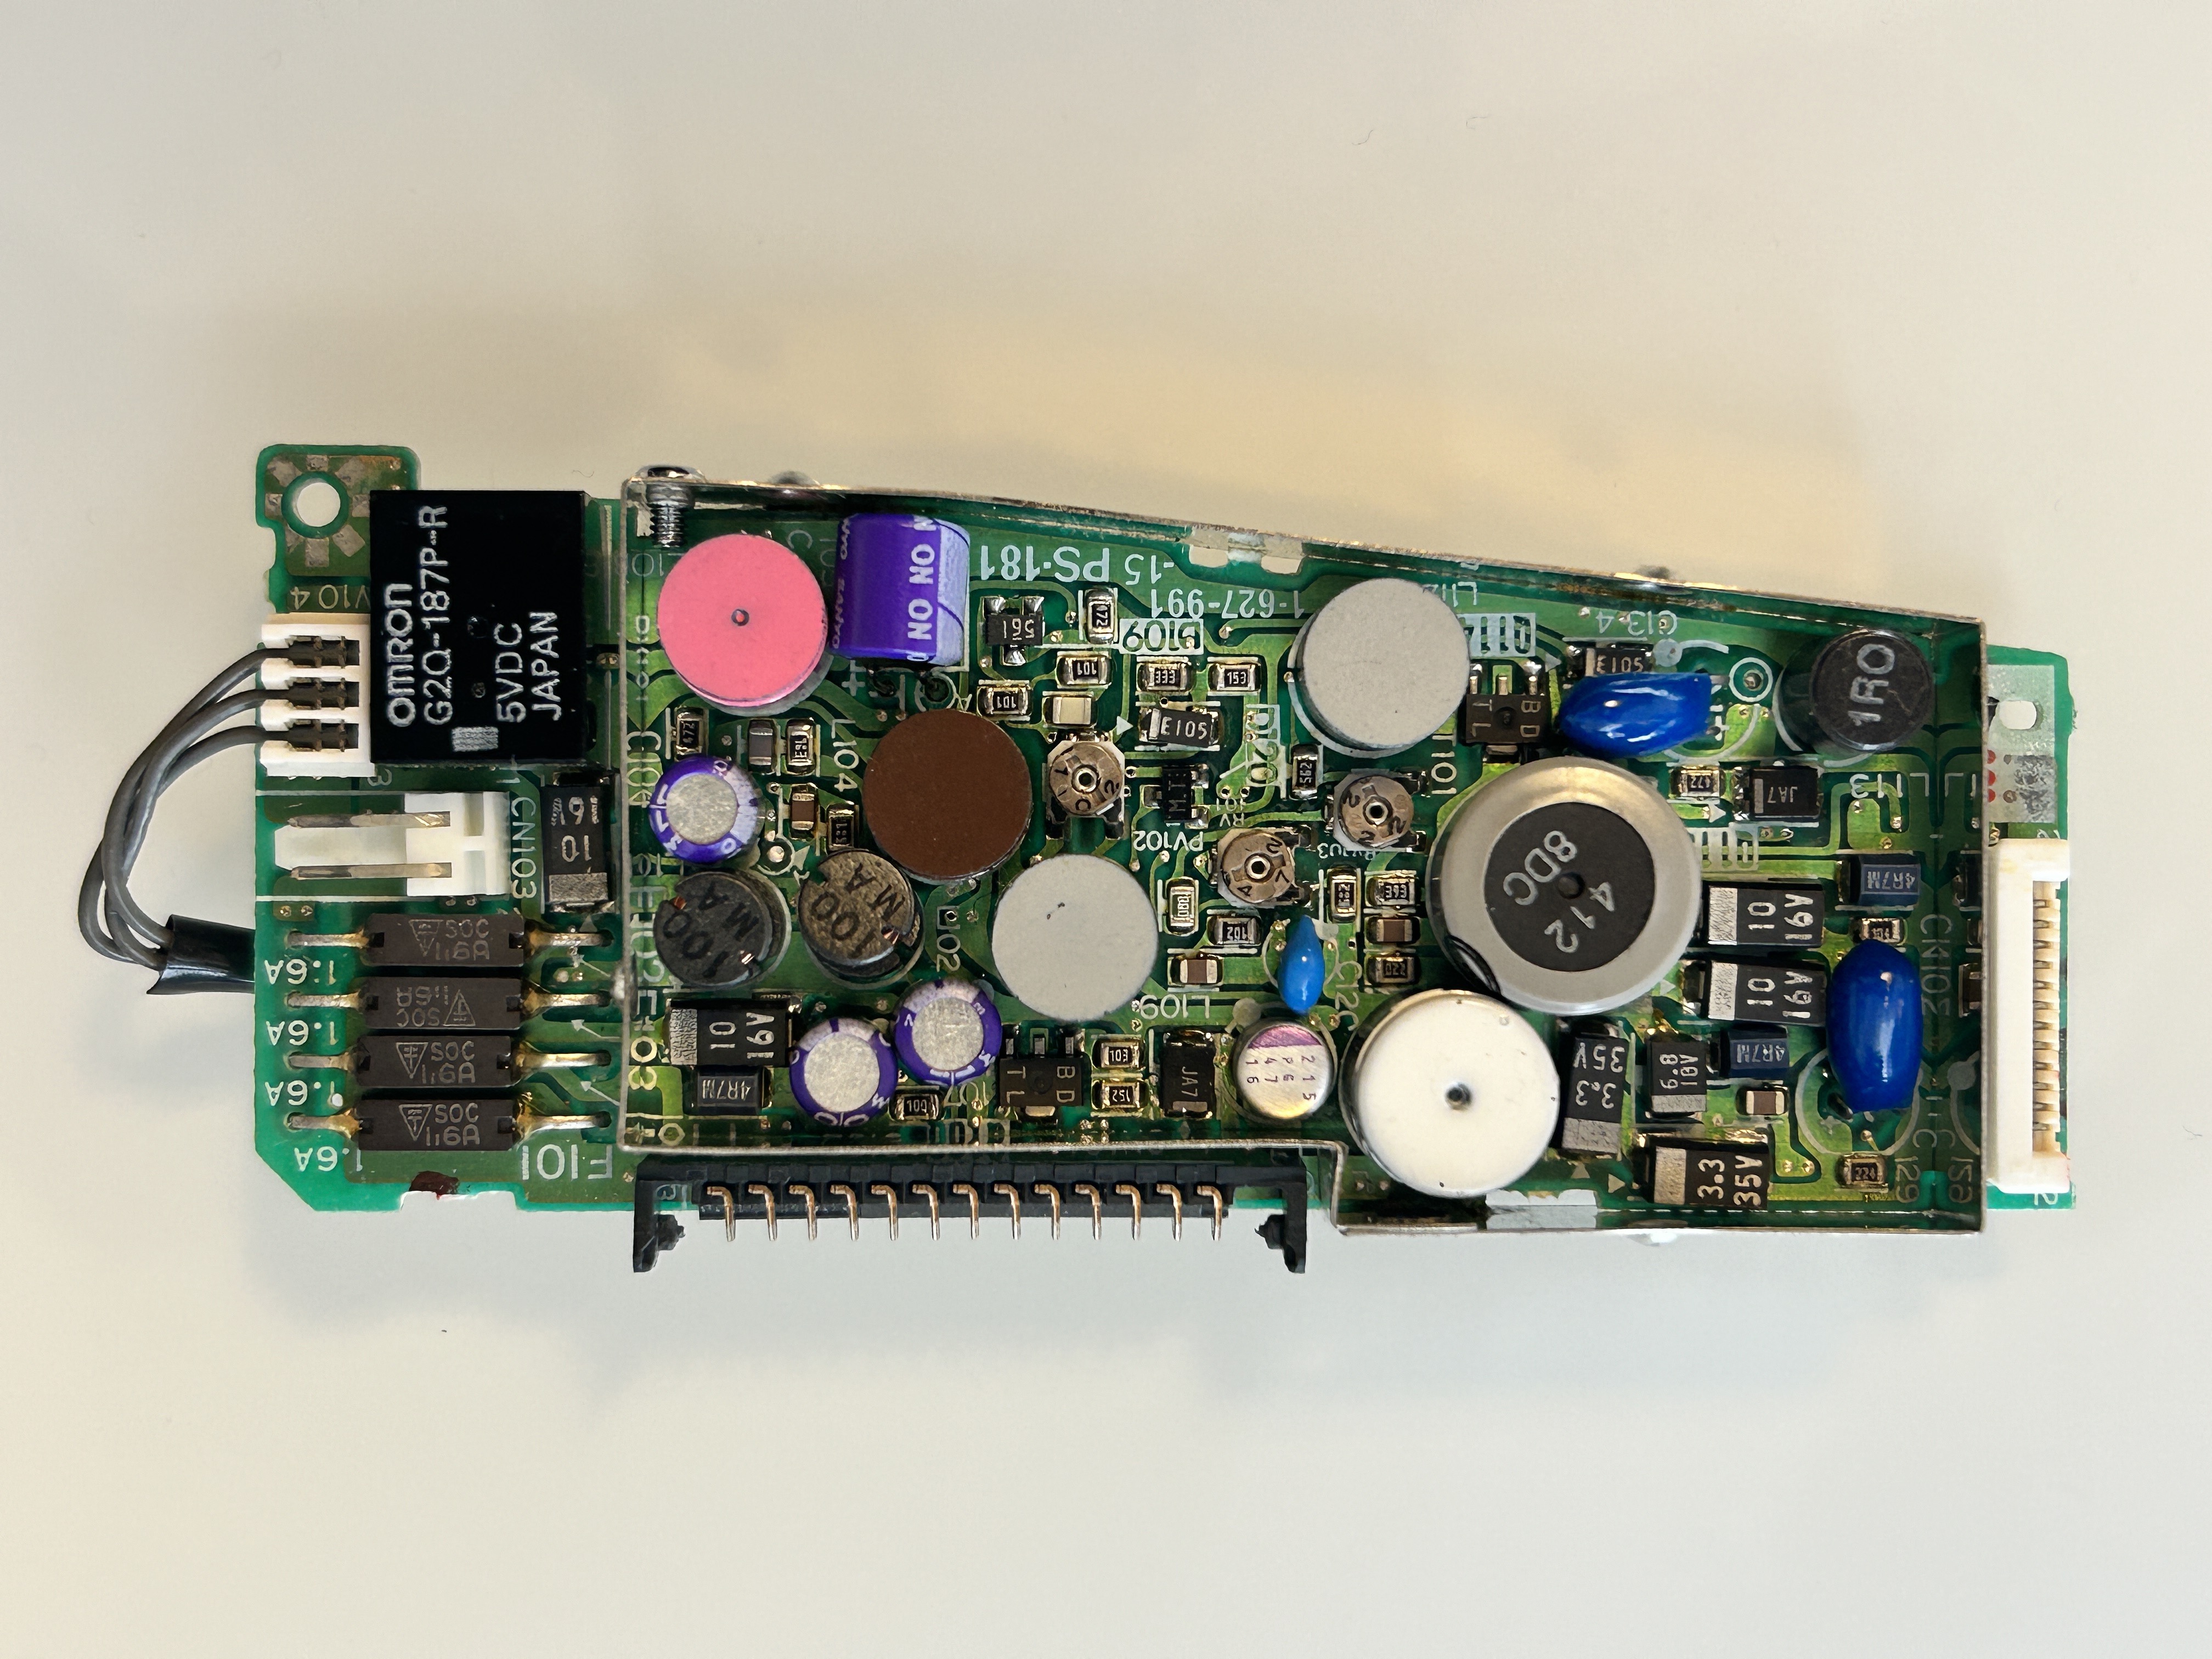
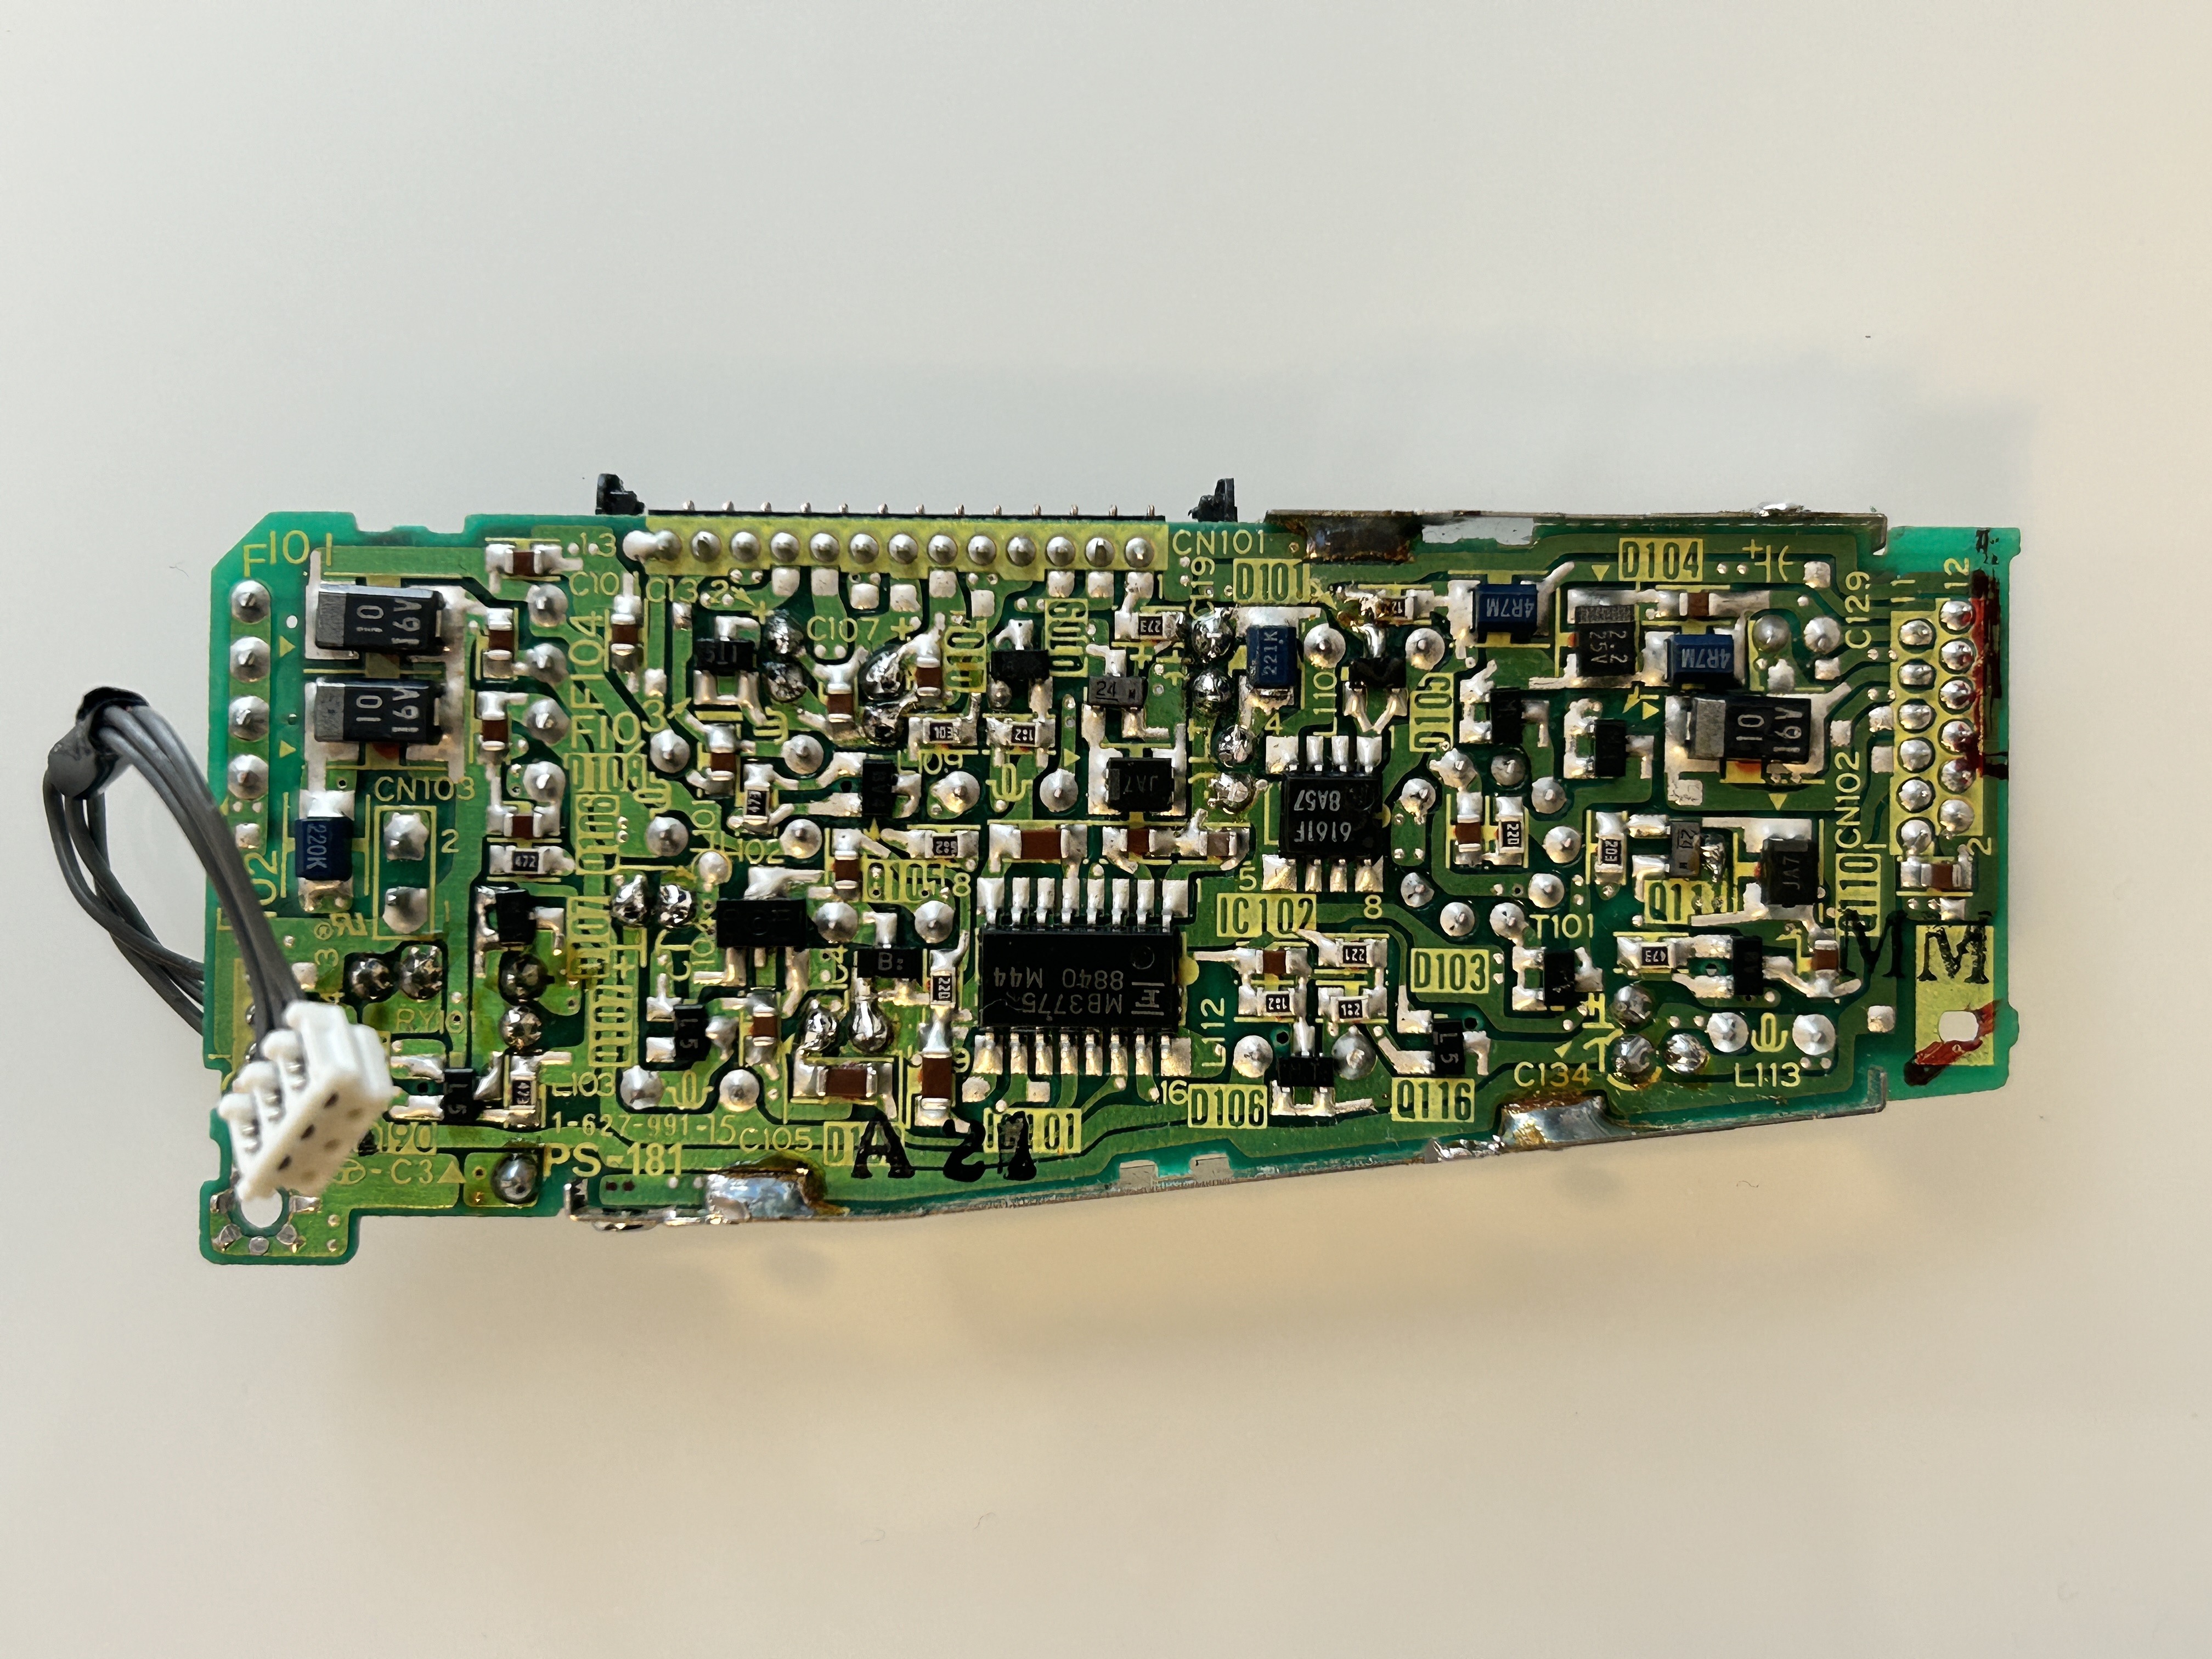
PS-181 power supply board
PS-181 board functions as the power supply. If your unit isn't turning on or certain functions aren't working, it's worth checking the four fuses on this board. If they're intact, you can also measure the voltage output of the device.
The solid purple Sanyo capacitors typically provided accurate readings, so I didn't replace them. However, I did replace the two ELNA electrolytic capacitors that had high ESR.
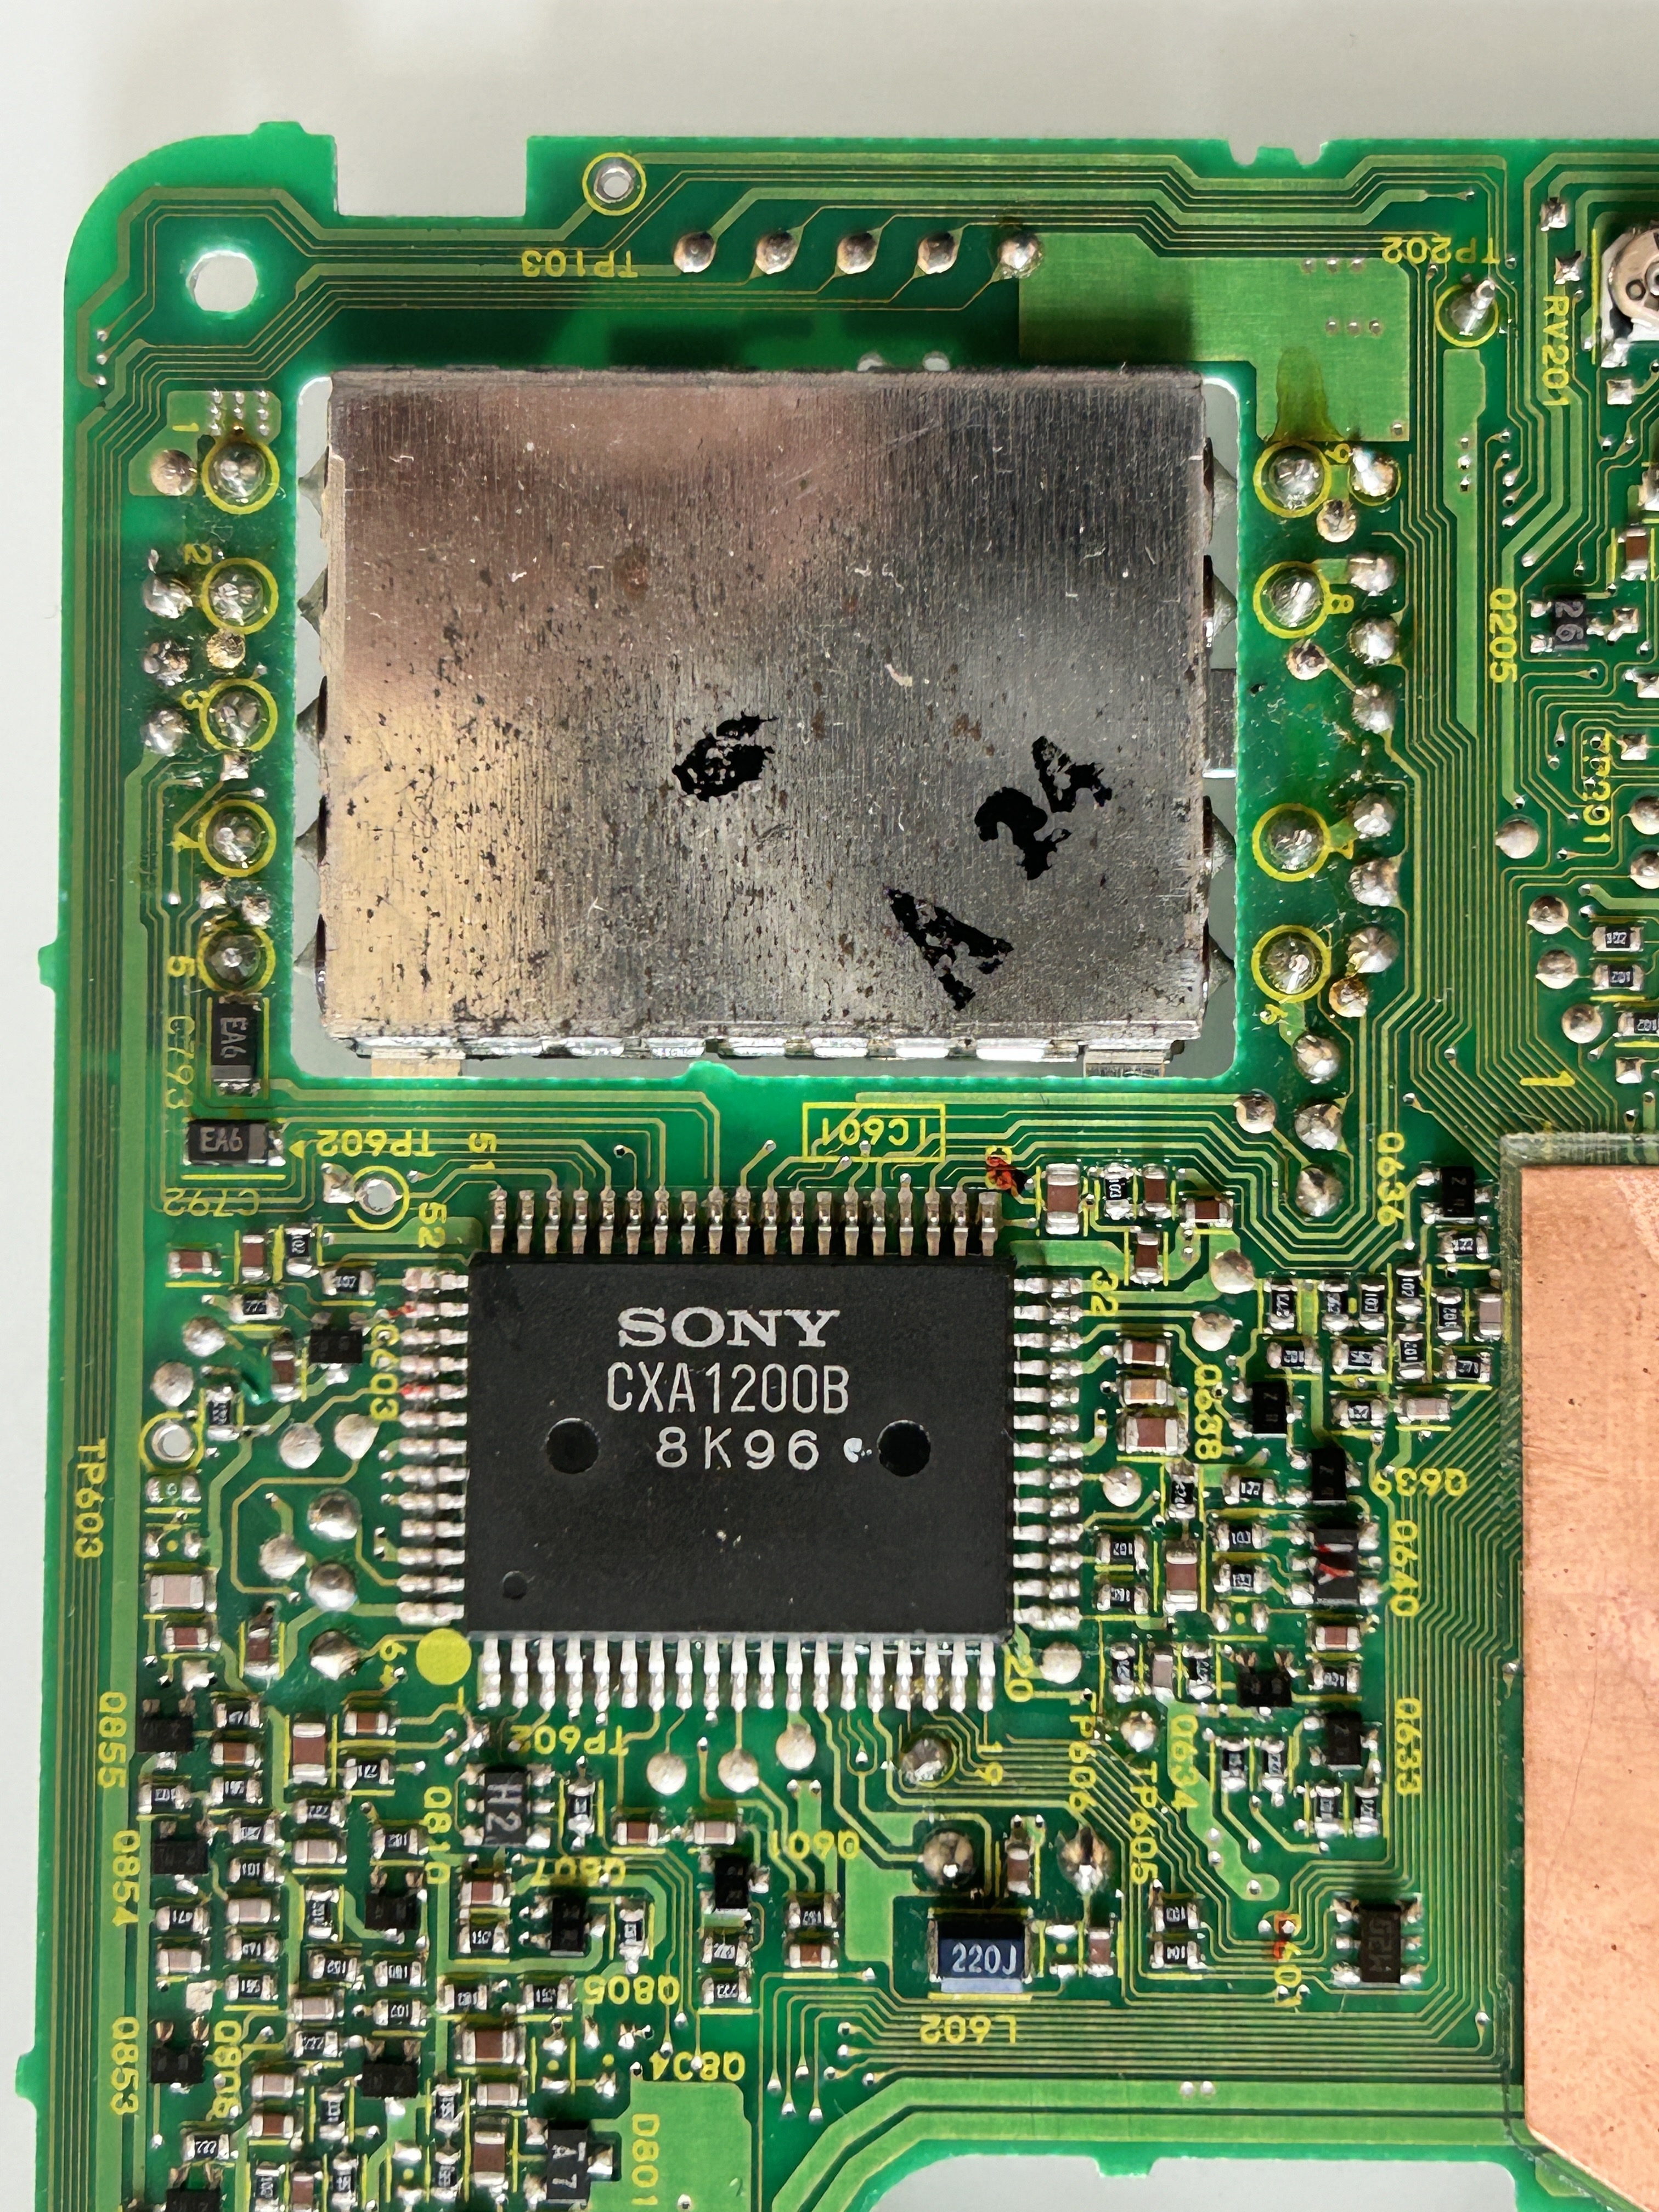
TT-19 tuner board
Tuner board (TT-19) is somewhat less useful in this unit. However, it is important to make sure it is functional. I didn't verify the unit's capability to tune into specific channels, as that feature held less significance for my needs, therefore I didn't invest much time in it. However, I replaced all capacitors with equivalent ceramic or solid polymer variants, as seen in the below picture.

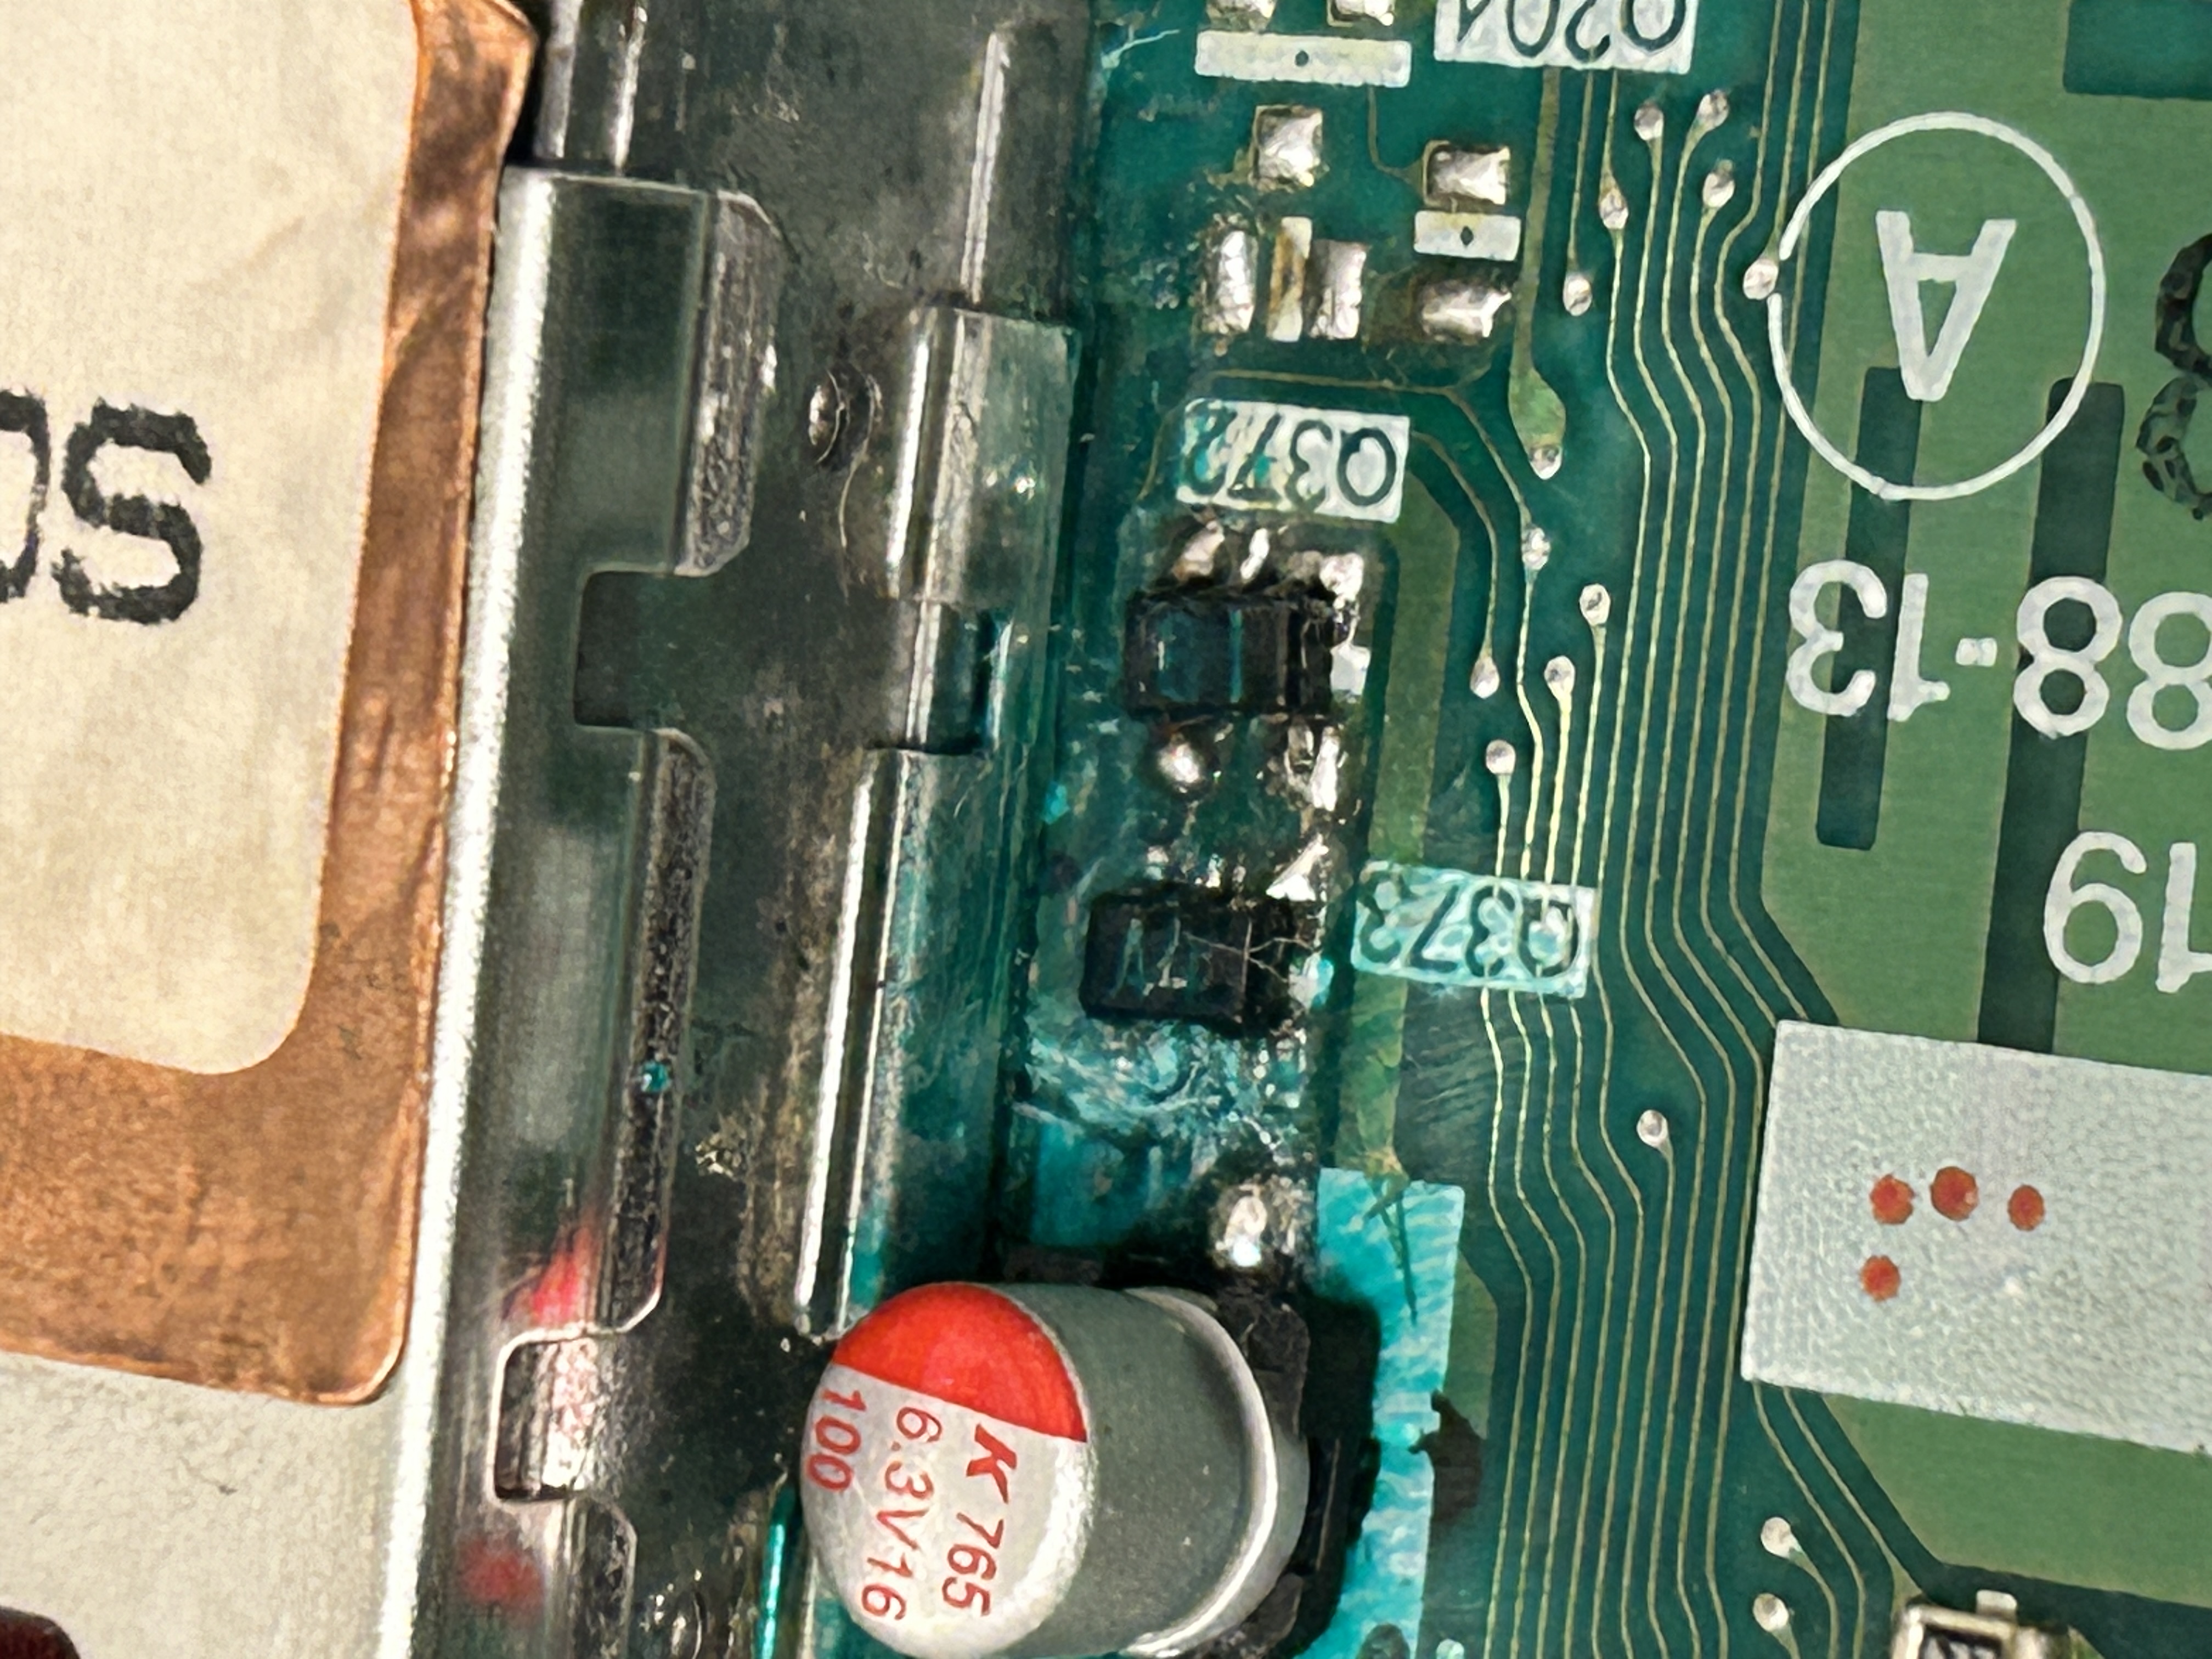
If your UHF/VHF marker is not showing, then it is likely because these two transistors (Q372, Q373) are not making proper contact. I had to check the traces here were not broken. Take the transistors completely out, clean the pads and then resolder them.
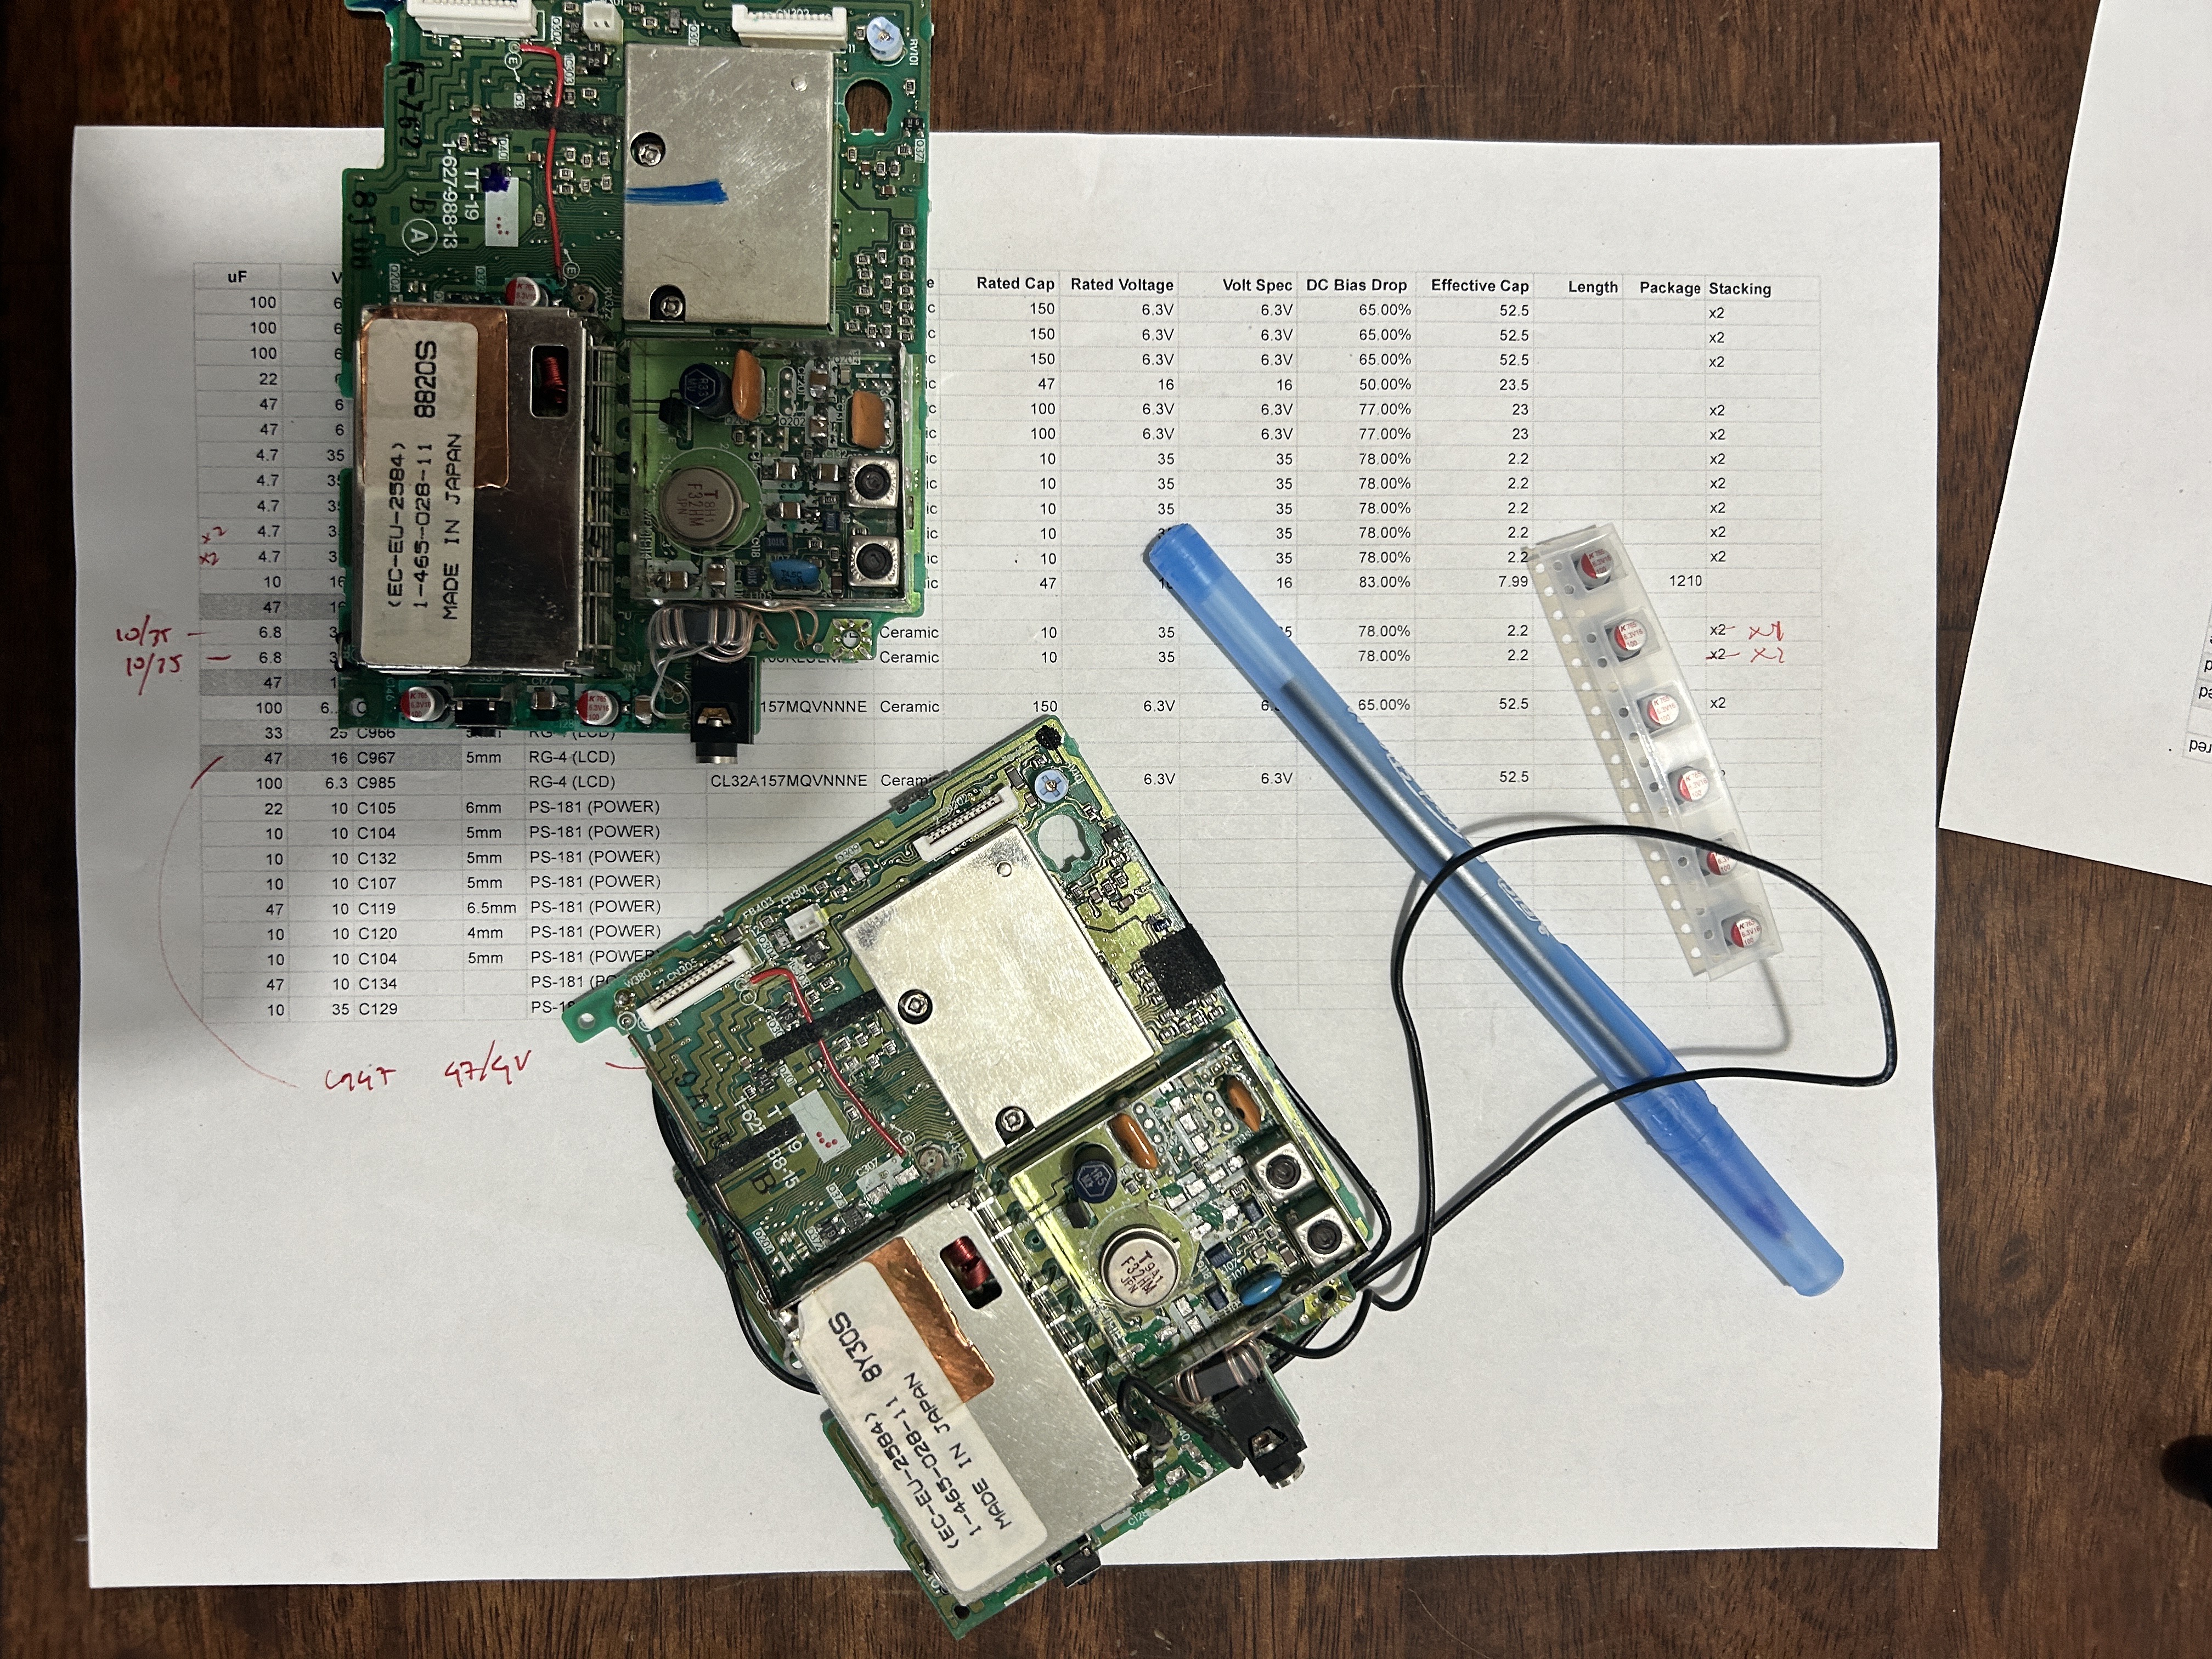
The following picture was captured during the planning phase for the capacitor replacement.
NTSC tuner board schematics.
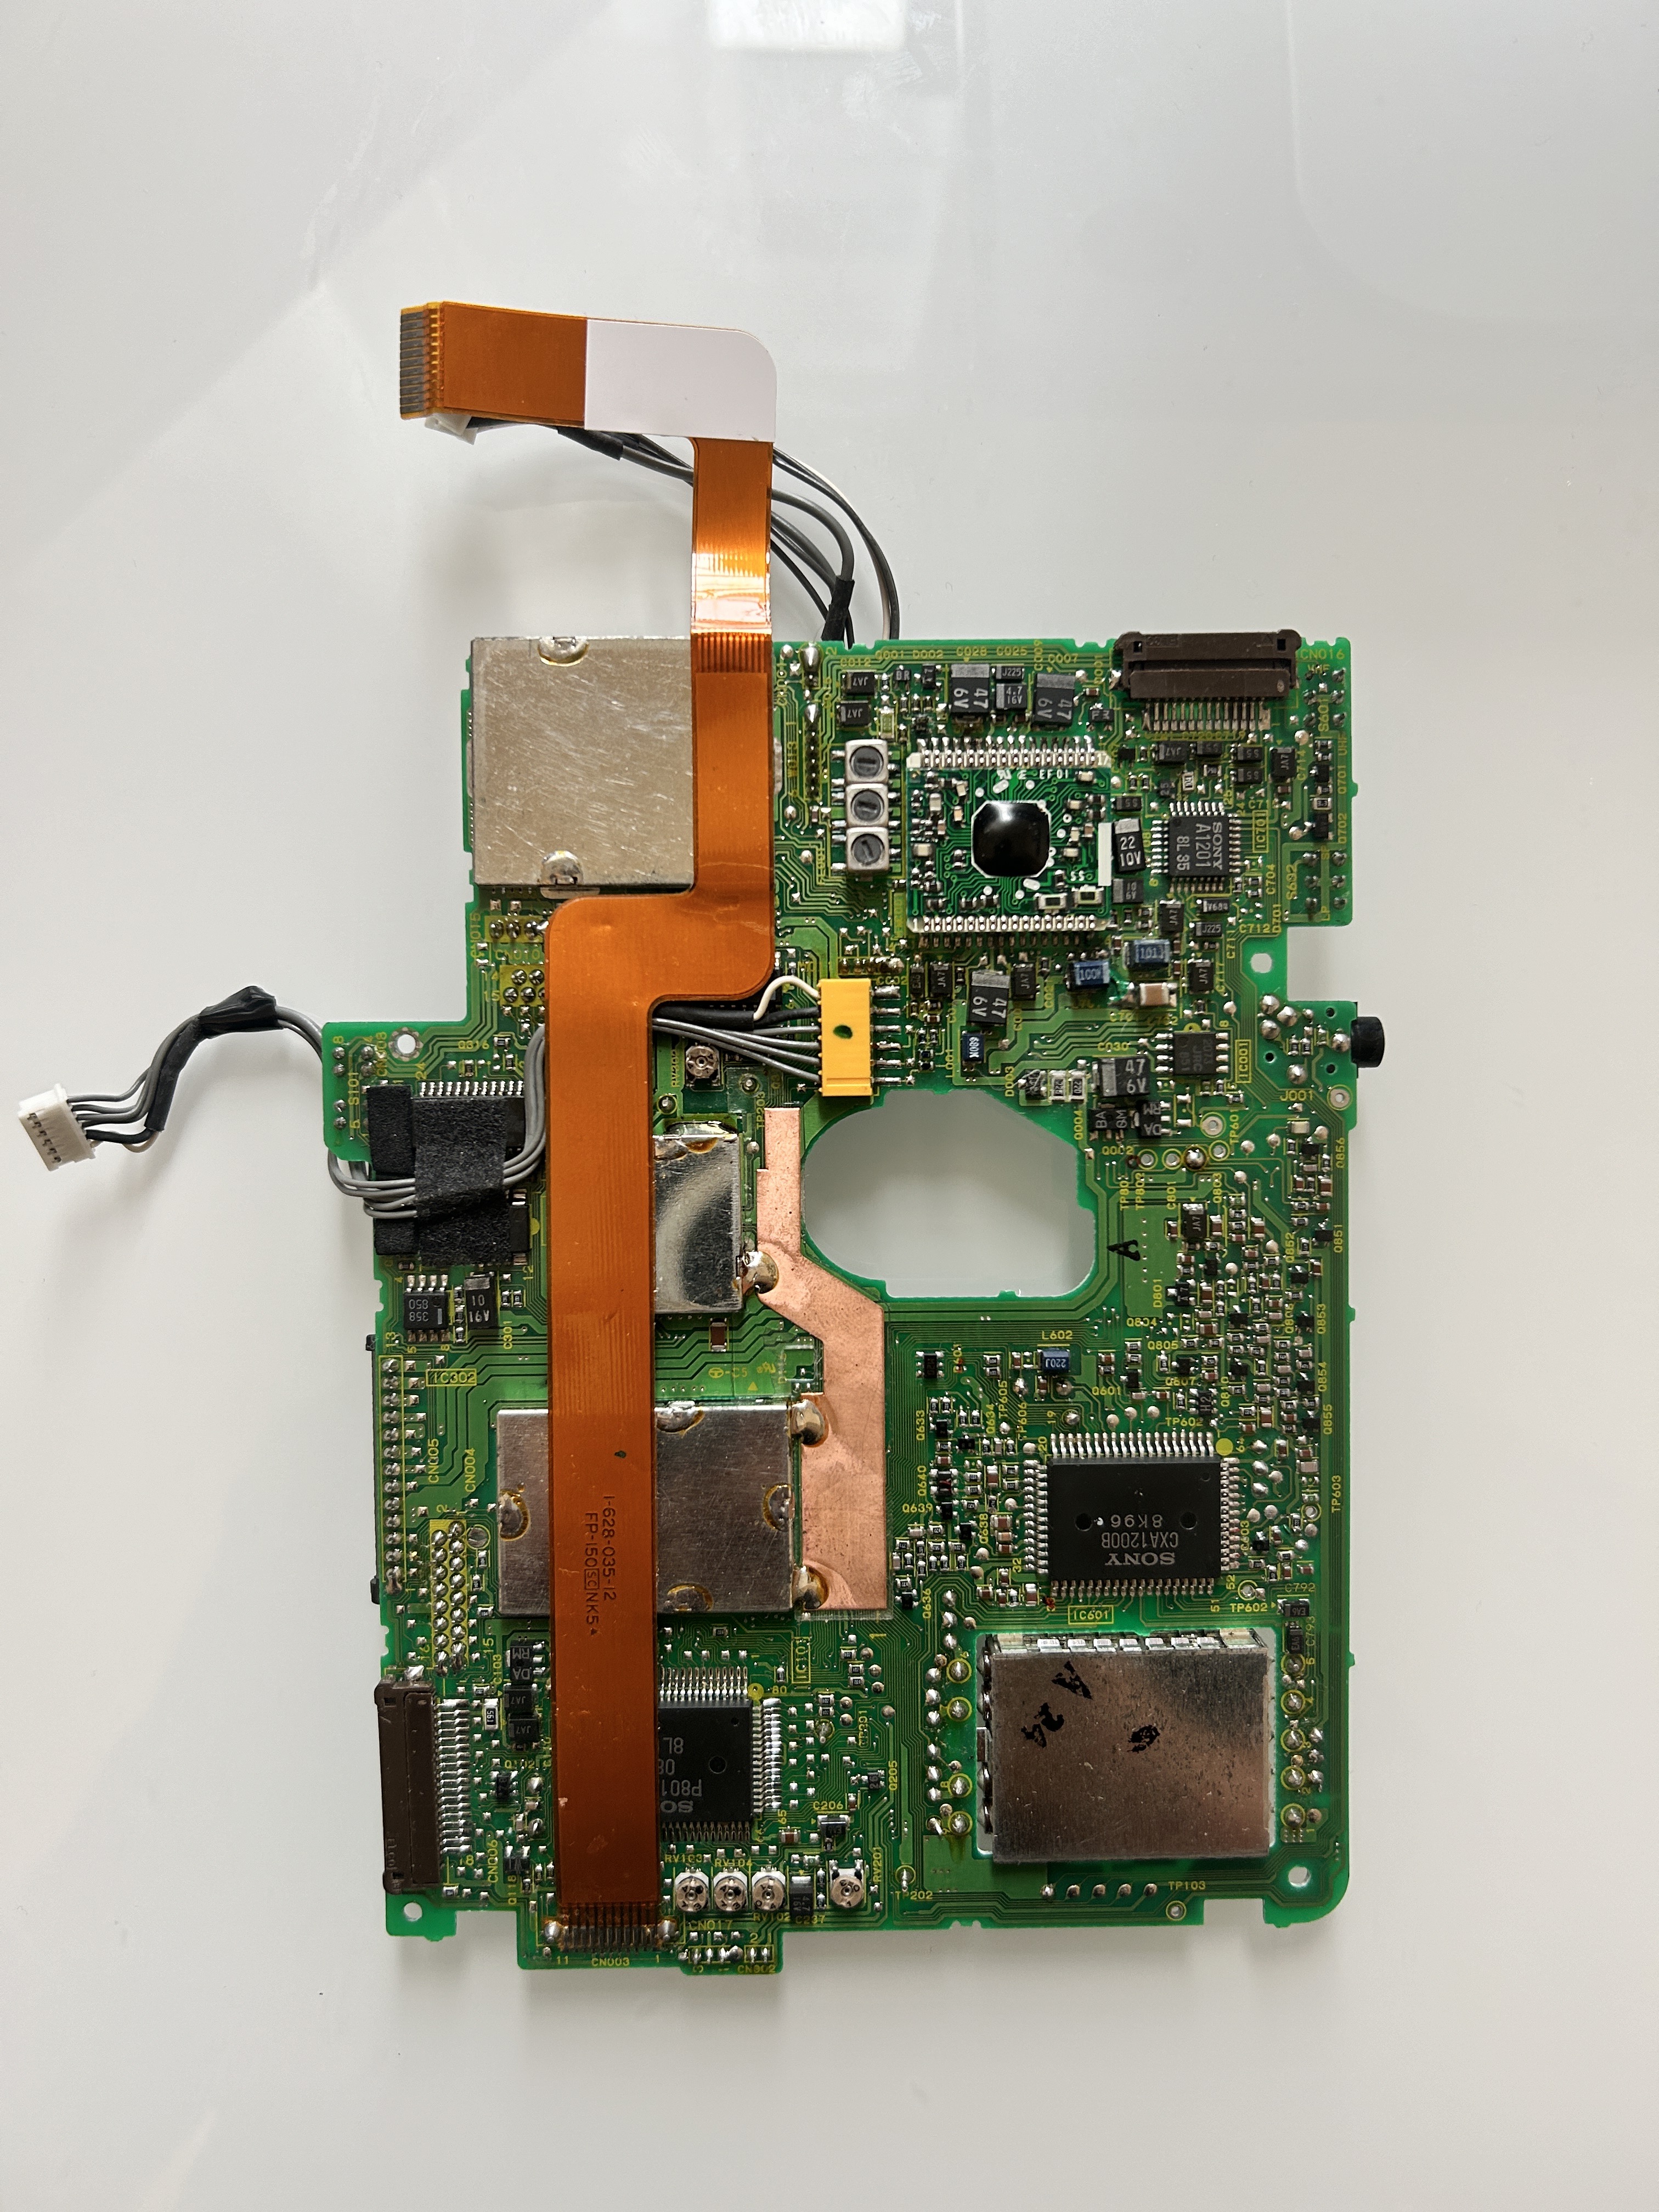
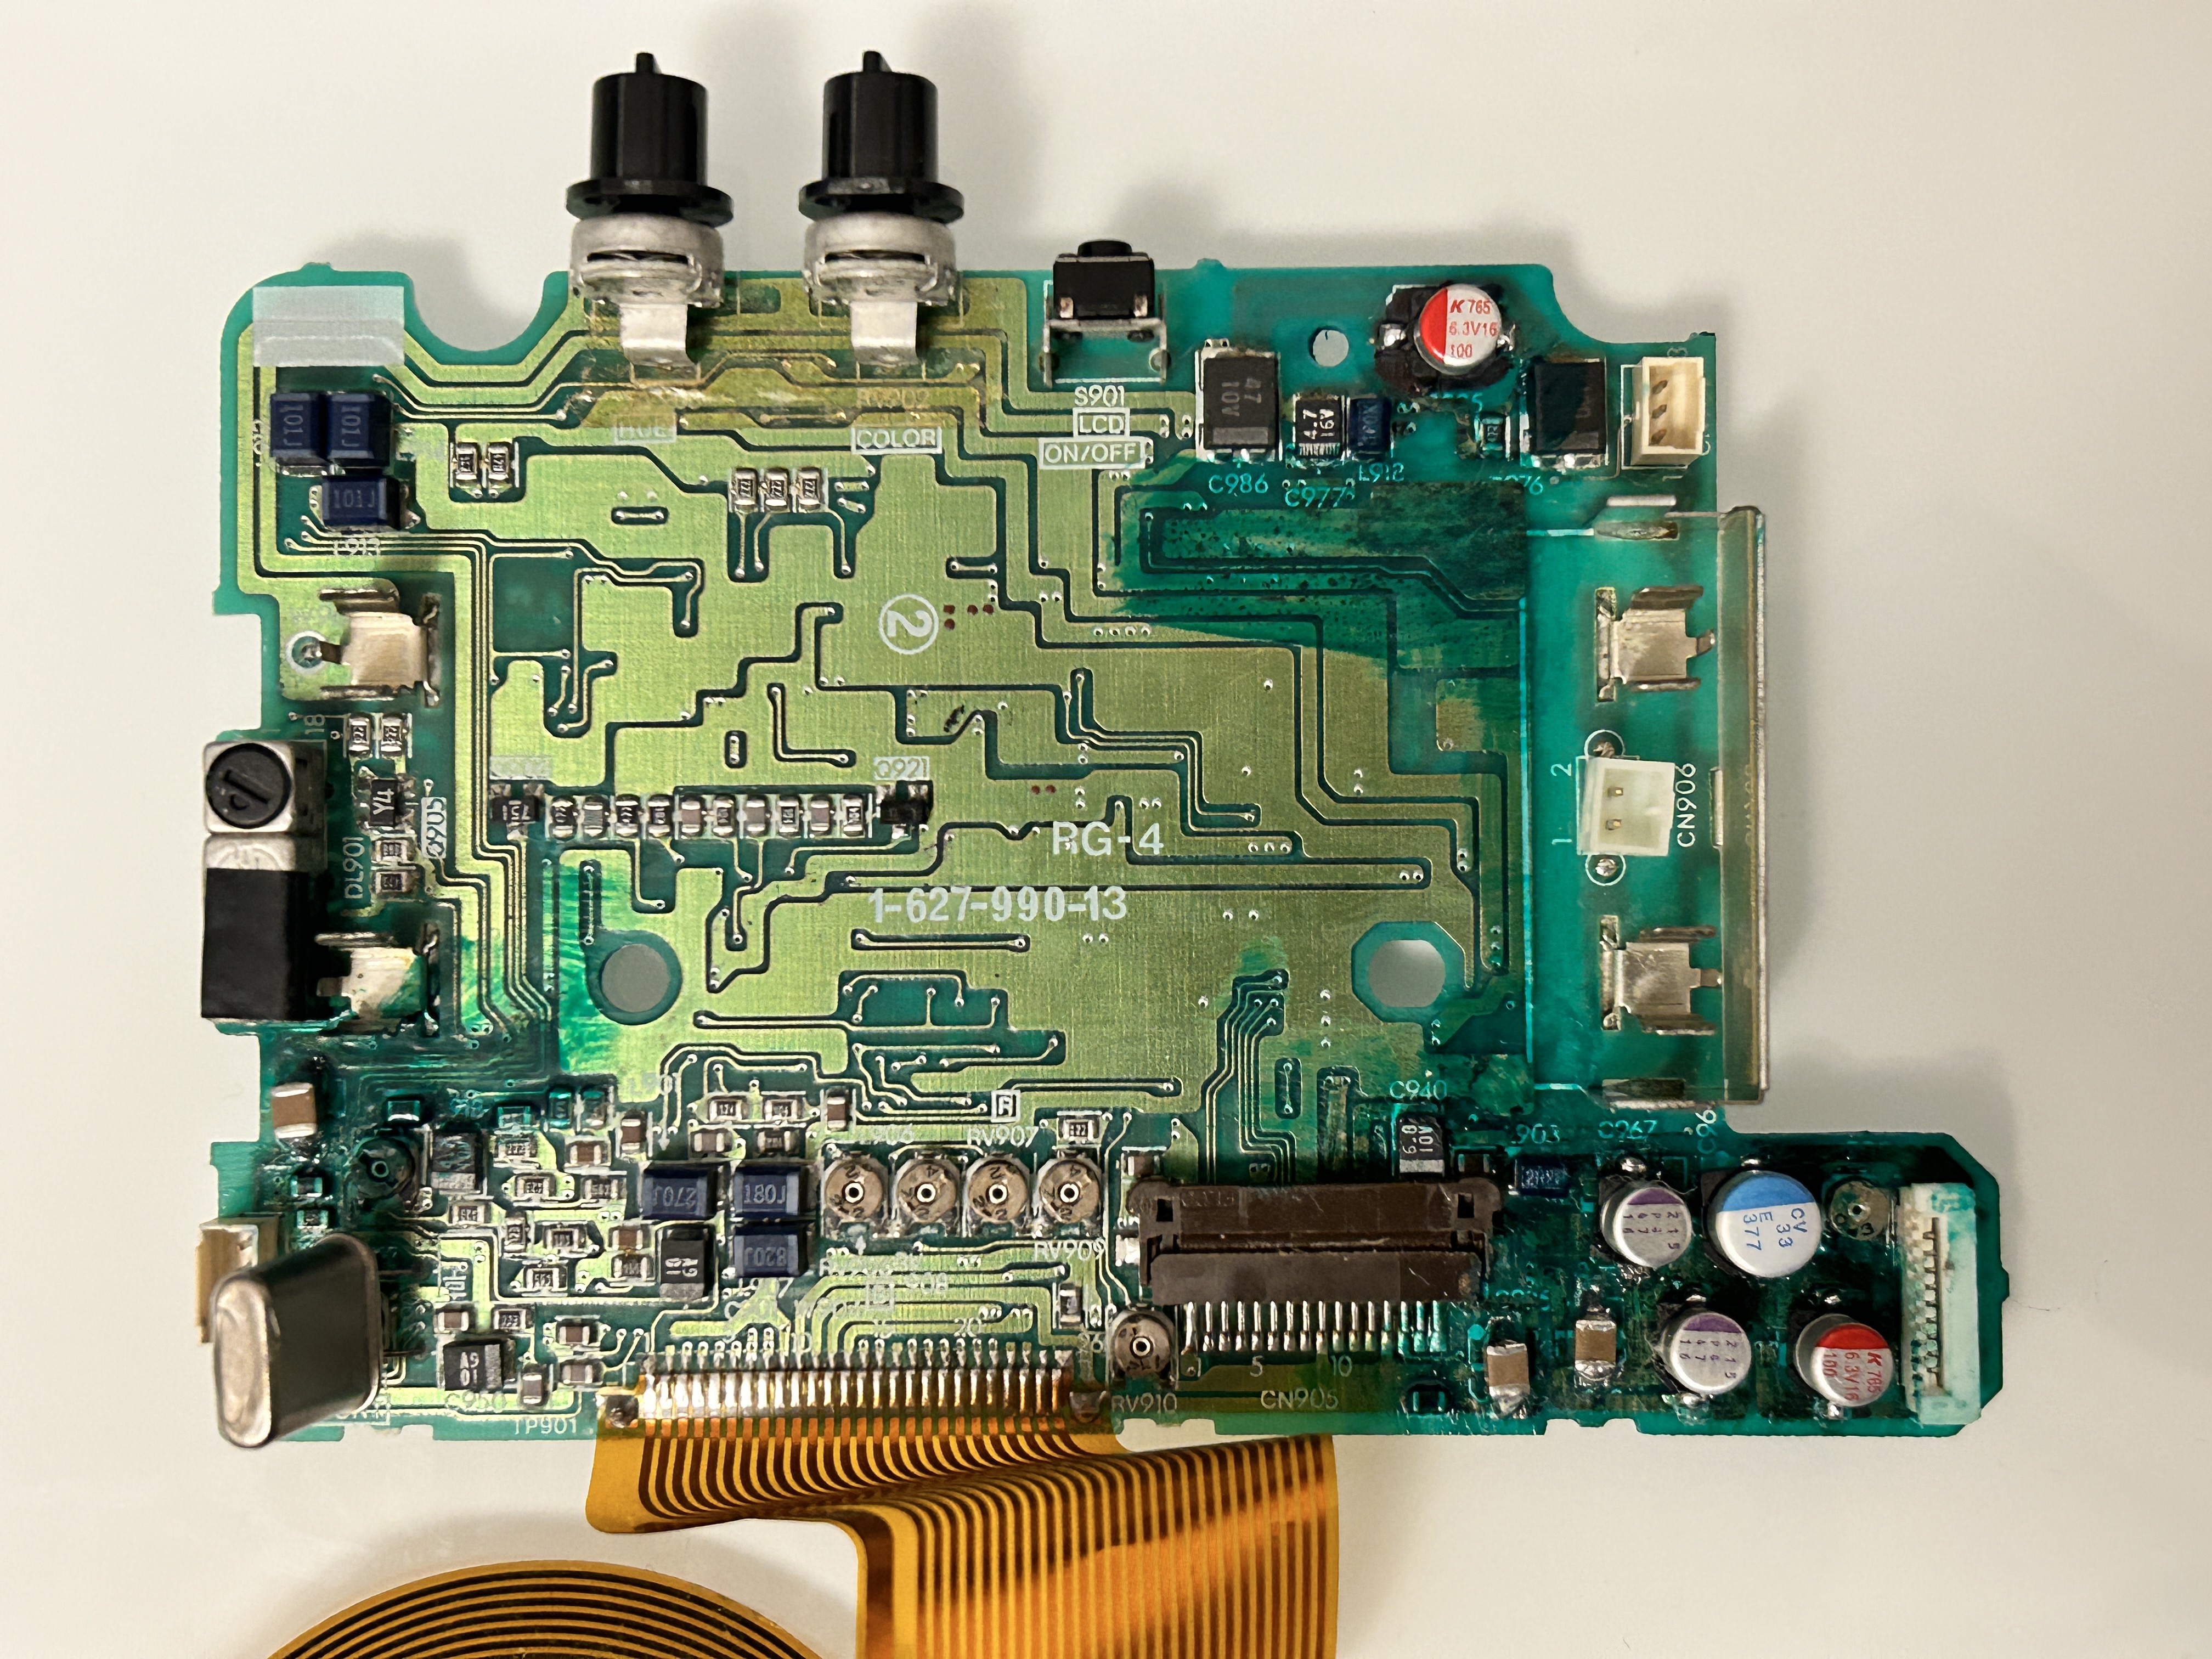
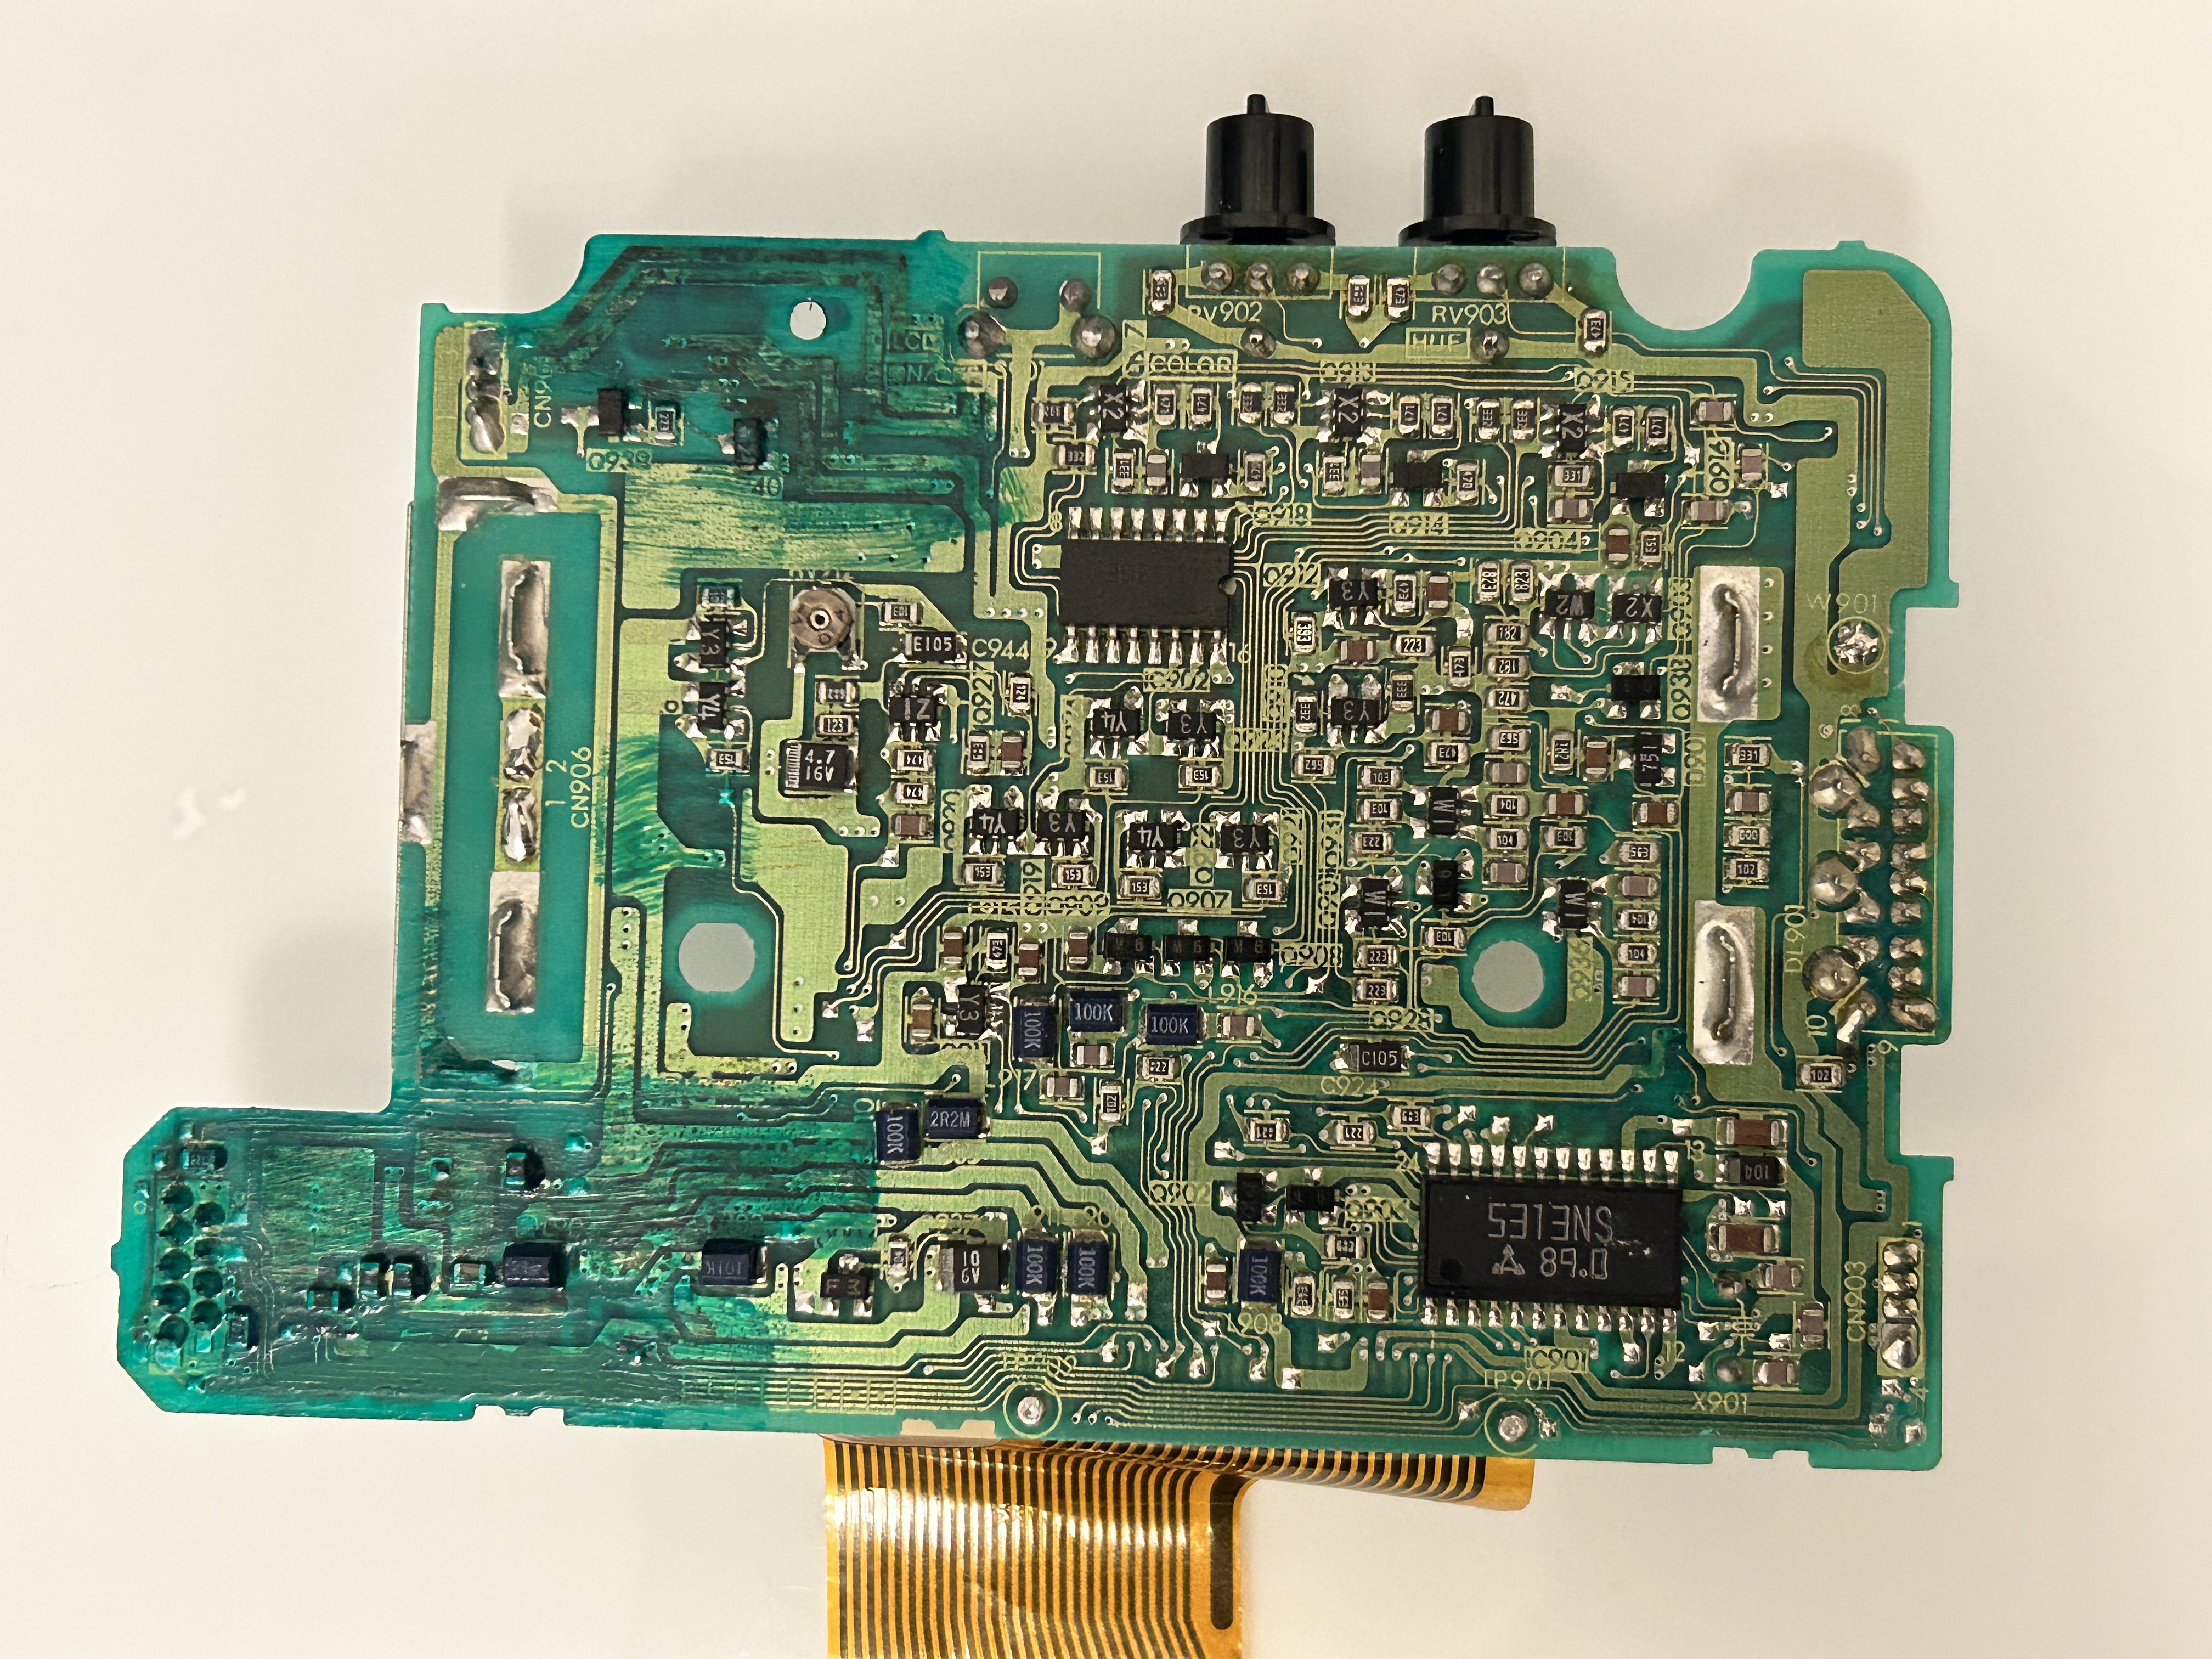
RG-4 lcd board
RG-4 lcd board was the most troublesome board out of all. When opened for the first time, it didn't seem like much was wrong. I have opened two units and both of them were bad. On one of them the corrosion was so bad, several hairline traces were completely eaten away. Problem areas are highlighted in the below picture.
You can see the copper traces once corrosion is scraped out.
I applied solder mask on top of this and hardened it using UV. While it is not a pretty job, it was hard enough seal making sure the copper underneath was protected.
Putting it all back together
I ran several tests in this service position making sure all functions were correctly working.
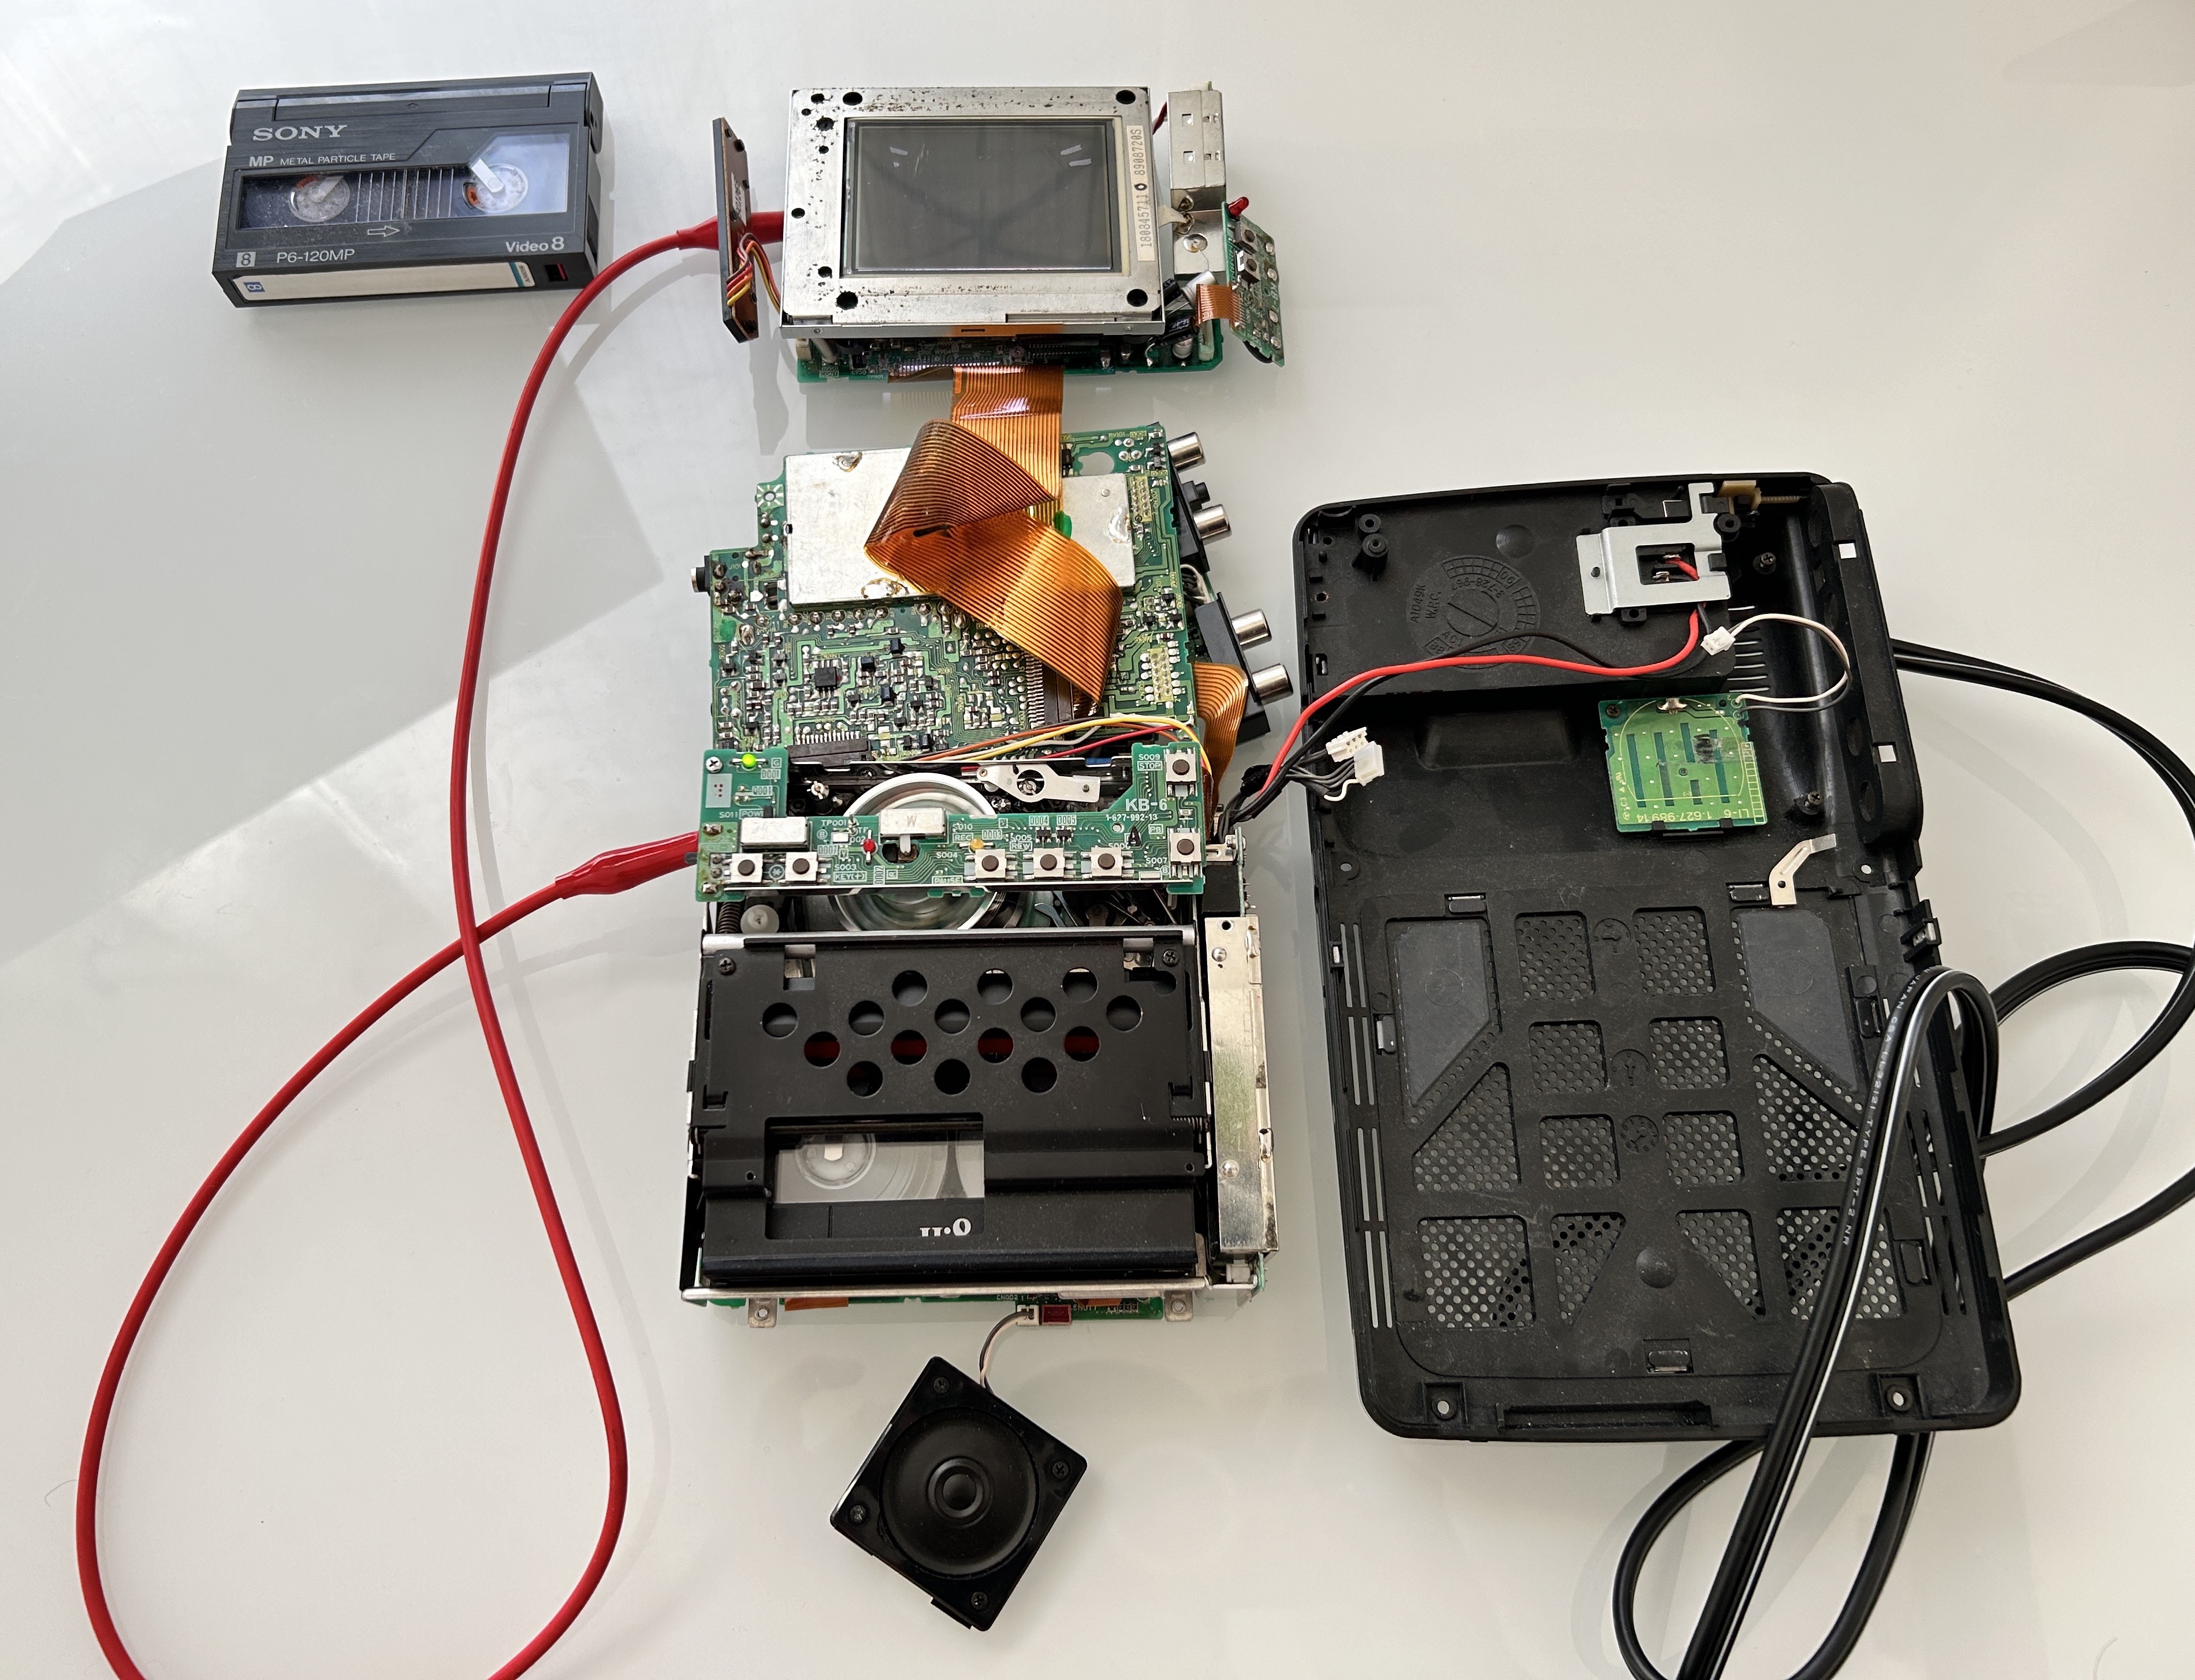
You would assume, once you have recapped the boards and fixed the issue, it's a slam dunk to put everything back together. Putting back everything together is more of an art than science.
LCD compartment is probably the easiest to put back together. Make sure to clean that nasty foam rot on the lcd panel before closing off the unit.

More Pictures