CRT safety
Disclaimer
HIGH VOLTAGE
You can die doing this! So read carefully! CRT TV is not a toy. Do not open a CRT TV. If you don't have any prior knowledge about handling high voltage devices, this guide is not for you. CRT TV contains sufficient high voltage and current to be deadly, even when it is turned off. High voltage is present in the tube, both when it's on and off, as well as in the capacitors throughout the CRT board, which take a long time to discharge.
This information is provided solely for informational purposes. After working on several CRT TVs, I've become somewhat familiar with where to touch and where to avoid. However, when I began this hobby, I took every necessary precaution to ensure my safety. If you haven't worked on a CRT TV before or are unfamiliar with high voltage equipment, it's best to stay away. Follow this tutorial at your own risk.
STEP 1: Discharge the tube
- First make sure all video inputs work without issues. If there are issues with your set, then you should fix them first before attempting to modify the set.
- Remove the TV from the power plug
- Let the TV sit for a few minutes, so that it can discharge itself (let it sit for a day for extra safety).
- Remove the screws on the back of the TV and take the back cover off
- WARNING: Discharge the tube using a proper probe (wear high voltage rated rubber gloves for extra saftey)
- Probe should be shorted to the spring or metal shield connected to the DAG (Deflection Anode Ground)
- Avoid discharging to any part of the chassis or heat sinks, as this can fry the ICs
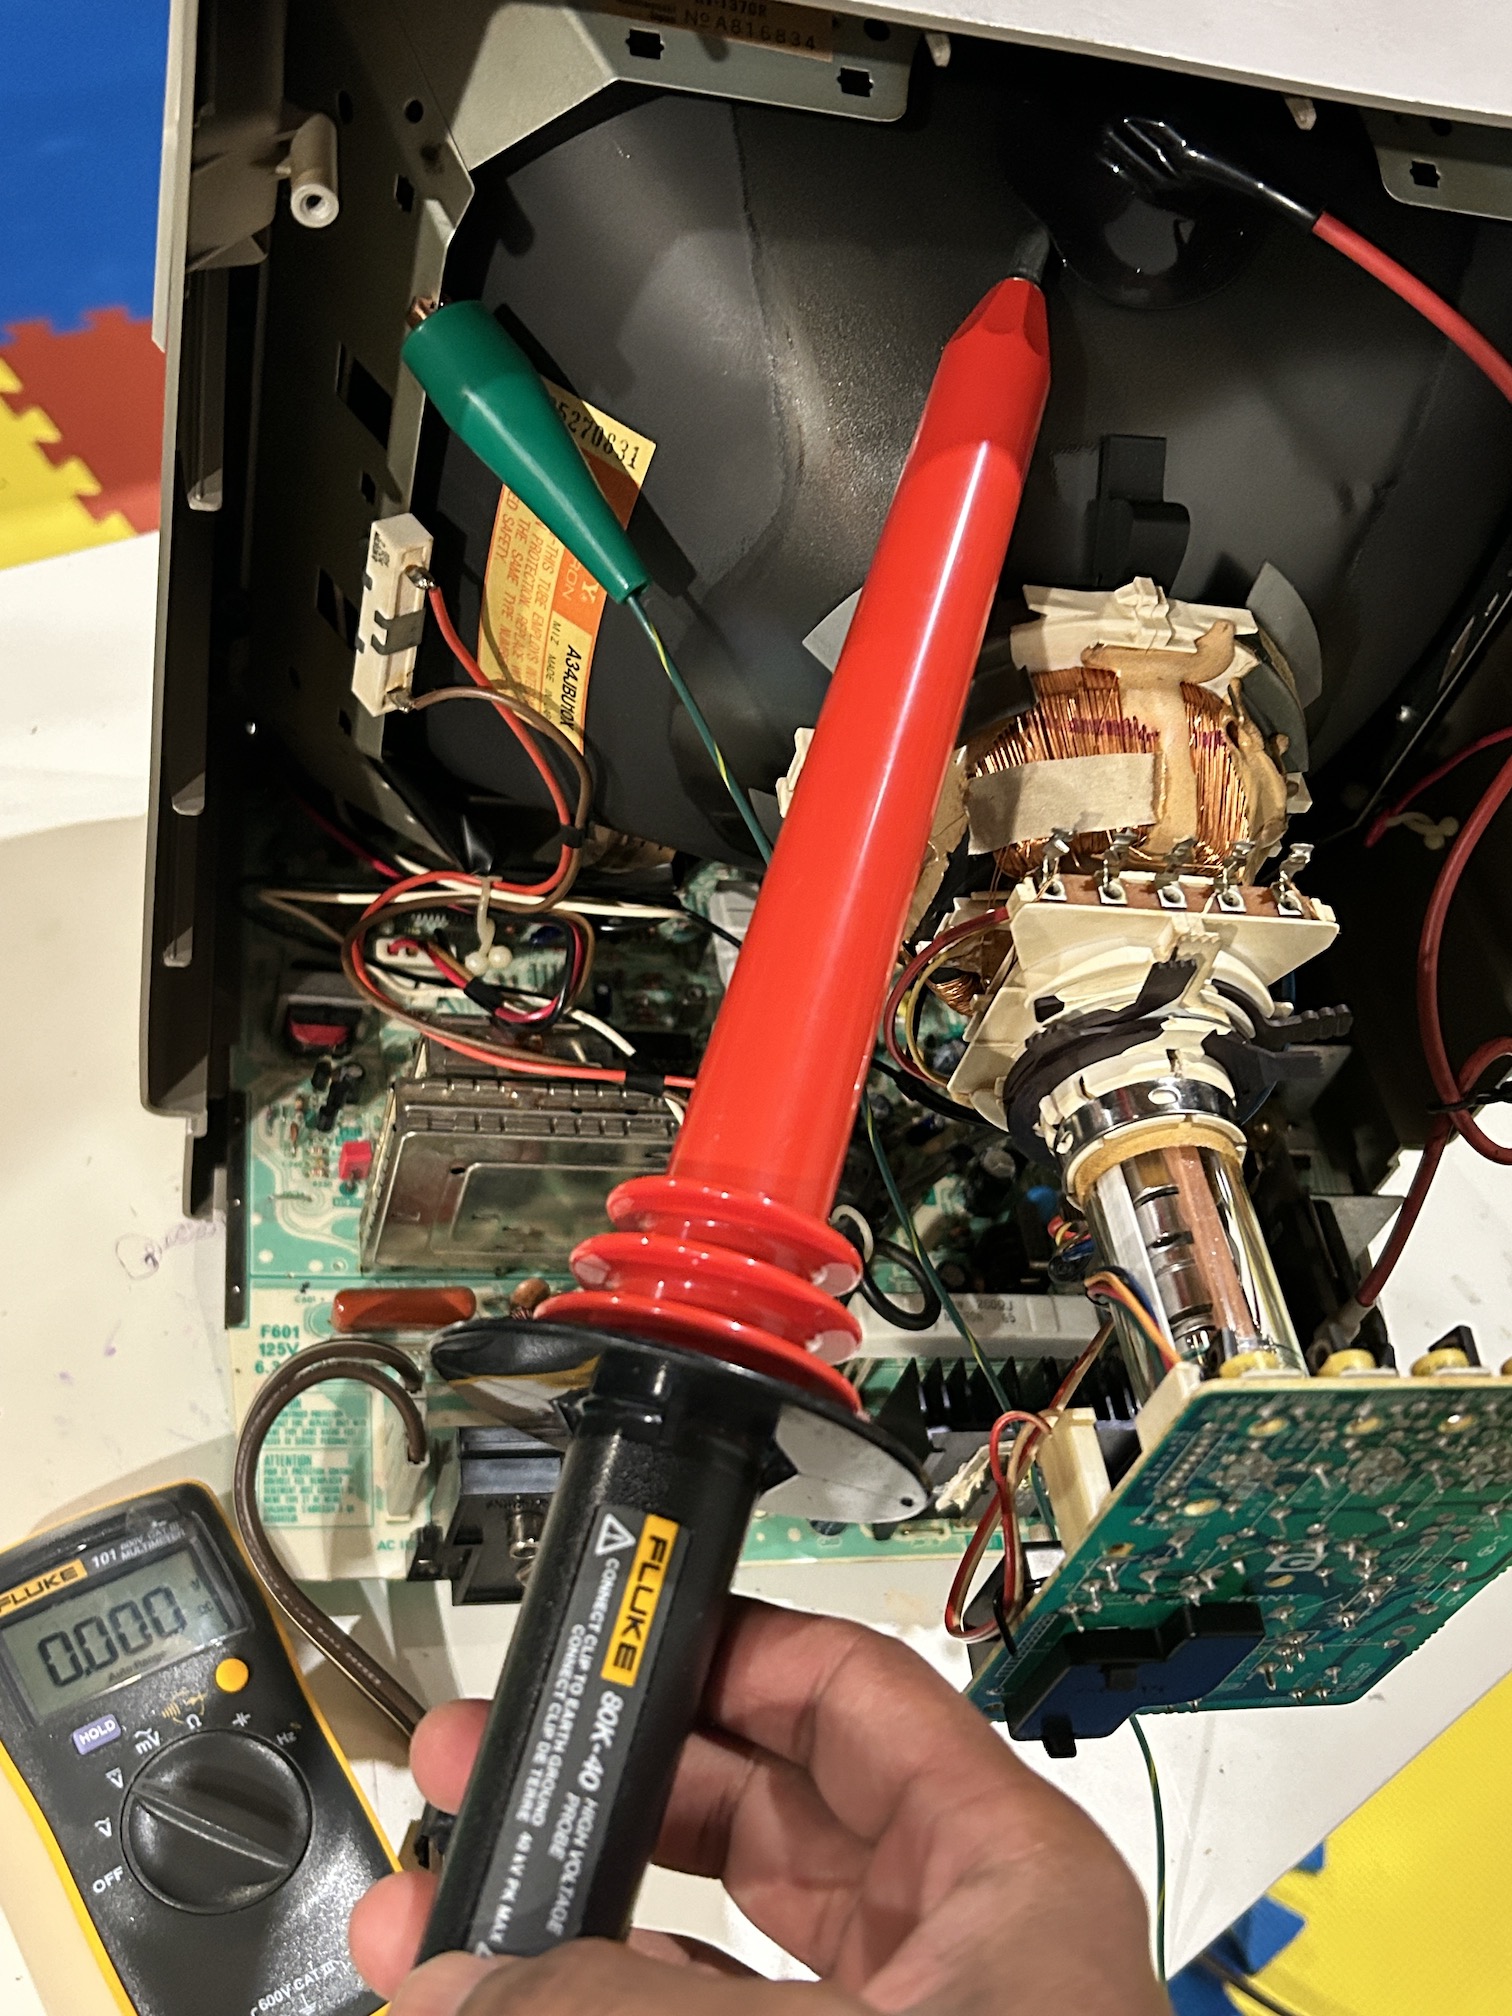 Picture above shows there is no charge in the tube. Green alligator wire connected to the shield is important. If there is no shield then connect to the spring attached to the DAG. Discharge no where else. Voltage reading 0 in multimeter. After double confirming this, you can now safely remove the anode cup.
Do I need this fancy pants probe to discharge? Personally, I use a DIY screwdriver-based discharger 99% of the time. However, please be aware that what works for me might not work for you. I cannot take responsibility for any injuries or damages that may occur if you follow my methods. Proceed at your own risk.
STEP 2: Disassemble the set
Be sure to take plenty of pictures as you disassemble everything; you'll need them when it's time to reassemble. Trust me, you won't remember all the details, so those pictures will be invaluable. I prefer to reassemble everything exactly as it was, including organizing the cables just as they were during disassembly.
In most CRTs there are few wires that needs to be disconnected/reconnected.
- Degauss wire
- Power wire
- Ground wire attached to the neck board
- Yoke deflection coil wire
- Anode wire (this is the one with the rubber cap)
- Left and right audio wires
MISSION CRITICAL WIRES
Please remember that wires 1-5 are critical for the CRT to function and should not be omitted. Having any of these disconnected while powering up can damage the board or can pose high risk.
STEP 3: Discharge the capacitors
- Remove the chassis (the main PCB board). Try not to touch any of the components. You don't want to fry an IC with static discharge.
- WARNING: Don't short to discharge the capacitors. Accidentally shorting the wrong location can damage sensitive components.
- Always use a 1k to 10k resistor to bleed the capacitor charge. Discharge the bigger capacitors one by one.
- You are now good to go
Tools needed
- CRT tube discharger (highly recommended to use tools made for the discharging purpose than use a DIY discharging tool)
- High voltage rated rubber gloves
- Phillips screw driver